From 4 in the floor, to 6 with a stick....
I remember the first time I ever tried to drive a stick. It was back when I was car shopping after accidentally wrecking my first car. Accidentally ran a stop sign with my Aerostar after mountain biking with a friend. Remember the kid back in highschool with a big blue van that was always filled to the brim with friends. Yah that was me in my big blue starship (My mom had a Nasa sticker on it before she gave it to me, I thought it was kewl). Anyways, I came across a 1994 Red Ford Ranger at a Dodge dealership of all places. They actually just got it in on trade, and I decided to take it for a spin. Well cranking it wasn't a problem, so I pushed in the clutch, put it in reverse, hit the gas and let the clutch out like I saw other people do several times before. Well the truck jerked a bit and the engine immediately died. So the salesman quickly poked his head in to see what was wrong (he really wanted a sale I guess). Turns out the parking brake was still on, so he popped the little lever and I tried again and away I went without any more problems. Now the really funny part about this was that the truck didn't jerk backwards, it actually jerked forward because I had it in 4th and not reverse like I thought I did. Needless to say if it wasn't for that parking brake I probably would of jumped the curve and busted out the front several sheets of glass and ended up coming to a stop somewhere inside on the show-room floor. Ha, ha get your laugh out. Cause I know every one of you that have EVER driven a stick have many "stupid" stories of their first encounter and along the way. Don't lie, I don't want to hear it. It's just Murphys law turn fact.
When I decided to upgrade Rydia I was looking at least at one of those new 5-speed TREMEC transmissions. They are nicely priced and would of easily fit had I gone with a 302 Block. But I'm very glad that the engine I had came with it's 6-speed transmission. This definitely gives me a better gear ratio over the 5-speed. That way I might have a good shot at getting something better than 8 mpgs. I'm shooting for 20-something while cruising. We'll see when I finally get it all together.
When I decided to upgrade Rydia I was looking at least at one of those new 5-speed TREMEC transmissions. They are nicely priced and would of easily fit had I gone with a 302 Block. But I'm very glad that the engine I had came with it's 6-speed transmission. This definitely gives me a better gear ratio over the 5-speed. That way I might have a good shot at getting something better than 8 mpgs. I'm shooting for 20-something while cruising. We'll see when I finally get it all together.
Linkages everywhere
Ahh the old 4-speed. This was actually a decent transmission. 1st to 2nd was a great ratio. 2nd to 3rd was pretty good in itself (as long as you wind 2nd out a bit). 3rd to 4th I think dropped my rpms from 3,500 to 3,000. I'm not exactly sure why they geared it that way, but at least it was better than nothing. I still wished it had another gear for cruising though.
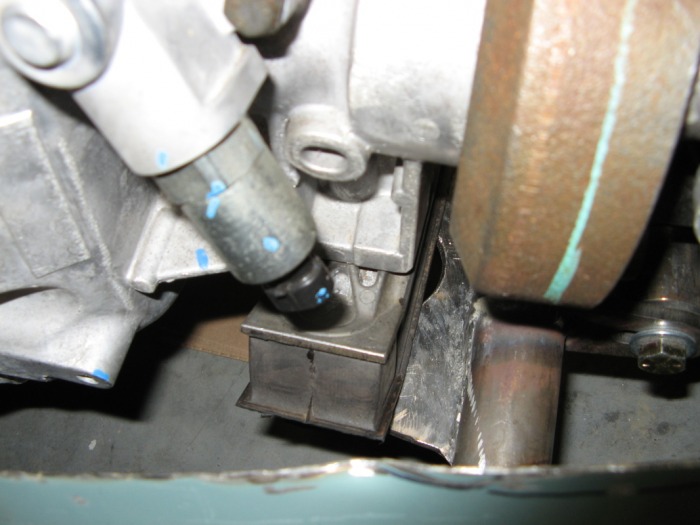
You can see the old mechanical lever arm for the throw-out bearning on the bottom left. I never had any problems with the old z-bar clutch linkage. It was a bit of a pain to take out though. There was this spring that connected that lever arm to the frame to keep the z-bar in a dimple on the throw-out bearing arm. That was always a bear stretching it to disconnect it. I'm so happy that I dont' have to deal with that anymore. Having the shift linkages on the outside of the transmission was interesting to watch how they move to shift between all the gears.
You can see the old mechanical lever arm for the throw-out bearning on the bottom left. I never had any problems with the old z-bar clutch linkage. It was a bit of a pain to take out though. There was this spring that connected that lever arm to the frame to keep the z-bar in a dimple on the throw-out bearing arm. That was always a bear stretching it to disconnect it. I'm so happy that I dont' have to deal with that anymore. Having the shift linkages on the outside of the transmission was interesting to watch how they move to shift between all the gears.
The new Mamba-Jamba
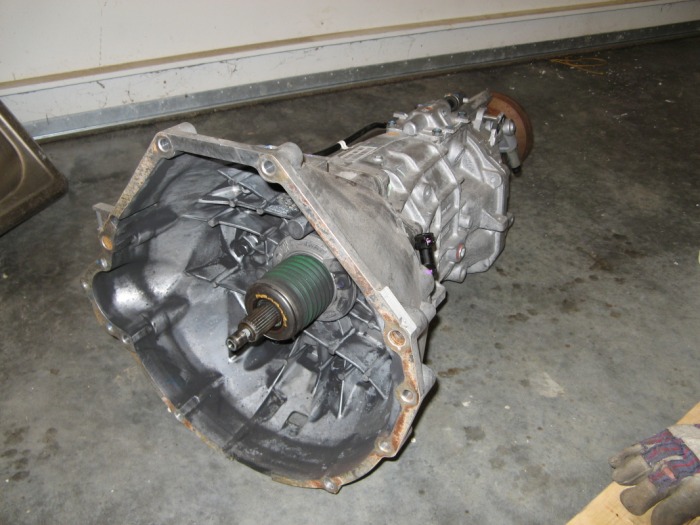
I'm pretty sure that when everything is said and done, that this tranny and me are going to get pretty intimate. For as large as it is, it wasn't all that heavy. I'm still surprised by the size of the clutch in the car. I think it's a multi-layer setup, but it's smaller in diameter than my old one was. This transmission is interesting in the fact that all the linkages are internal, and it uses a trailing arm setup for the shifter. That's actually nice because I can adjust the length of it to get it right where I want my shifter (but I'm going to try it first before I start welding on that one). Just reading the specs, this should have some really nice gear ratios, and be kind on the gasoline also. One thought is, since this is a hydraulic throw-out bearning (the big green thing in the middle), how do you bleed that cylinder? I'm going to have to figure that one out before I get it too far put back together.
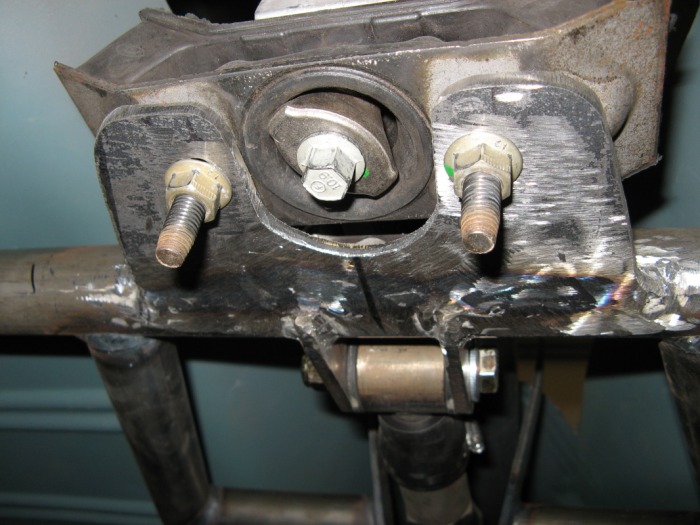
Old transmission mounting location
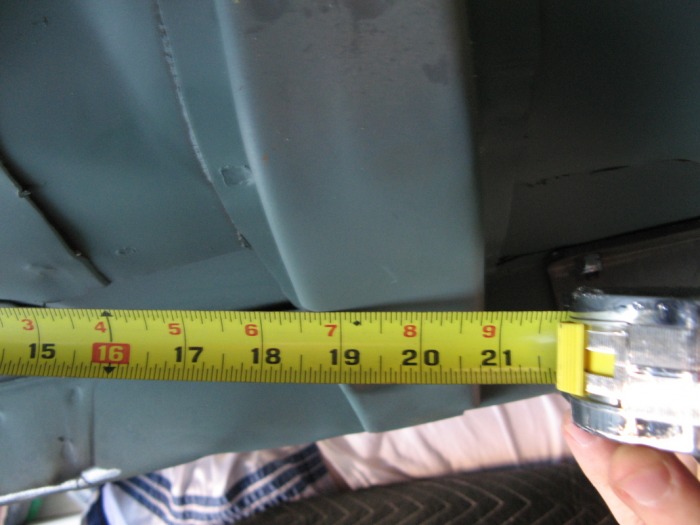
Picking up at the end of the first adventure getting the motor in the car: After the hassle of blindly trying to fit something, I decided it was much better to measure things just to see if it is even possible. Here we are measuring from the where the bellhousing bolts to the engine block to the old transmission crossmember mounting location. So that's about 19-3/4".
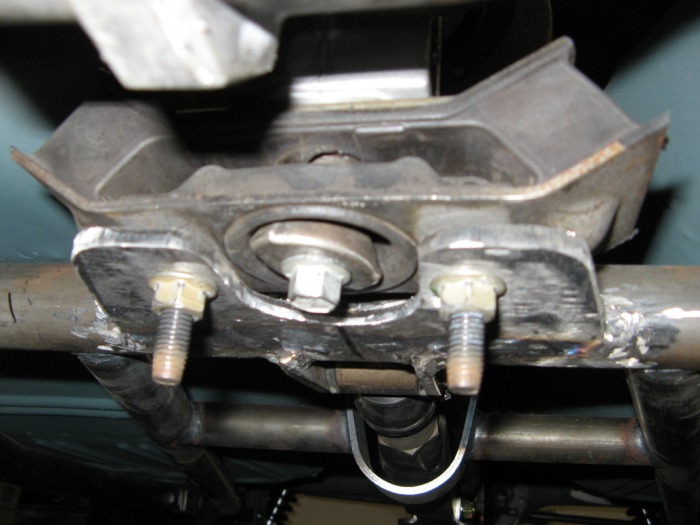
New transmission mounting location
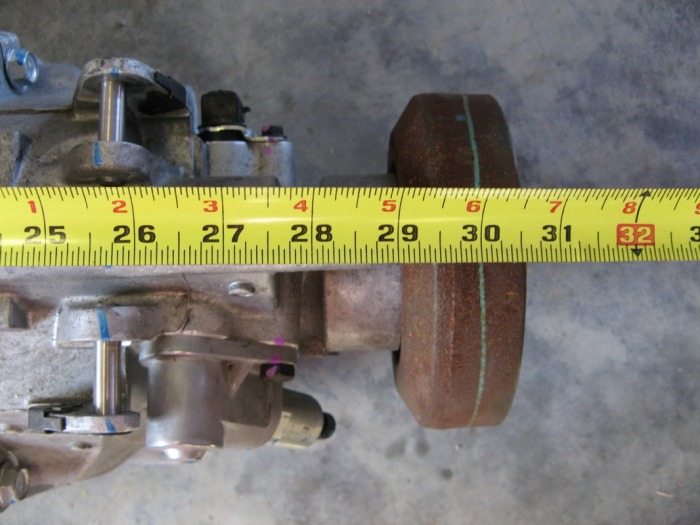
Luckly this transmission came with it's mount and crossmember still attached to it. Here I am measuring the same location but now on the transmission. The 2008 GT500 mounts to the transmission right at about 28-1/4". Well that's a long way from my car's 19-3/4" provisions. Having a transmission crossmember with that kind of lever-arm would surely cause issues very quickly when the driveshaft starts spinning.
Beefy crossmember mount
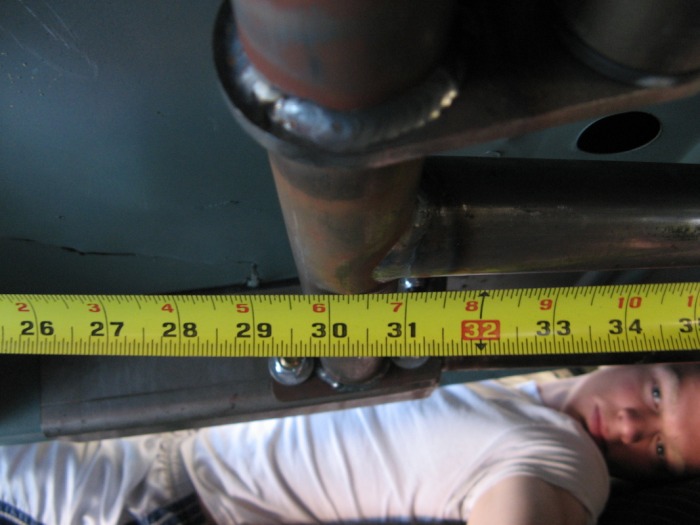
If you read the rear suspension pages already then you'll know that this is the frame-rail crossmember. This piece bolts in and ties both the left and right frame rails together (and also the front and rear). All I can say is 28-1/4" is alot closer here than the original bolt holes. I figured that since this was stout enough to be an integral part of the car's frame and ake the torque from the rear-end it should be beefy enough to mount of the rear of my transmission. So now that we know where things are going to bolt to, here comes the fun part of raising a transmission tunnel. Oh yah doesn't John look all so excited here?
The reason why it wouldn't fit the first time
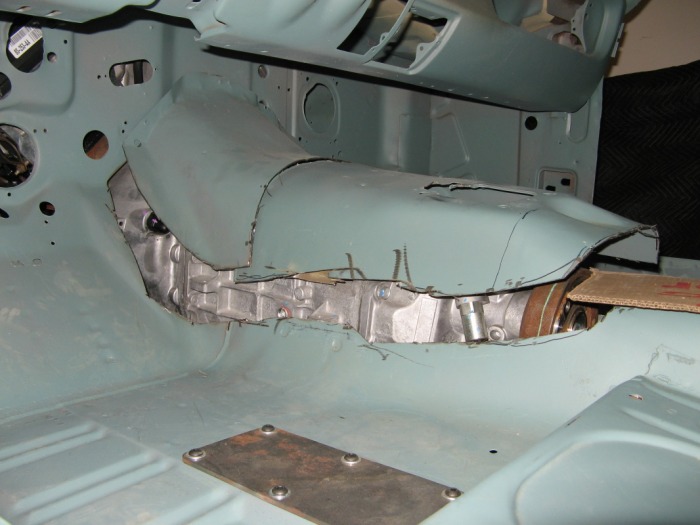
I first hoped that I would just have to modify the bellhousing portion a bit. So I cut along the body seam there. But after testing again it can apparent that this tranny wanted alot more out of my car. So I just say screw it and cut the whole blasted thing out. There's a nice 3-1/2" gap on both sides of the tunnel here. No, I can't cut straight either. Good thing this is getting covered up with undercoating and carpet. Oh and I don't own any air-tools, so everything is done with a grinder with cutoff wheels. Yah I'm cheap, get over it.
More measurements
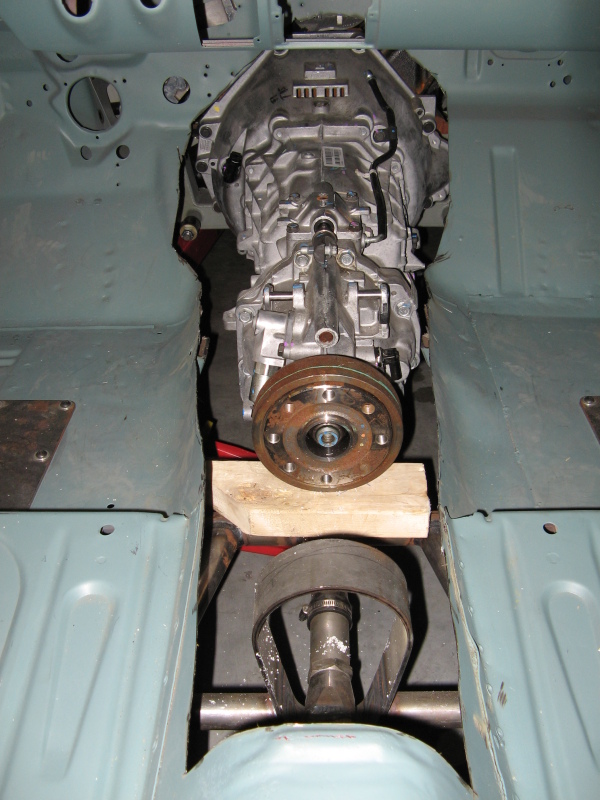
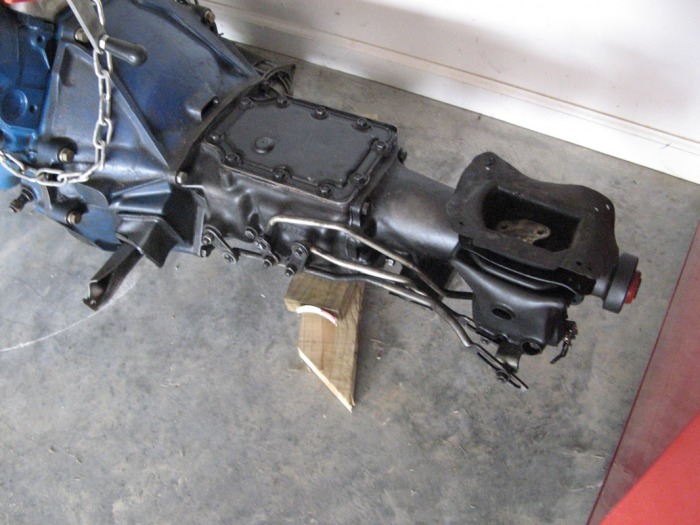
I decided to cut a bit more out of the floor so that I can see how I needed to fabricate up the crossmember mount. Before I started down that road I needed to get a custom driveshaft, so I did alot of reading about setting up the transmission angles, etc. Here I have the transmission propped up with a 2x4 which sets me the transmission at 7 degrees. This isn't a critical yet, but gives me a good measurement to get a driveshaft ordered. You can really see how much bigger this transmission in on the right-hand side. I think there is a cluster of gears countersunk on that side or something.
Cheapest driveshaft I ever purchased.
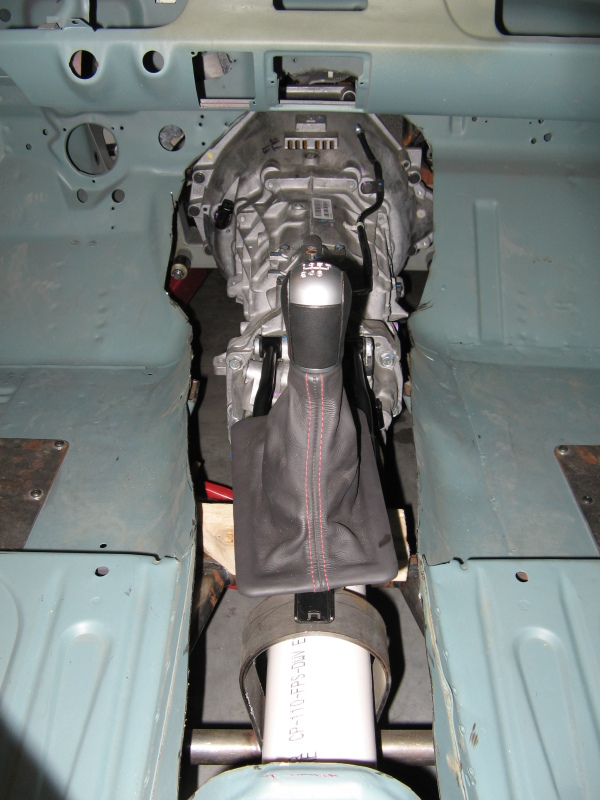
I saw that most custom driveshafts that would meet my requirements would be in the 3" to 3-1/2" OD range. Well if you go to Lowe's 3" PVC pipe gives you a nice 3-1/2" OD to work with. So check out my $8 driveshaft. it was super easy to cut and it's the lighted thing in the world. Actually I wonder how much force it would take to shear it in half. LOL, maybe I'll try it someday with a beater engine. Here you can also see the original GT500 shift linkage and shifter. I really want to reuse the shift-linkage because it puts the shifter in a really nice spot. That's the other bane with the old transmission was how far you had to move your body to get it to switch gears. I'm 6'2" and my shoulder always came off the seat when I shifted. Just figure judging, this will set the shifter right along the edge of the seats. I'm going to get a more retro stick though. Just something simple like a stainless steel shaft and a 8-ball or something.
3 days later...
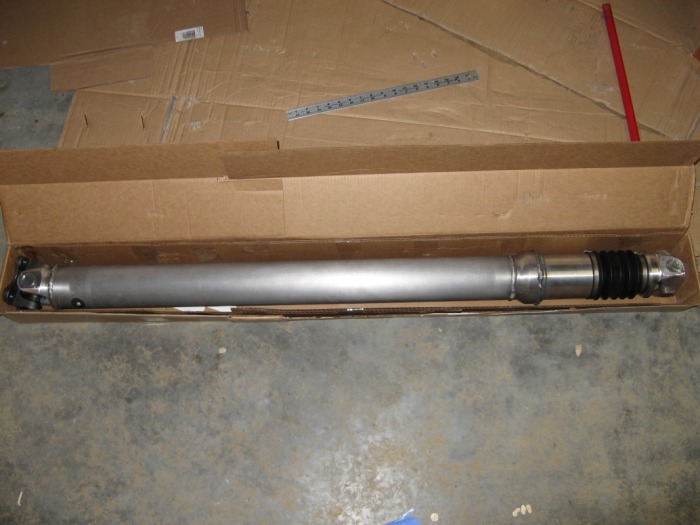
The trick to this driveshaft was that the slip needed to be in the shaft. The old transmission had the slip at it's yoke (hence it's slip-yoke). After doing some search, my best bet would find a supplier for a 2008 GT500 shaft and see if they could do a custom one. I ended up getting this little 3-1/2" aluminum beauty from the Driveshaft Shop (yes that's their name) for $600. Turns out that they made it to replace the GT500 two piece driveshaft with a lightweight single piece aluminum one. You can see the slip the the right hand side. This normally would go near the transmission, but since the driveshaft safety loop was there I opted for it in the rear next to the pinion u-joint. The only main difference between this and the GT500 one is that I dont' have the rear-end flange (I connect directly to the u-joint), and the length is about 1" shorter.
Even more measurements
Once I received the driveshaft I put it in and finally set my angles. I have 5 degrees on the transmission, 4 degrees on the driveshaft, and 3 degrees on the pinion. From what I read the key to getting vibrations out of the drivetrain is the the u-joint angles as close as possible (or at least lower than 4 degrees and equal but opposite). So just mocking it up I have 1 degree from the transmission to the driveshaft and -1 degrees from the driveshaft to the pinion. Not bad at all for the mock-up phase of the build. I'm pretty sure I can get this dead on when I finally get it all together the for the last time.
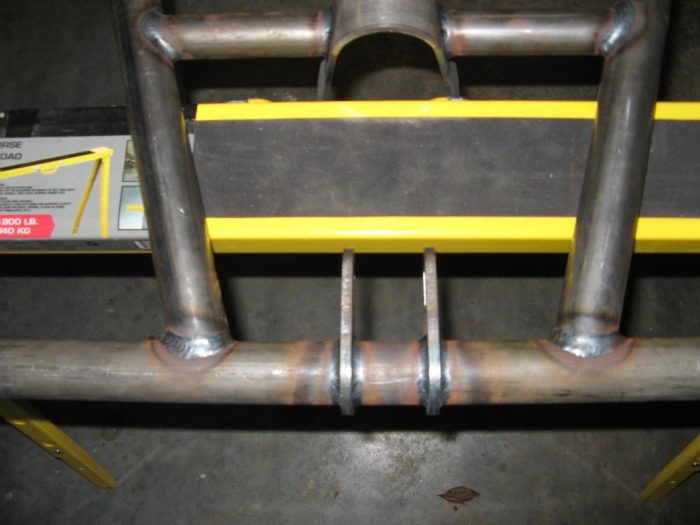
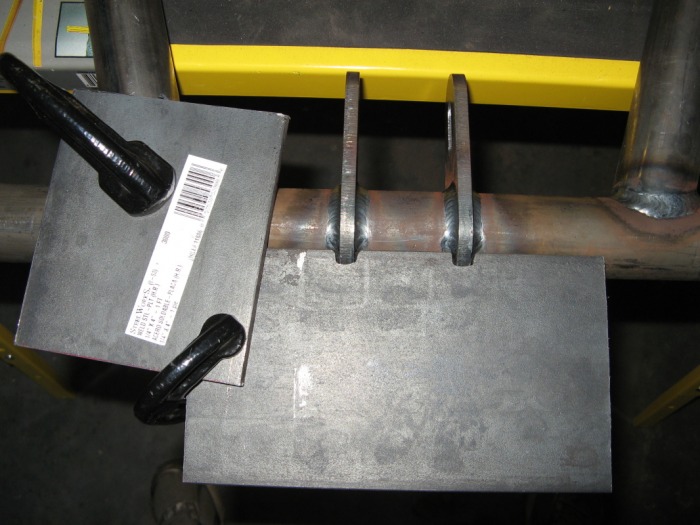
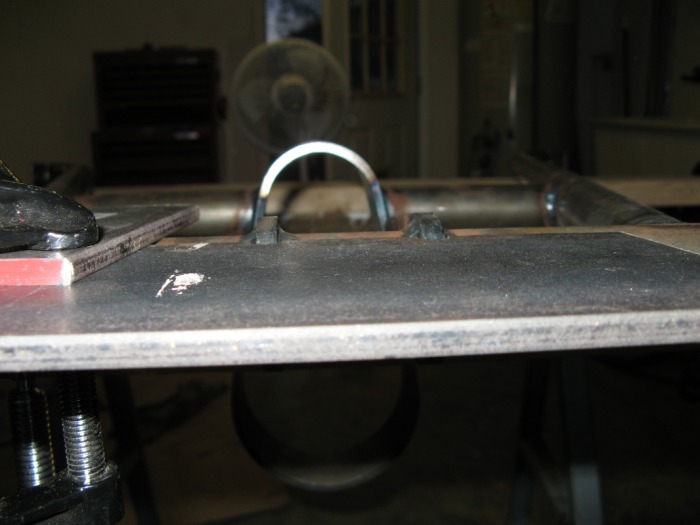
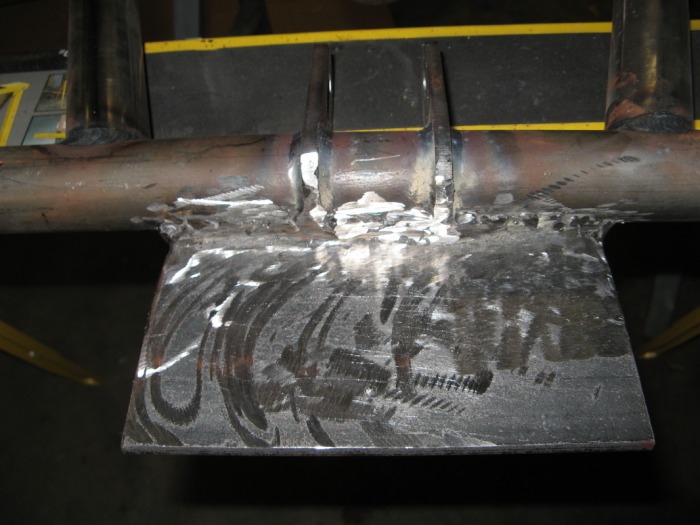
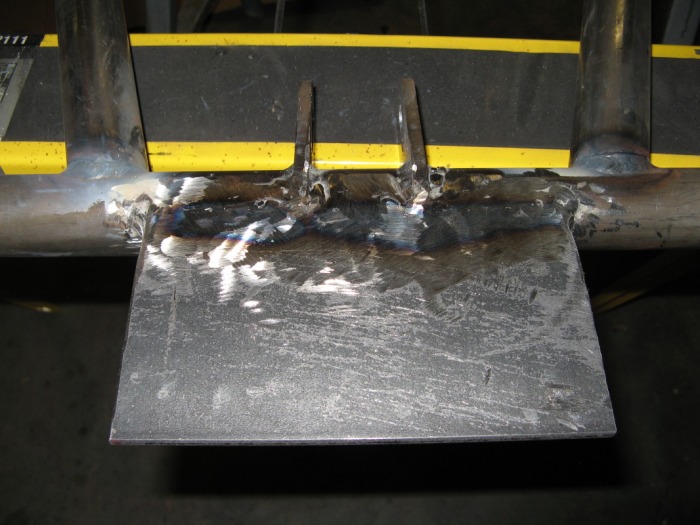
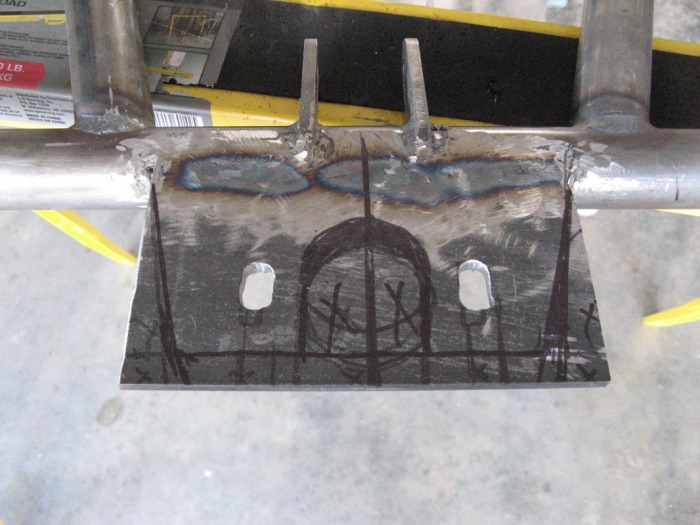
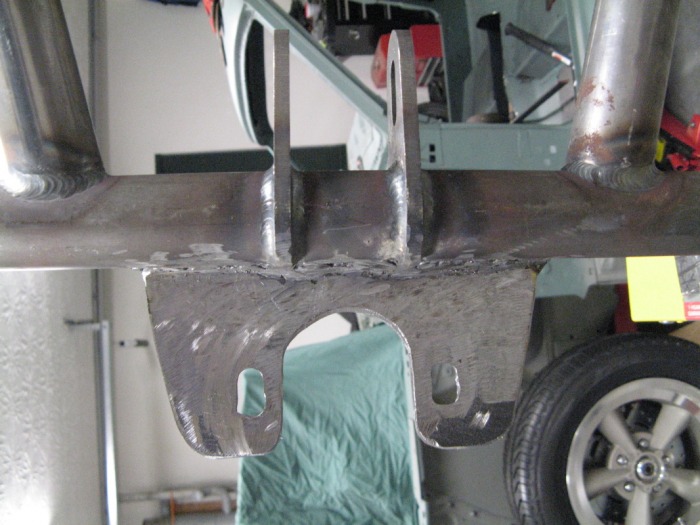
The keystone

Now that I'm happy with the drivetrain angles, I setout to work on finalizing the transmission crossmember. Here is the final product. I decided to reuse the GT500 transmission isolater. This makes it easy to upgrade to a hard urethane one or if I mess mine up it's easy to replace from the store. Anyways to use that all I needed was to weld on a tab with a couple of holes in it. While checking the drivetrain angles I cut up some cardboard and saw that if the tab was welded even with the bottom pipe, all I needed was two washers for spacers to get me to my set angle. Mocking it up with washers allows me to have both +/- angle adjustment for the final assembly. So, I clamped two falt pieces of metal onto the center of the crossmember support. This gave me the "even with the bottom" that I was going for. I then welded it up solid on all sides. here I used my original cardboard cutout to give me a silloutte to cut to. A little bit of TLC with a grinder and my keystone was complete. On the same note, I actually had to raise up the driveshaft safety loop by about 1/2" so that I would have clearance for the driveshaft. I don't think my centerline is any higher, just the transmission is alot longer. Here is a quick slidshow showing the progression.


Ahh finally a self-support car

Here is when the car is finally on all four wheels, and no jacks holding up the engine or transmission. Everything is all just bolted in so nicely. The driveshaft slips in like a glove, and just a few washers and I had a perfect centerline. On a side note, I just listened to the theme music from the Animaniacs, then iTunes put on Black Hole Sun. LOL, and I thought it was late. Anyways, I actually did this over the christmas holidays. It was a bit cold, but welding does warm you up a bit. Here are a few more pictures of how things look at this point.