For Rocket Fuel Press Here
This was an interesting little project in itself. The original gas pedal was nothing more than a simple pivot bolted to the firewall that had a direct linkage to the carberator. This is very straight forward and very easy to keep working. But like everything new on a car, electronics creep has taken more of the no-brainer mechanical assembles in favor of electronic controls and servos. This isn't all that bad, it's alot easier to route a wire somewhere than have to clear mechanical linkages. But it does make it an interesting challenge to get the new stuff to work in old bodies. So put on your thinking hats, pull out the grinder and lets get to work.
Drive-By-Wire Gas Pedal
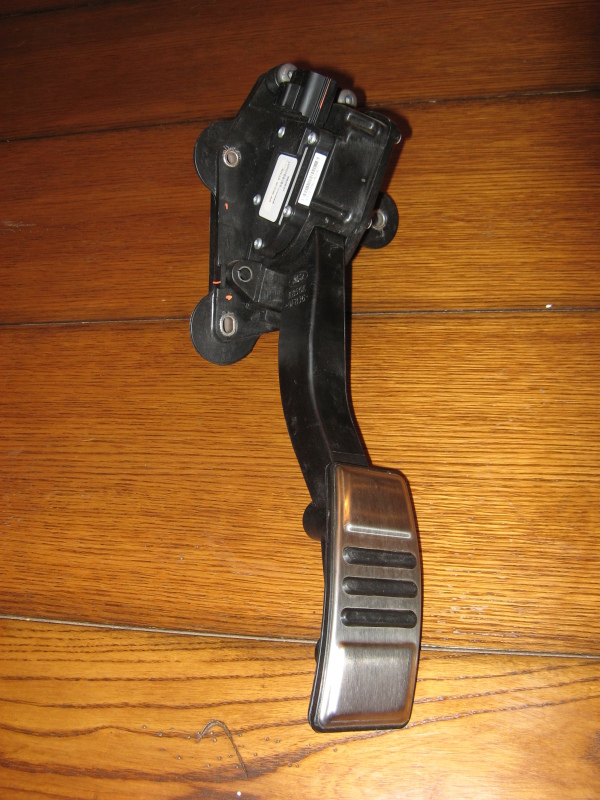
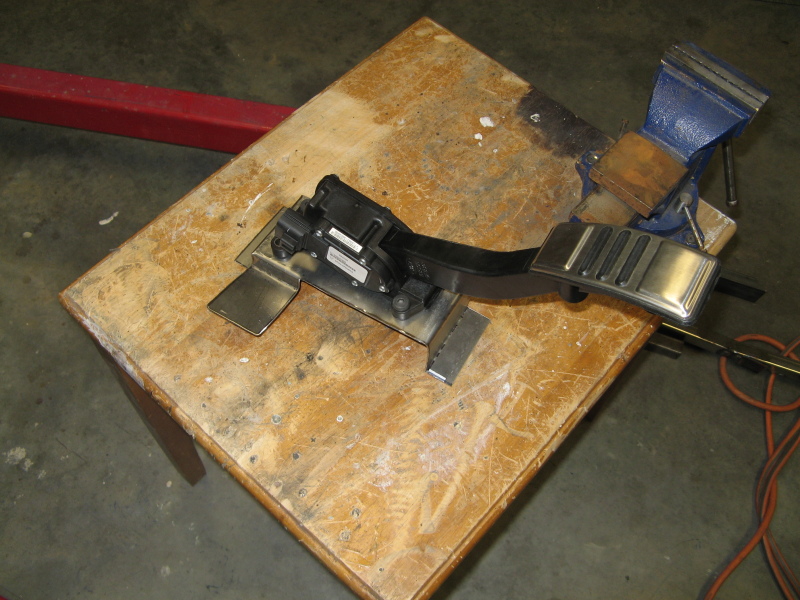
Ford Racing basically just took the entire pedal assembly from the new mustangs and threw it into their controls pack kit. I find it interesting that they have the pedal assembly bolted to another bracket then bolted into the car. Though the bracket is worthless to me, the idea is a good one. Oh and if your wondering this pedal assembly is nothing more than a lever attached to a potentiometer with a spring to make it return. I bet you $5 that I can get some parts from Radio Shack and make it work. I probably won't do that on my engine, but if anyone has a spare car they want to play with let me know.
Mocking it up
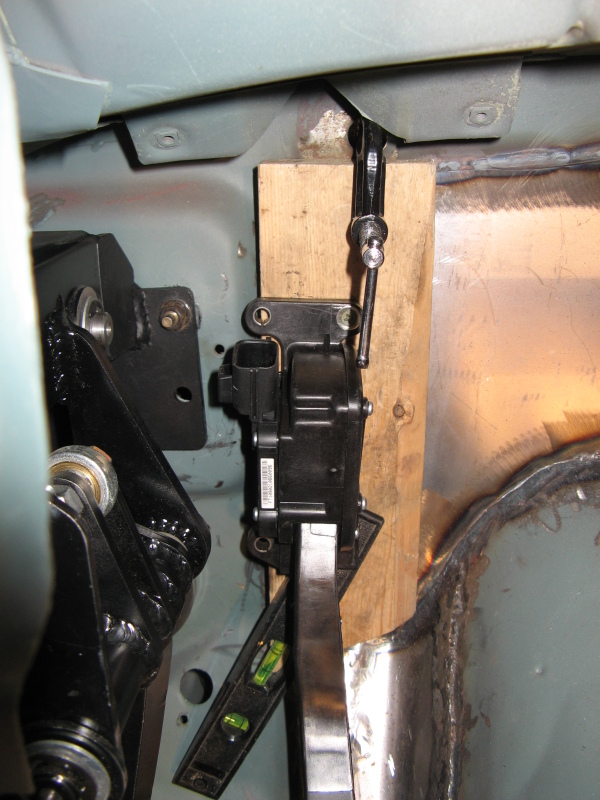
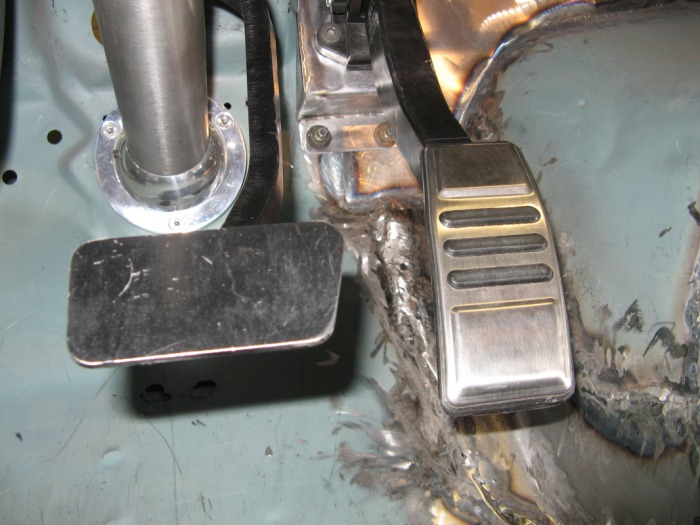
Since I was only born with 2 hands I needed an easy way to move the gas pedal around to get it into a nice position and build a bracket from there. So after removing the massive OEM bracket I'm left with a nice slim pedal assembly. Now the next issue is holding the pedal on the firewall and seeing what it feels like. Turns out that a 2x4 actually spaces the pedal off the firewall very nicely. That and it was easy to move the wood screw around to get the pedal in a nice location. I was having an issue with the pedal hitting the floor and it just felt kind of flat, so I tilted the bottom of the pedal out a bit (that's what the level is doing). The OEM bracket actually had a slight tilt to it so I knew this was ok.
The Spark of Genius
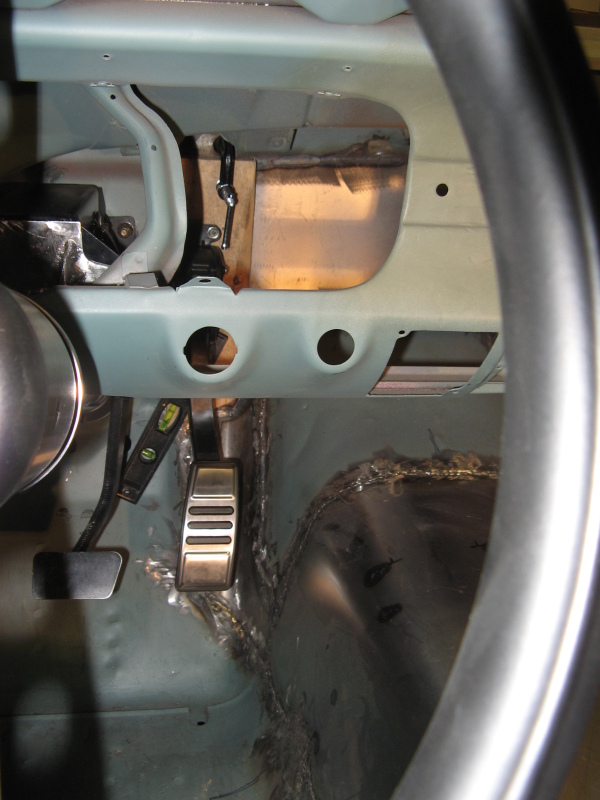
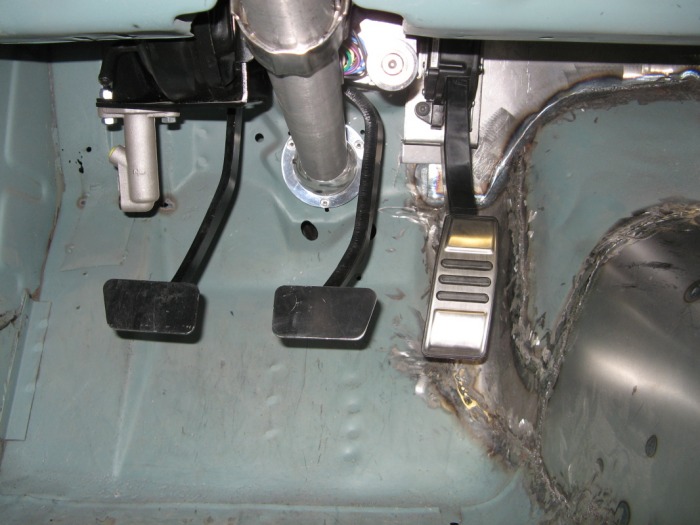
I've actually been thinking about what kind of bracket I needed to make to attach the pedal to the firewall. I was thinking everything from a massive framework that connects across the firewall all the way to the A/C unit. But in the end the simpliest bracket was the easiest. I finally had a stroke of genius on Monday night while working on my bike and finally figured it out. If you look at the previous image you can see how close this pedal is sitting next to the brake/clutch pedal assembly. So I figured if I could connect there and then to the firewall it would help to space the pedal correctly and strengthen this section of the firewall. That will help when you literally put your foot to the floor. Anyways, here's the idea:
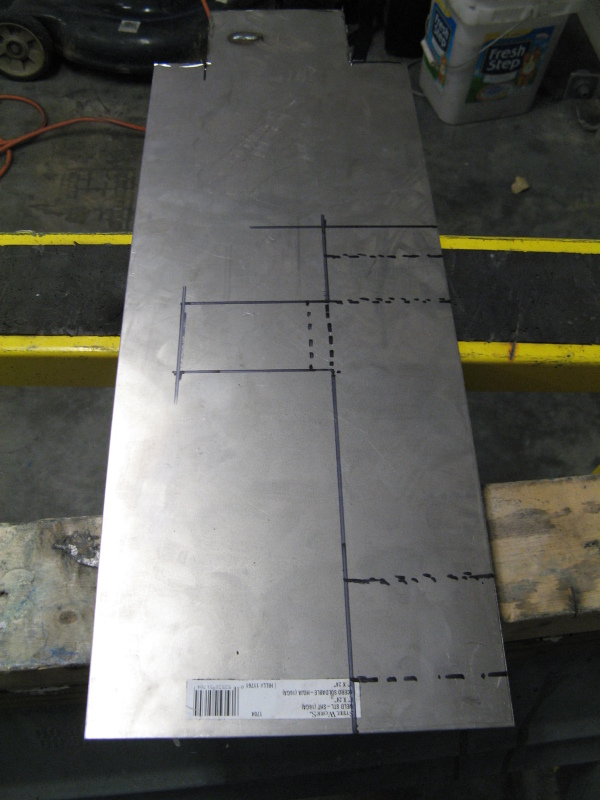
I need to have the base of the pedal tilted with a 1-1/2" standoff at the top and a 2" standoff at the bottom. This needs to have two flanges to bolt to the firewall. It also needs to have an ear that connects to the brake pedal support bolt which is only 1/2" from the level of the pedal. Got it all?
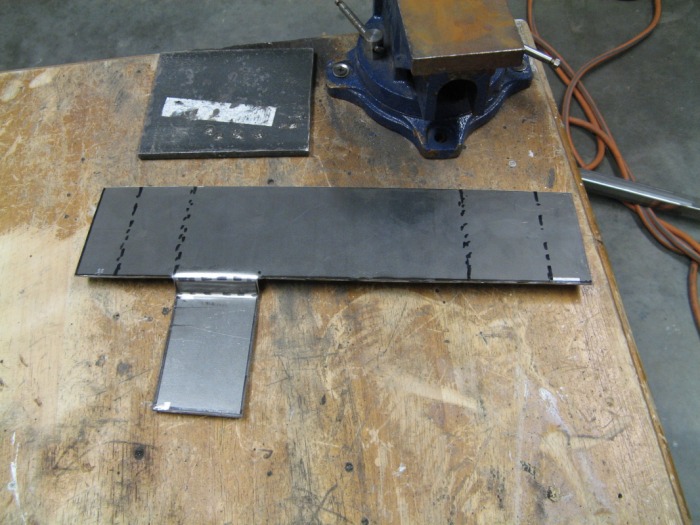
This picture shows both the outline cut and the bend lines for everything. The main section on the right is 3" wide with a 7" pedal support length, 1-1/2" rise at the top with a 1" ear, 2" rise at the bottom with a 1" ear, and a 1/2" rise for the 3" tab that goes to the brake assembly.
Now for the fun part: Bending sheet metal without a sheet metal bender.
I need to have the base of the pedal tilted with a 1-1/2" standoff at the top and a 2" standoff at the bottom. This needs to have two flanges to bolt to the firewall. It also needs to have an ear that connects to the brake pedal support bolt which is only 1/2" from the level of the pedal. Got it all?
This picture shows both the outline cut and the bend lines for everything. The main section on the right is 3" wide with a 7" pedal support length, 1-1/2" rise at the top with a 1" ear, 2" rise at the bottom with a 1" ear, and a 1/2" rise for the 3" tab that goes to the brake assembly.
Now for the fun part: Bending sheet metal without a sheet metal bender.
Bending sheet metal with Mind Powers
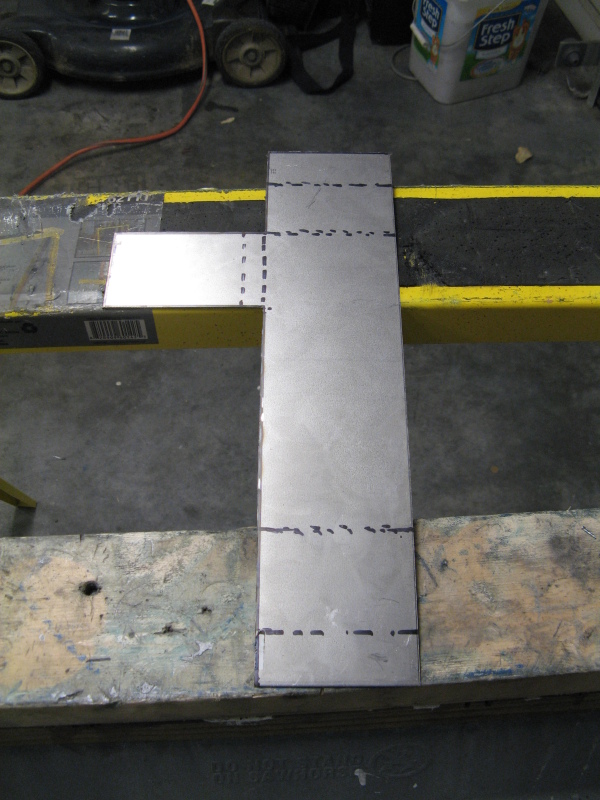
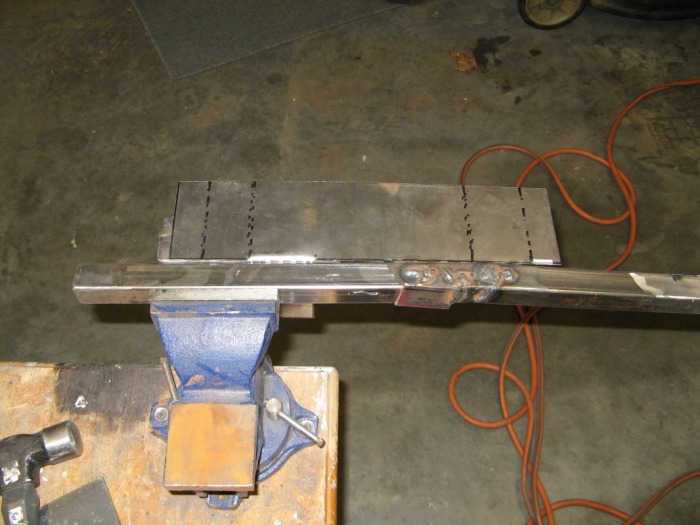
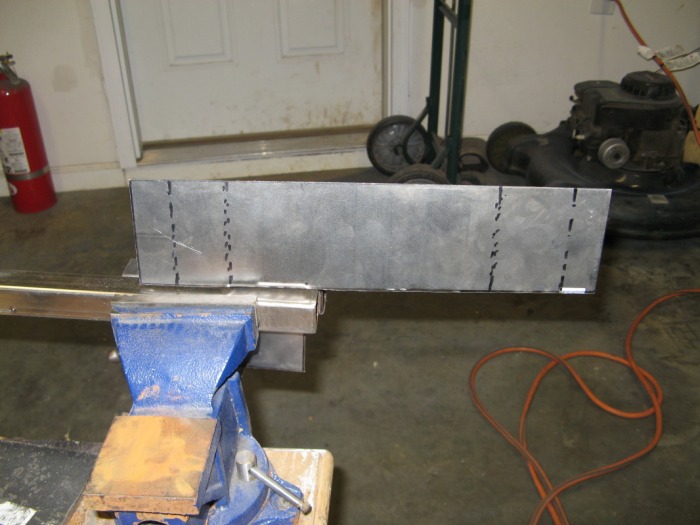
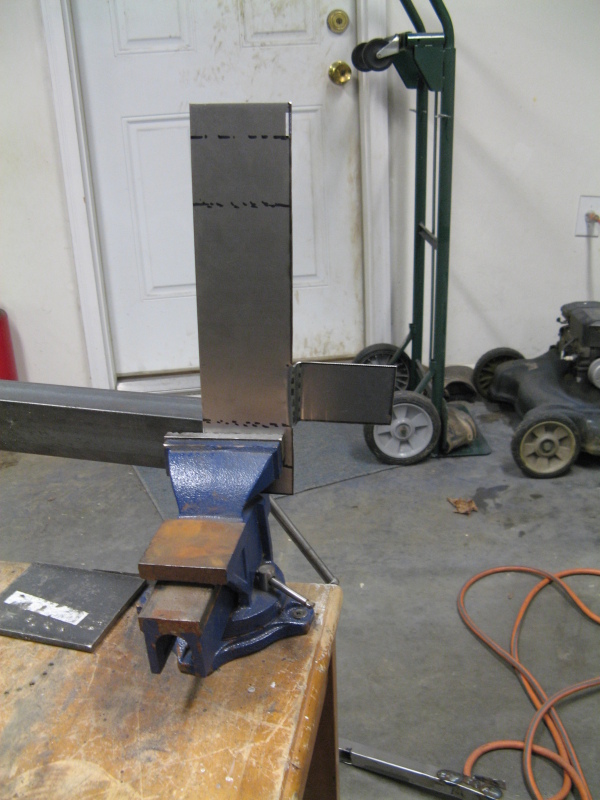
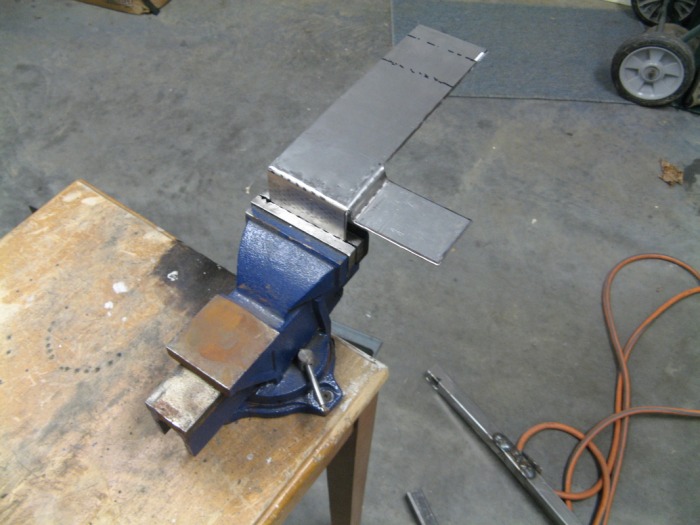
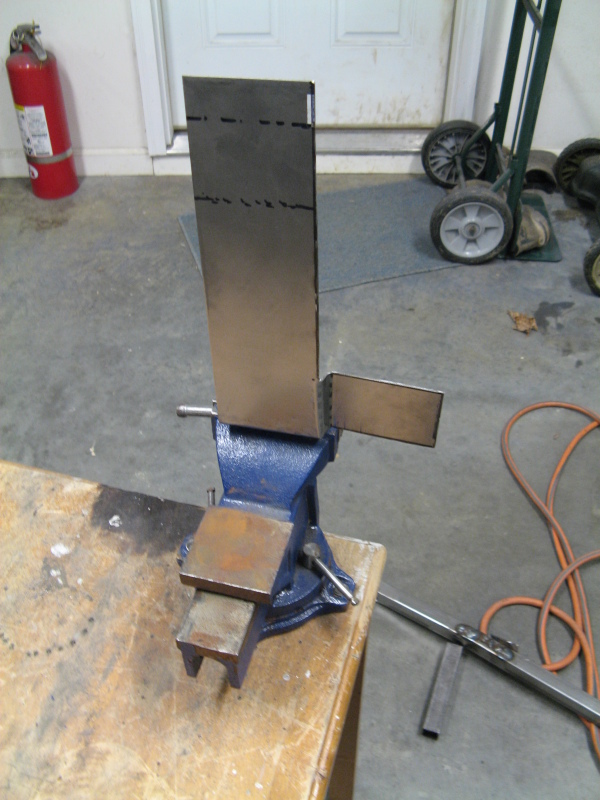
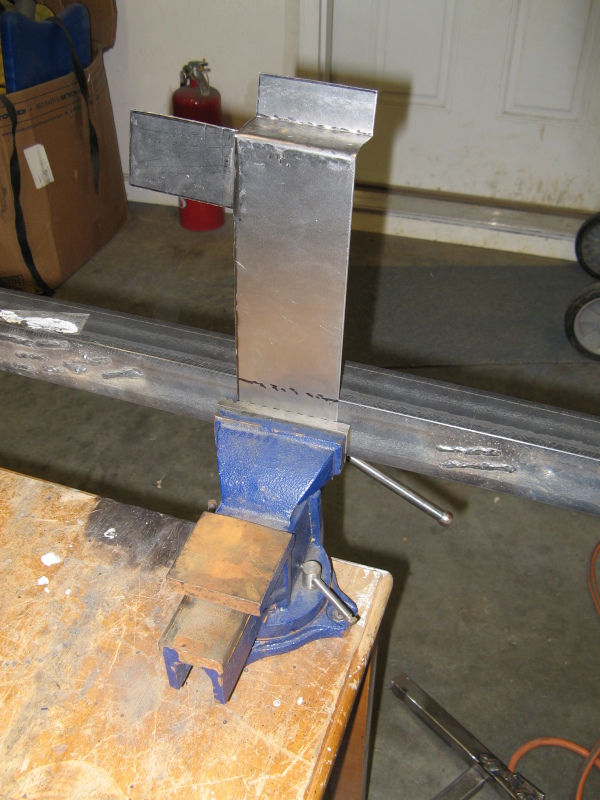
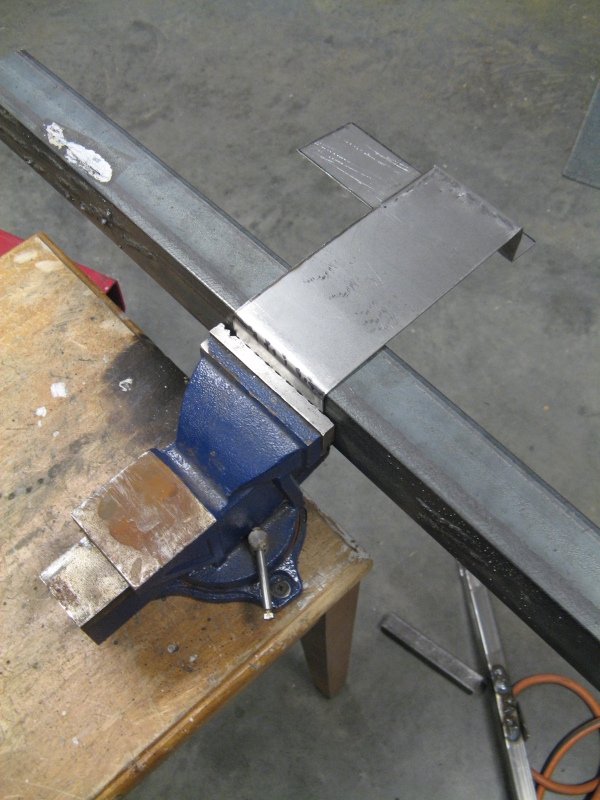
The following series of pictures show how I folded the sheet metal one step at a time to get my final shape:
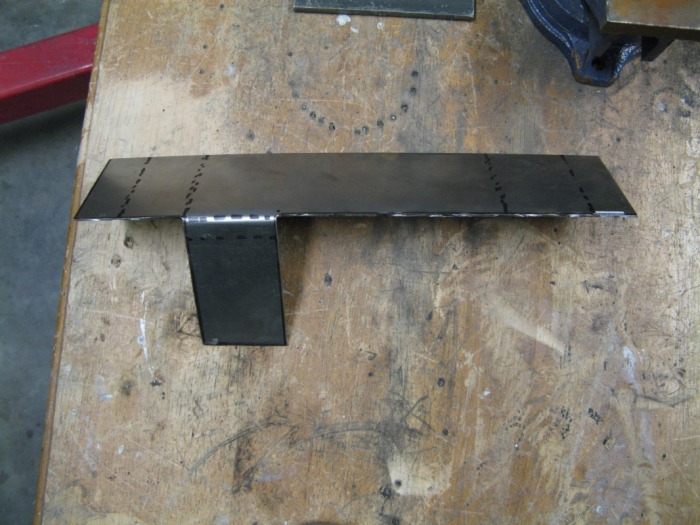
Bending Sheet metal with Tricky Clamps
So I figured I'll let me secret out of how I actually bent this. Yep all I used was a vice, a hammer, and some scrap metal. Enjoy!
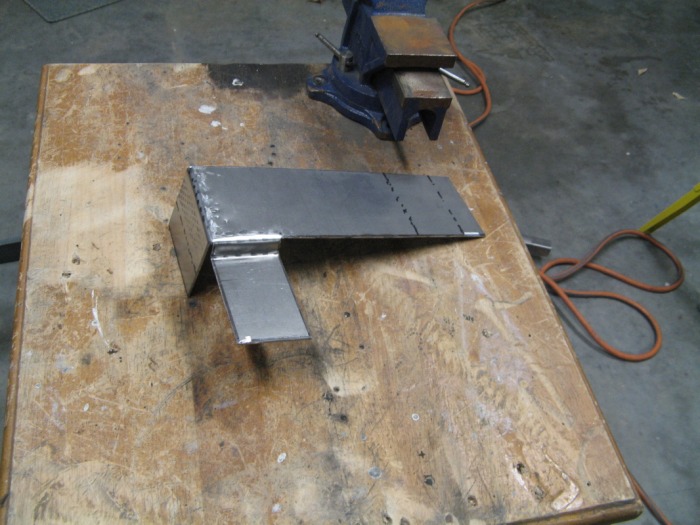
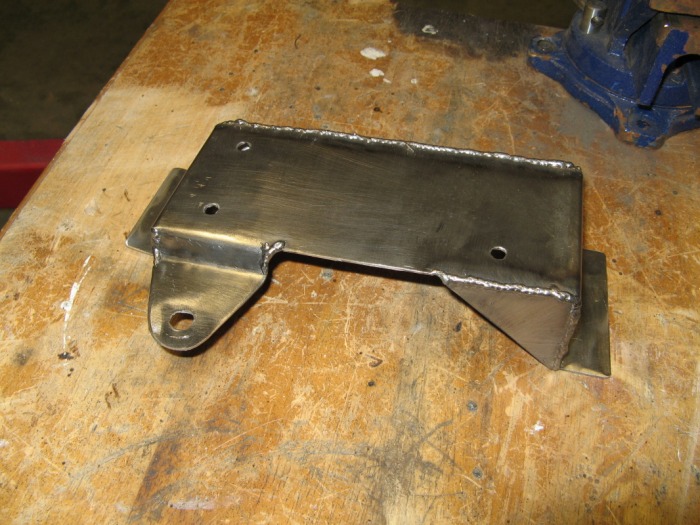
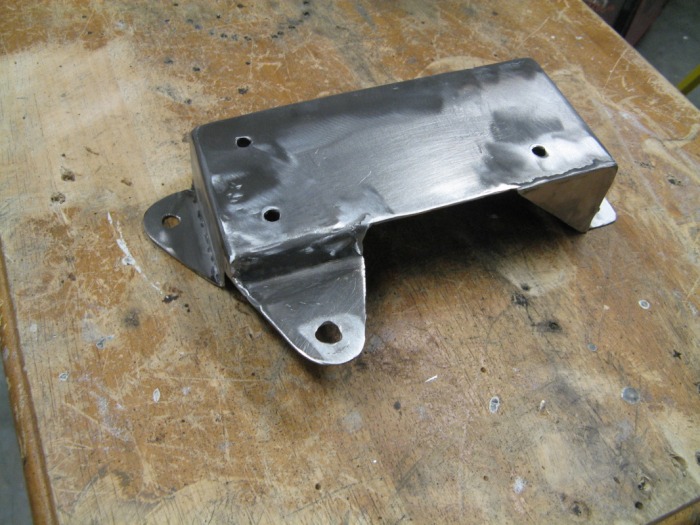
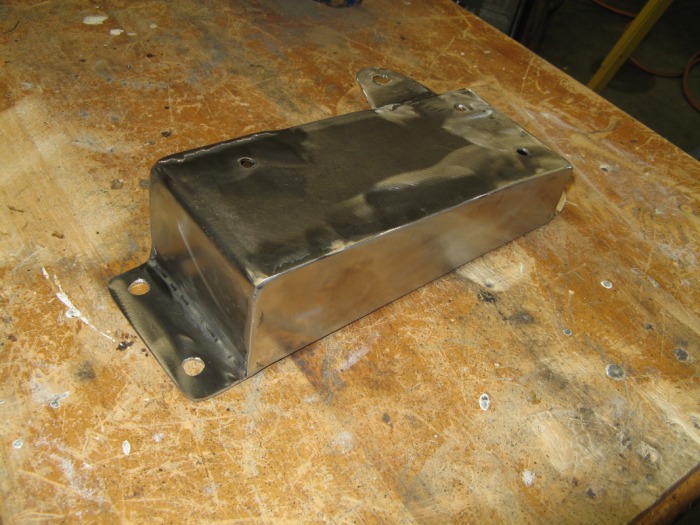
Pedal Support
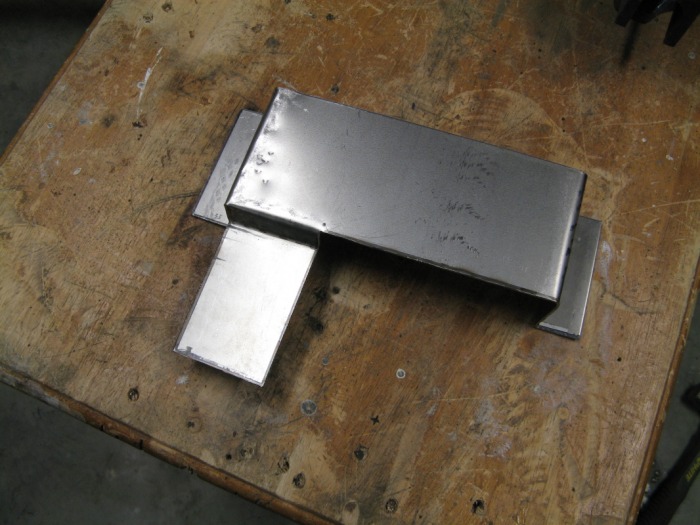
Either way, after a bit of interesting bending this is the end product. Now I have a nice platform that I can bolt my pedal to and then bolt into the car. And since it's 16 gauge metal, it's actually pretty light compared to some of the other ideas I was tossing aorund. Anyways, time to go test fit it in the car.
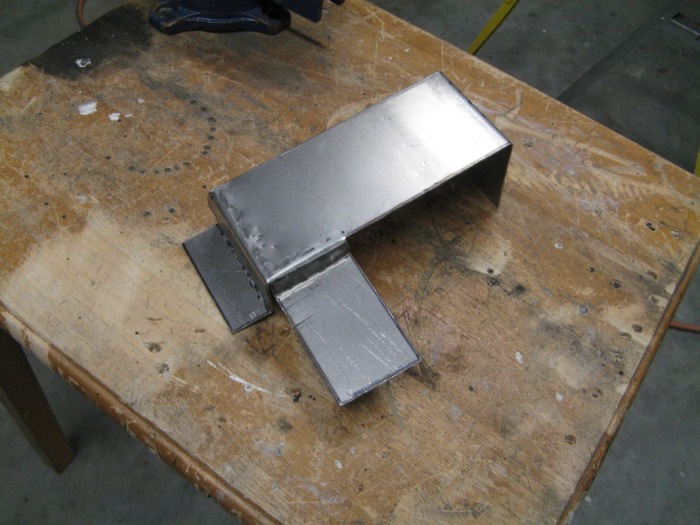
Mocking it up with Metal
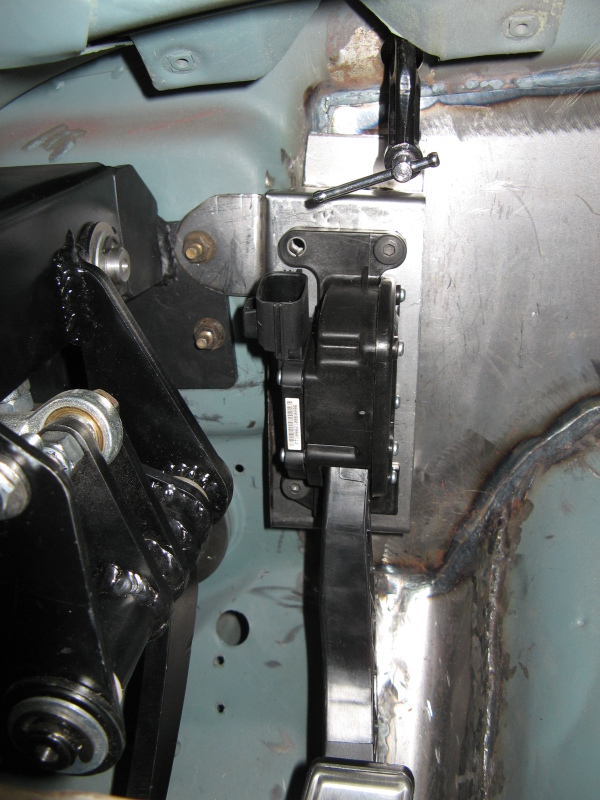
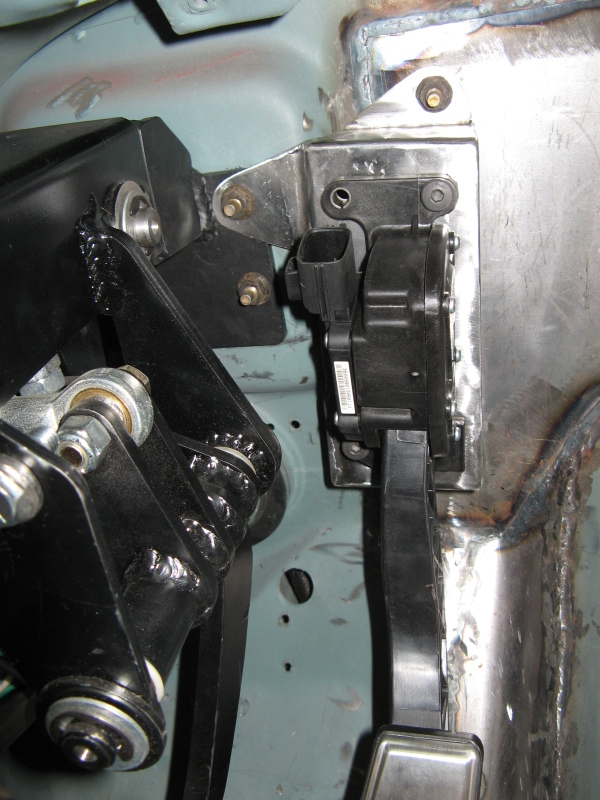
I then drilled and rounded the tab that attaches to the brake pedal assembly. You can see how that bolt aligns everything now. I had to got a bit of tweaking with the two flanges that touch the firewall to get them to sit flat. Basically I bent everything as close to 90 degrees as possible, but since the top standoff is 1-1/2" and the bottom is 2" the final bends on each tab needs to be a bit different to get them to sit co-planar with each other. In other words, I bent it some more to get it to sit flat and flush with everything.
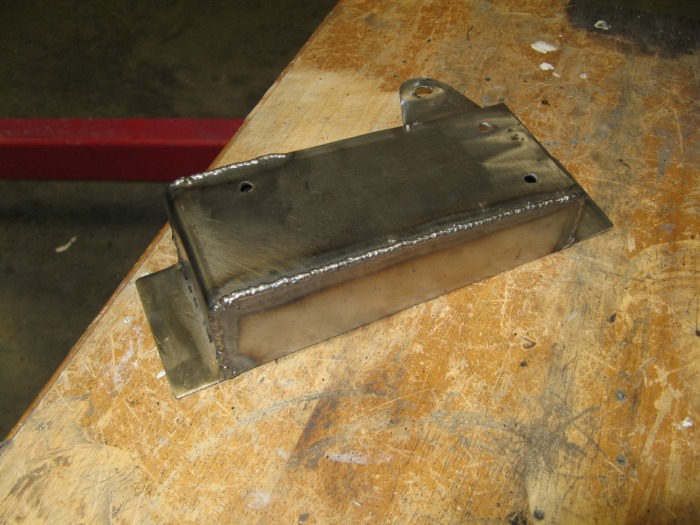
A bit of Bracing

Now with everything straight I added some bracing and welded the corners close to get this puppy ridged. I added a triangle on this side and completely boxed in the other side. There are a total of three bolts that hold the pedal to this bracket, and then four bolts that attach this bracket to the car. It actually can out pretty neat. It's kinda sad that it will be hidden under the dash and nobody will ever see it again. That's unless I paint it hot pink. :-)
All Three Levers are a GO!!
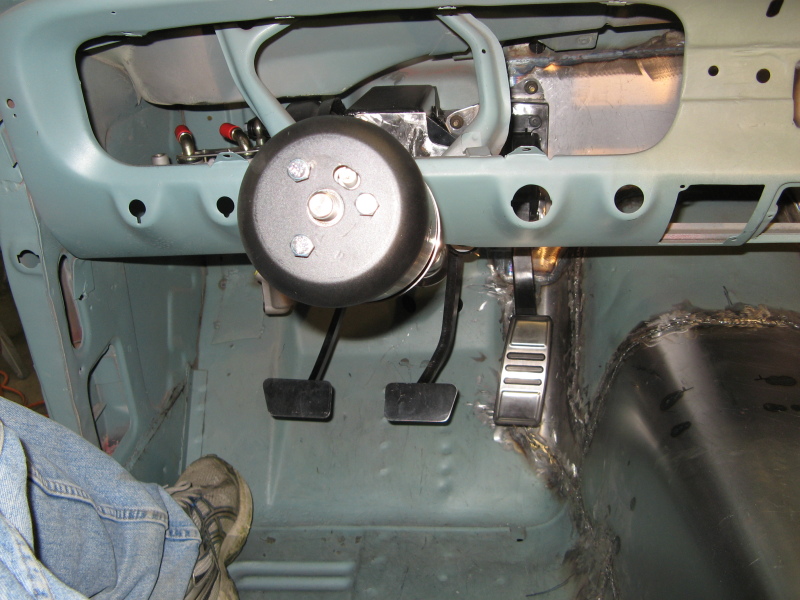
AHHH, finally I have all three pedals in the car. Actually the driver's cockpit is all finished now. I have steering, clutch, brakes, gas, and a seat. Dude, I'm good to go! I'm still debating on the final pedal covers to use, but that can wait till after I get the car out to undercoating and paint. The gas pedal actually feels really nice with the slight angle to it. And yes, I have made alot of car noises. But I bet the final rumble will be alot better on the ears. And like always here are a few more random pictures. Till next time - VROOM VROOM! :-)

And with a bit of paint...
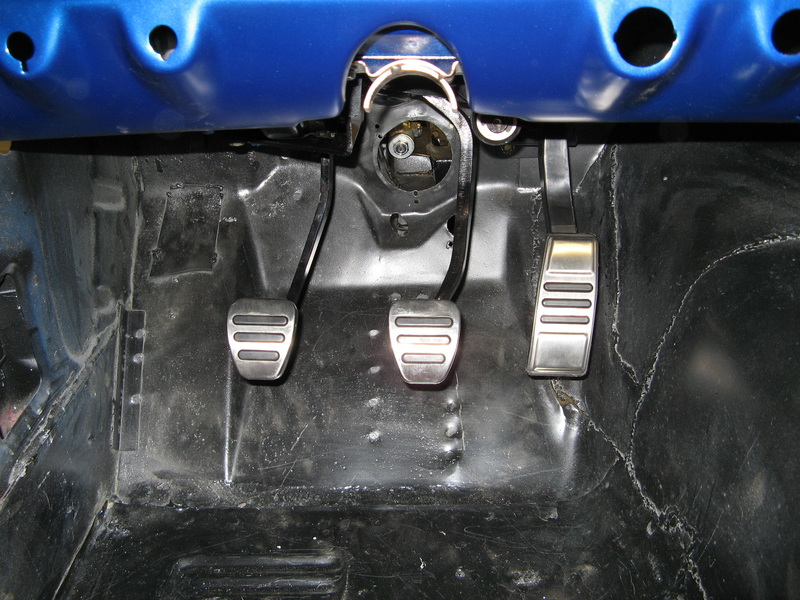
It always looks really good once you get a nice coat of paint on things. Here you can see how all the 2008 GT500 pedals look in my 66. Very nice indeed.
