Exhaust (noun): RUMBLE, RUMBLE, RUMBLE.....
The exhaust adventure really had two parts to it. Part one being shoe-horning some aftermarket GT500 headers, and part two being getting happy with a band saw and a TIG welder. Since this is such a radical restomod it's almost easier just to custom make everything and save the time and money trying to make something fit that really doesn't want to. But then there are the other times when working with good companies that it's worth the extra phone call or two to make your starting point alot closer to the end goal. When I first started thinking about exhaust I knew I wanted long-tube headers with a beefy exhaust all the way out the back. So here is where my search started....
Part One: Search for Headers
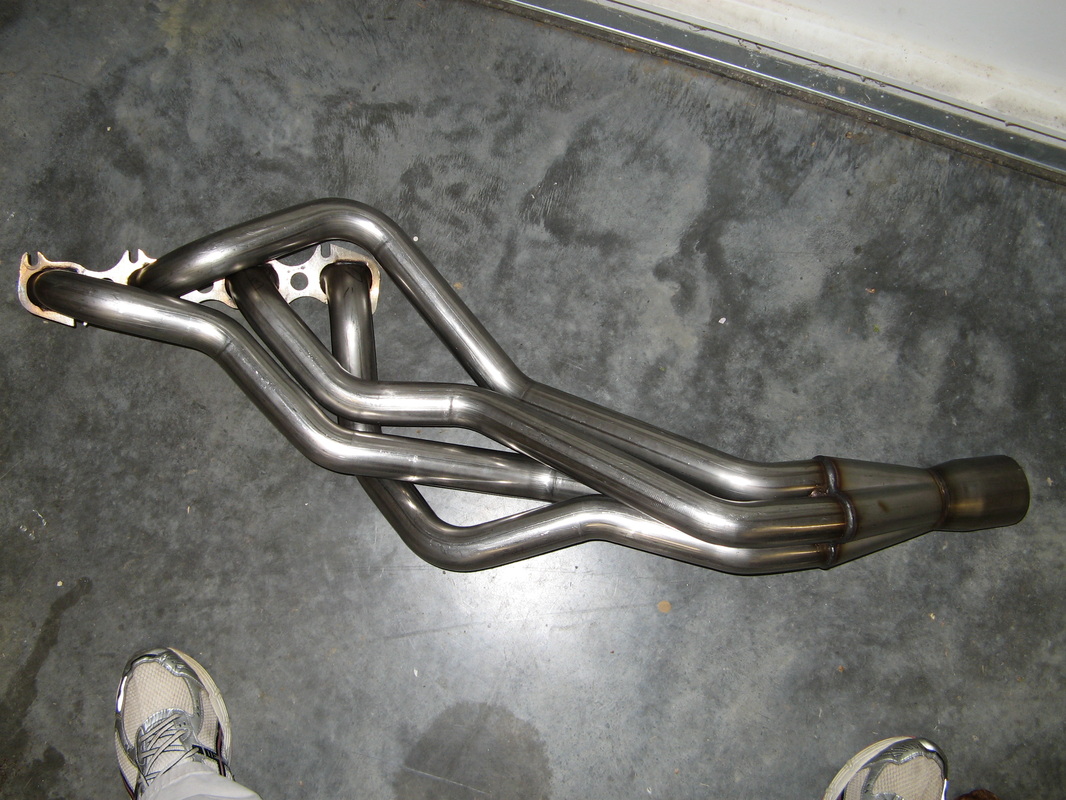
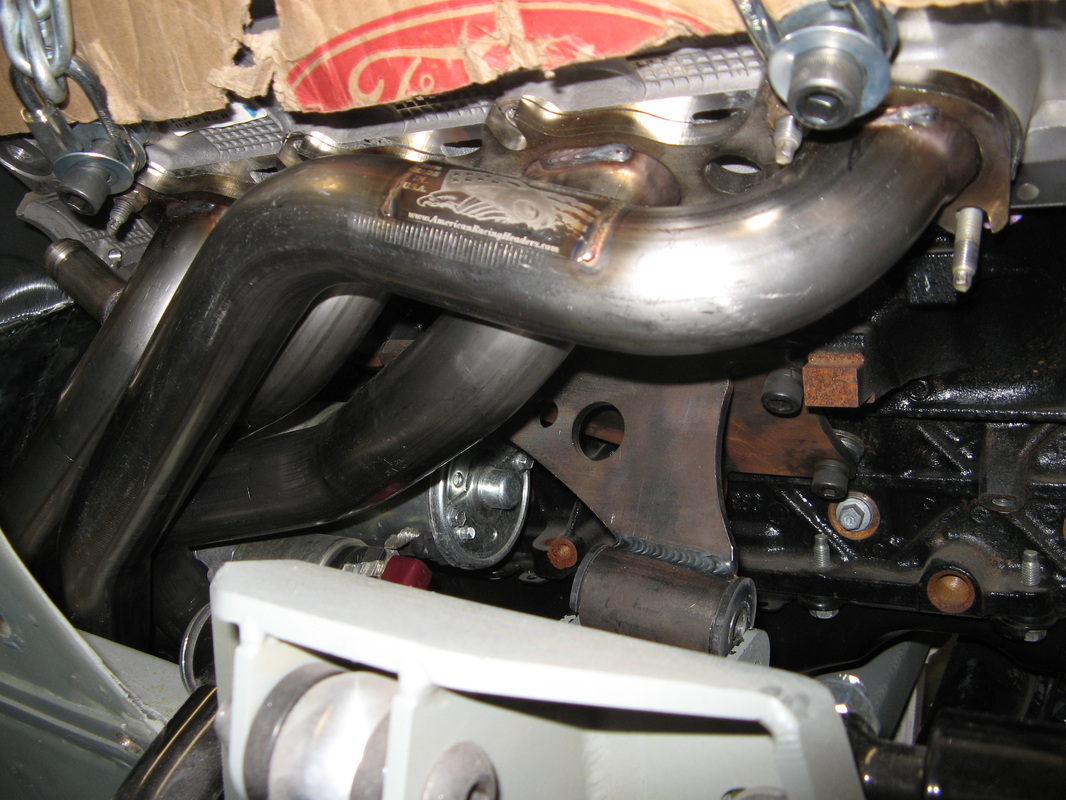
First step on my exhaust was to find some headers that work fit my bill. I eventually phoned up American Racing headers to tell them my project and see if they were interested. After a few conversations they agreed to send me their standard GT500 headers and if they wouldn't work, they would swap them out for an unwelded set free of charge. Well the driver side worked, but the passenger side hit the frame rail. Not to mention that the headers hung down really low. We both knew that was probably going to be the case since the car bodies are completely different. But it was worth a shot. Anyways, here are a few pictures to show what I mean:
Part Two: A Band Saw and a Good TIG Welder
Since the standard GT500 headers wouldn't work, American Racing were happy to trade them out and send me an unwelded set of headers. The real nice thing about this deal was that the pipes were already stretched and shaped to fit the oval exhaust opening on the engine head. This saved alot of headache in trying to match up exhaust ports and such. But alas those pipes just sat unattended in my shed for several months before I was ready to do the exhaust.
Long story short, I heard of Barillaro Speed Emporium way back when I had my car originally media blasted. At the time I just tossed their card in my desk until I was ready to do the exhaust. I actually met Jim when I was selling some fenders on Craigslist and he told me that he does custom exhaust work. I didn't put the two together until I saw his email address and realized that he worked there. Turns out it's a family shop he has with his brother. From the get go he was really interested in my car since he really likes older model mustangs and hot rods. I always like finding people passionate about restoring older cars and love a good challange. So when the time was finally ready we loaded the car up and off it went to Barillaro Speed Emporium. And when it came back and I was simply amazed at the quality and ingenuity of their workmanship.
Long story short, I heard of Barillaro Speed Emporium way back when I had my car originally media blasted. At the time I just tossed their card in my desk until I was ready to do the exhaust. I actually met Jim when I was selling some fenders on Craigslist and he told me that he does custom exhaust work. I didn't put the two together until I saw his email address and realized that he worked there. Turns out it's a family shop he has with his brother. From the get go he was really interested in my car since he really likes older model mustangs and hot rods. I always like finding people passionate about restoring older cars and love a good challange. So when the time was finally ready we loaded the car up and off it went to Barillaro Speed Emporium. And when it came back and I was simply amazed at the quality and ingenuity of their workmanship.
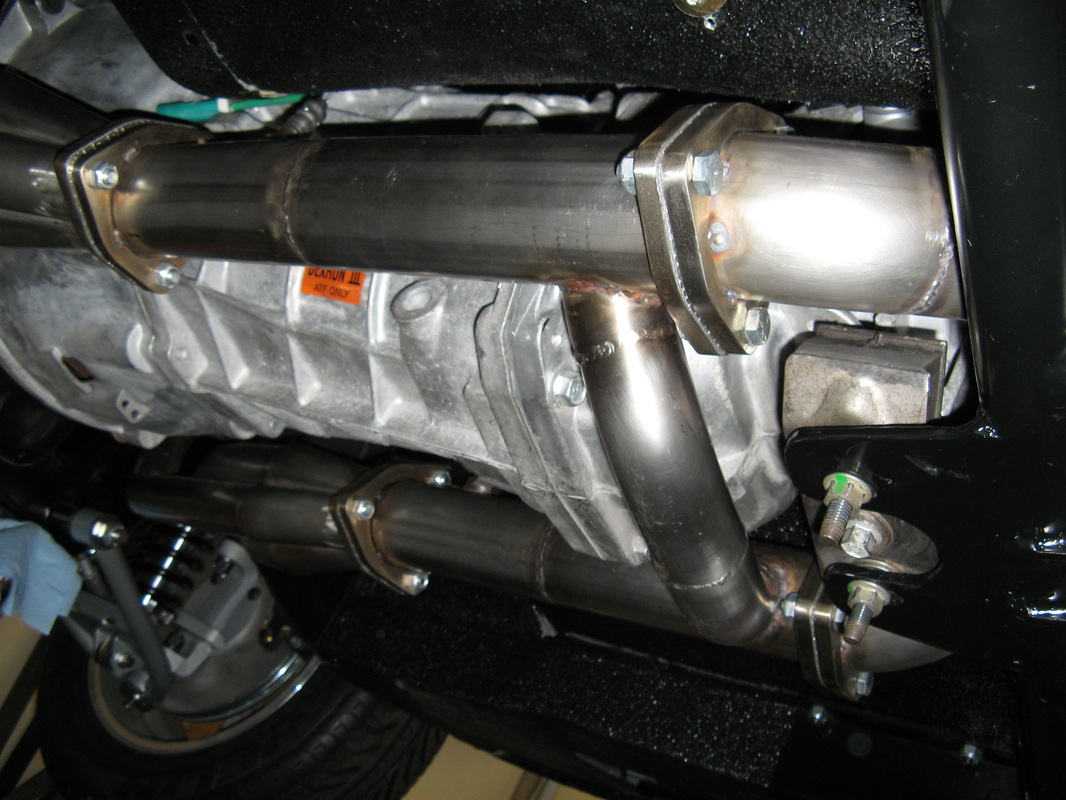
Headers
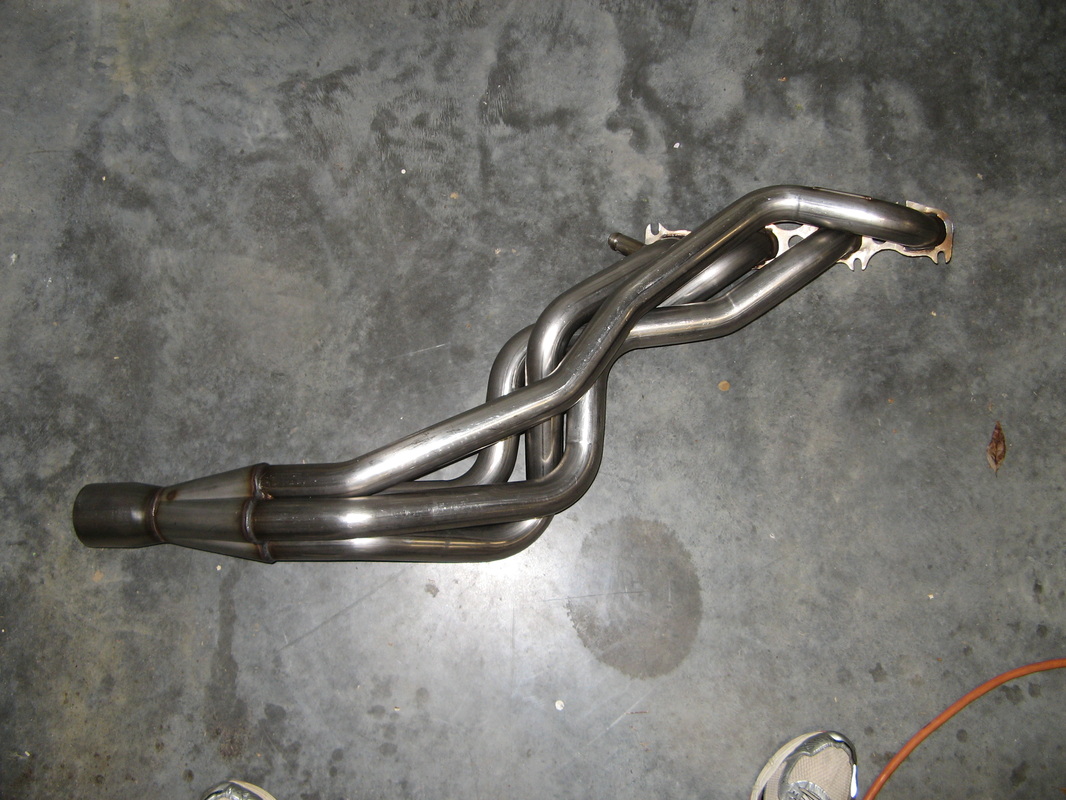
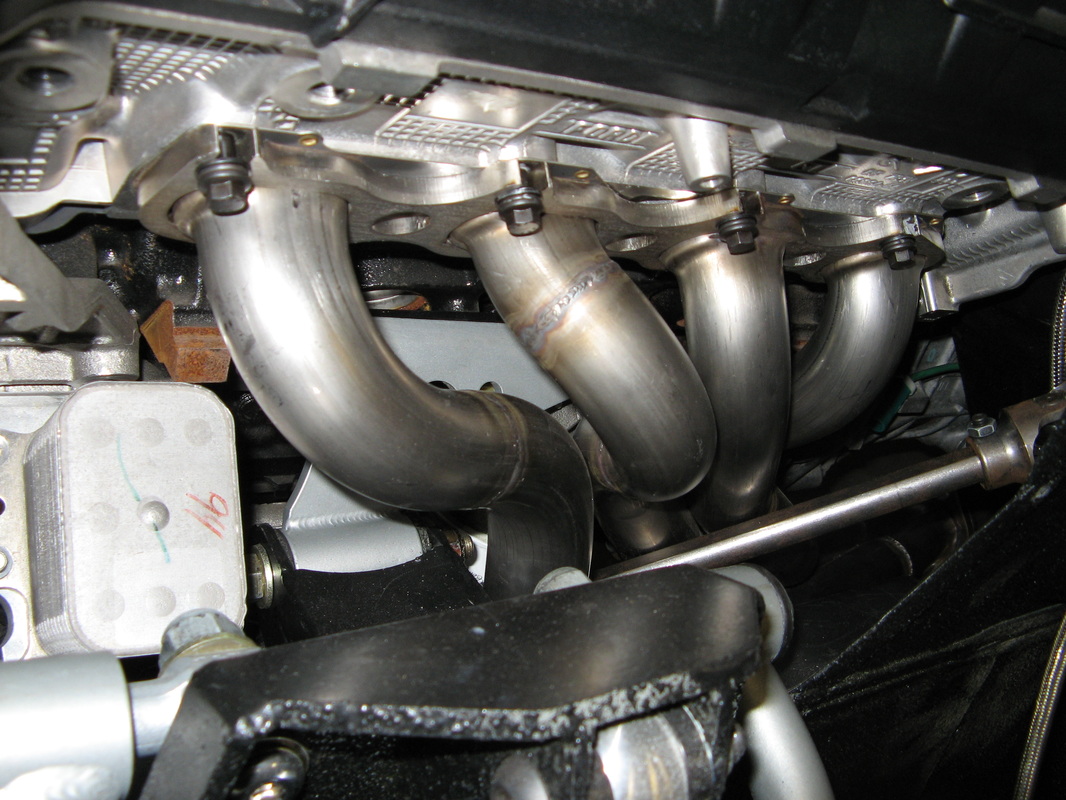
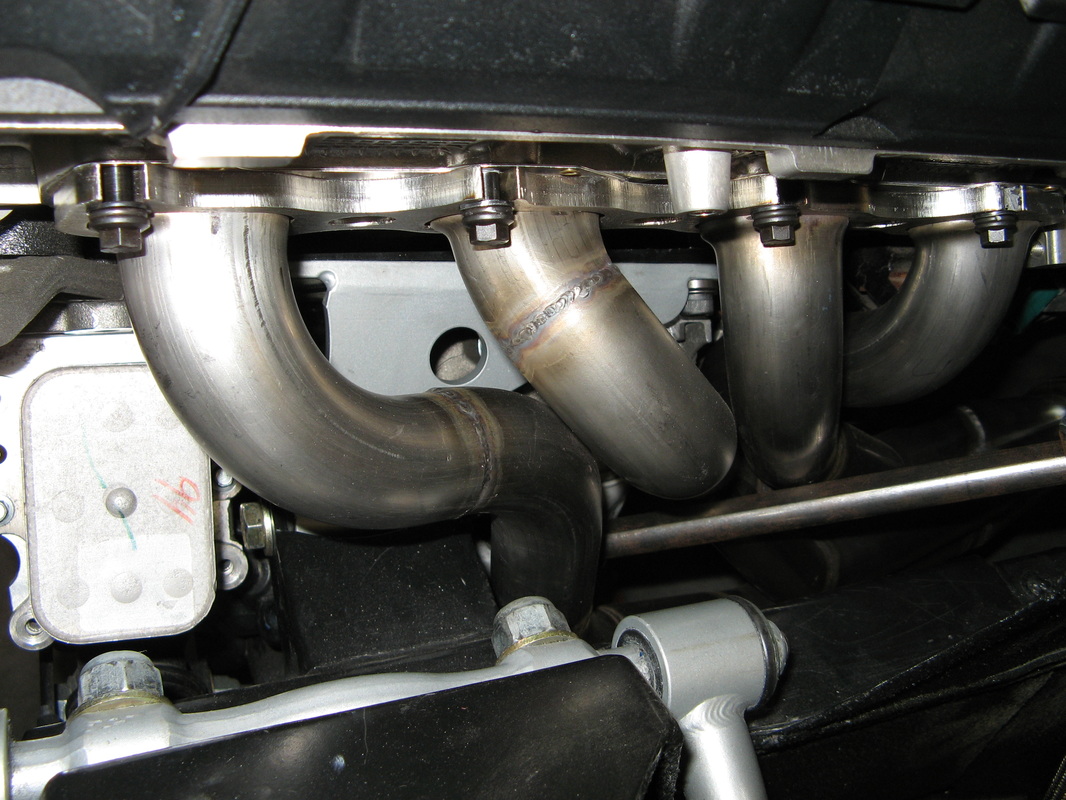
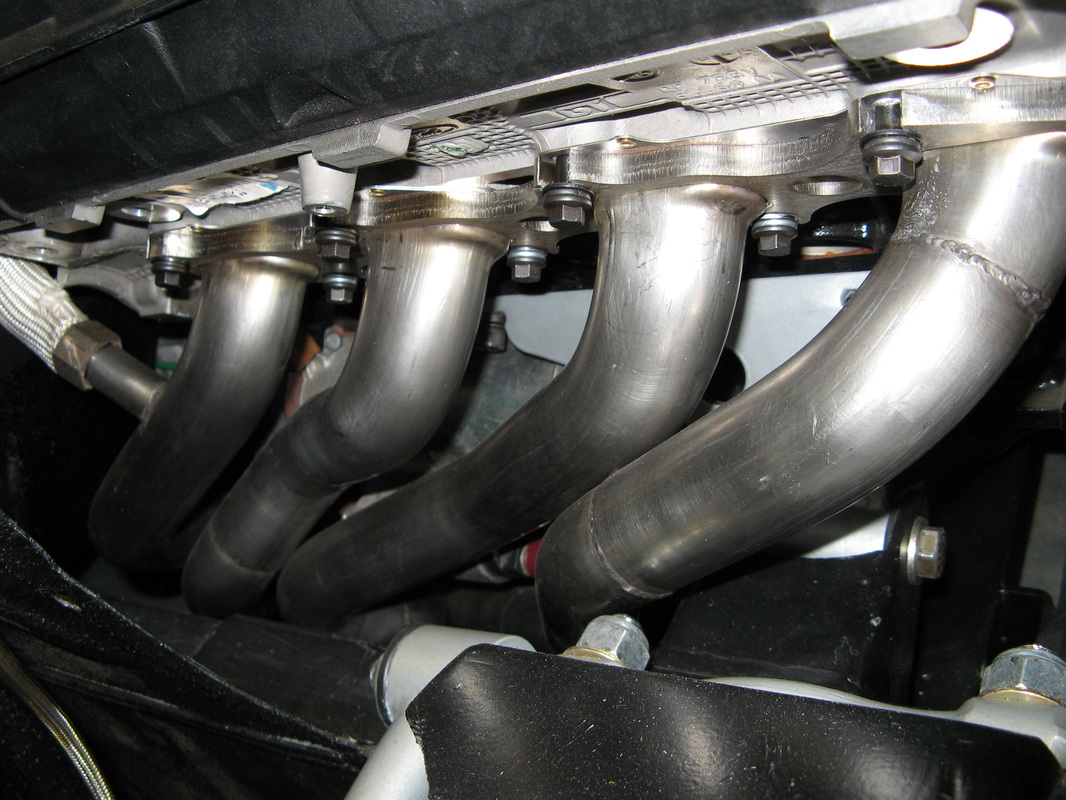
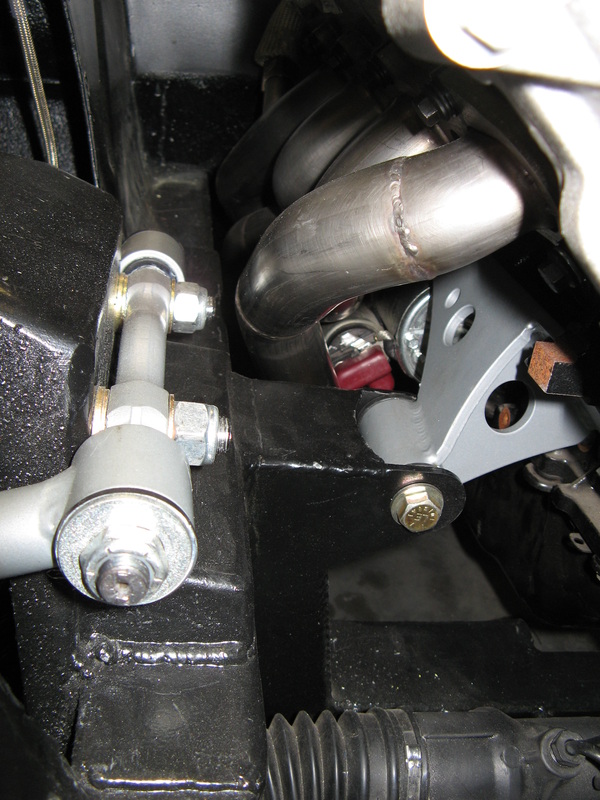
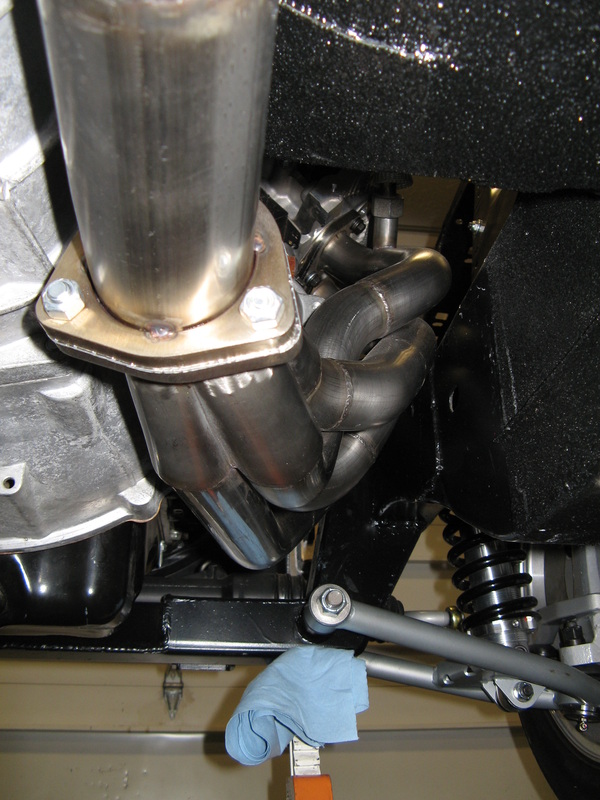
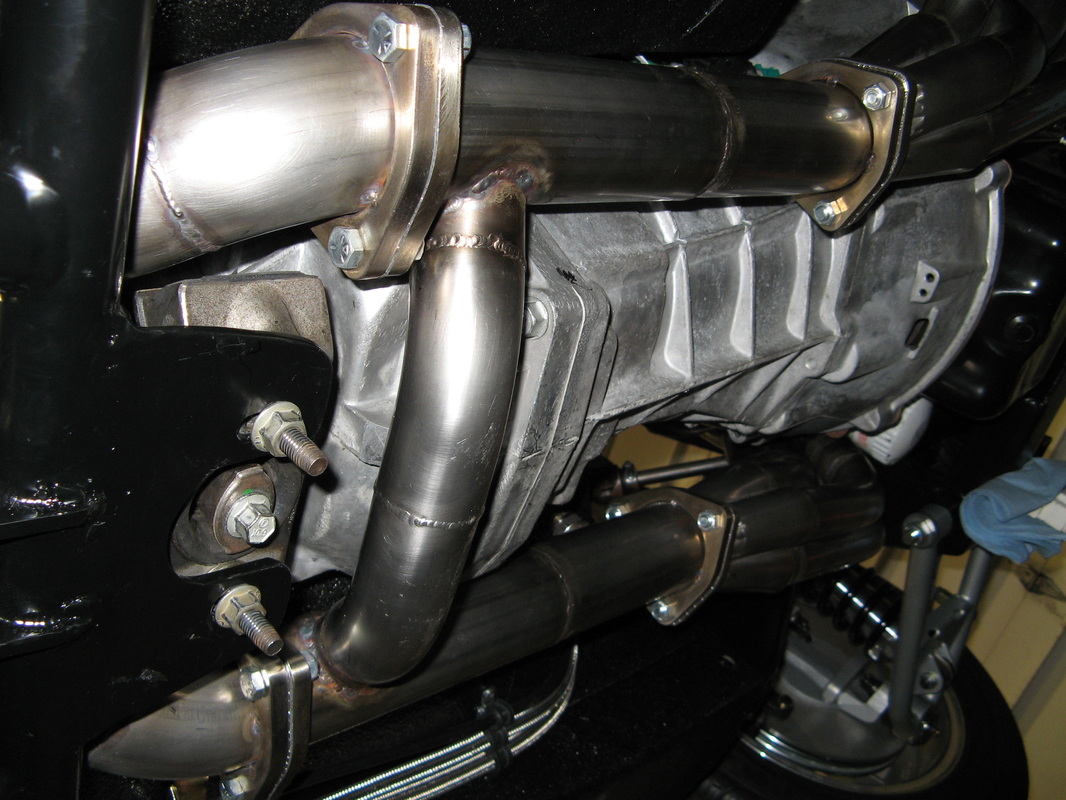
Starting with the 1-3/4" 304 Stainless Steel header pipes from American Racing Headers and ending with a 2.5" collector, the Barillaro Twins set to getting them tucked up tight against the transmission to miss the narrower frame rails and other tid bits here and there. It's a real talent to be able to move bends in a pipe here and there to get them to line up exactly how you wanted them to be. Needless to say both headers came out really nice and the TIG welding looks great. Finally We added some ARP bolts to lock them tight against the motor.
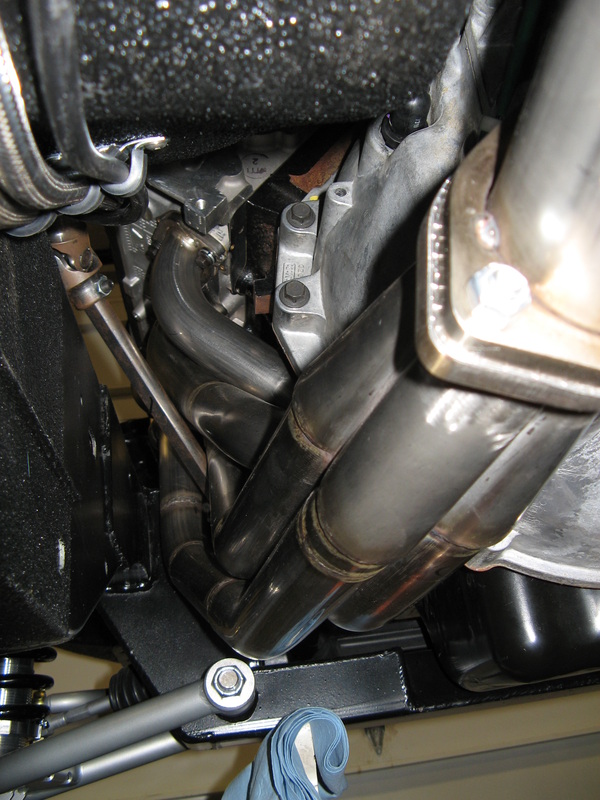
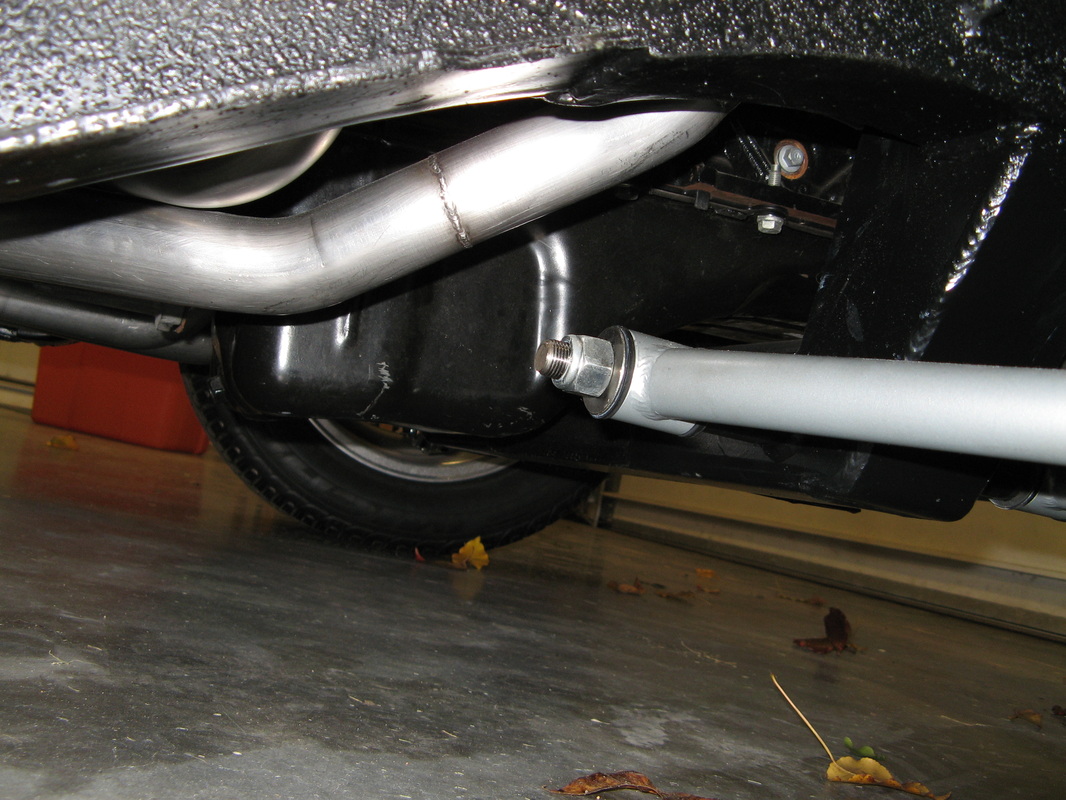
H-Pipe
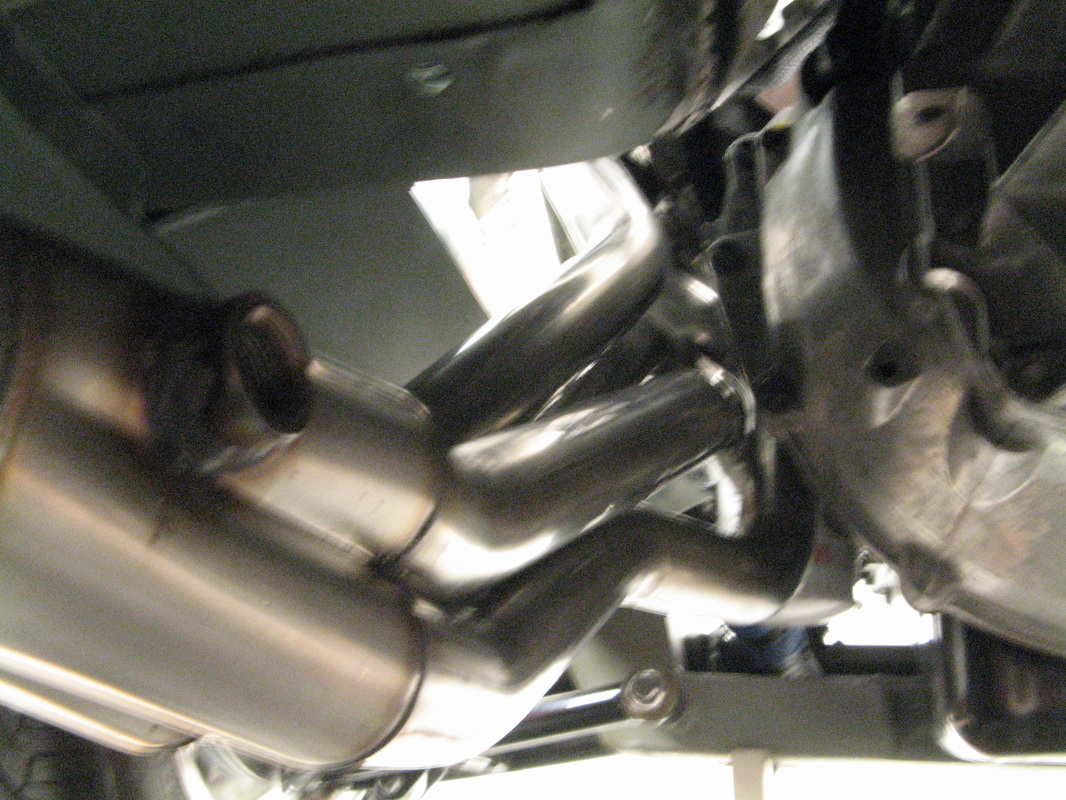
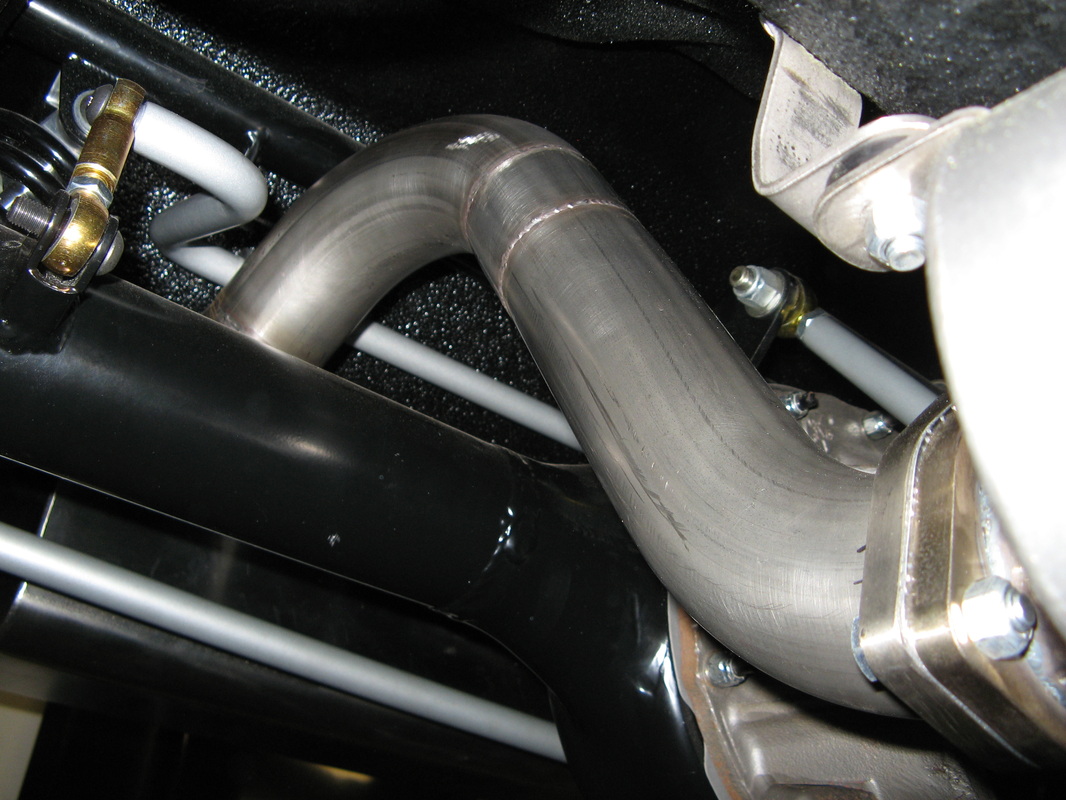
I think this was the piece that Jim was the proudest of doing. Basically we had to add a crossover pipe right after the headers, but there is that monster transmission sitting right in the way. After clipping the transmission mount a bit, Jim rolled the crossover pipe back a nudge to fit into a notch on the transmission. Believe it or not but this pipe is still higher up than the oil pan on the engine. What really nice is that if I ever need to replace the O2 sensors, I can unbolt the four flanges and this whole assembly just slides out. This also keeps the main exhaust pipes very straight. This was definitely the most ingenious piece of the exhaust system. I'll definitely give Jim an A+ on creativity on this one.
Mufflers

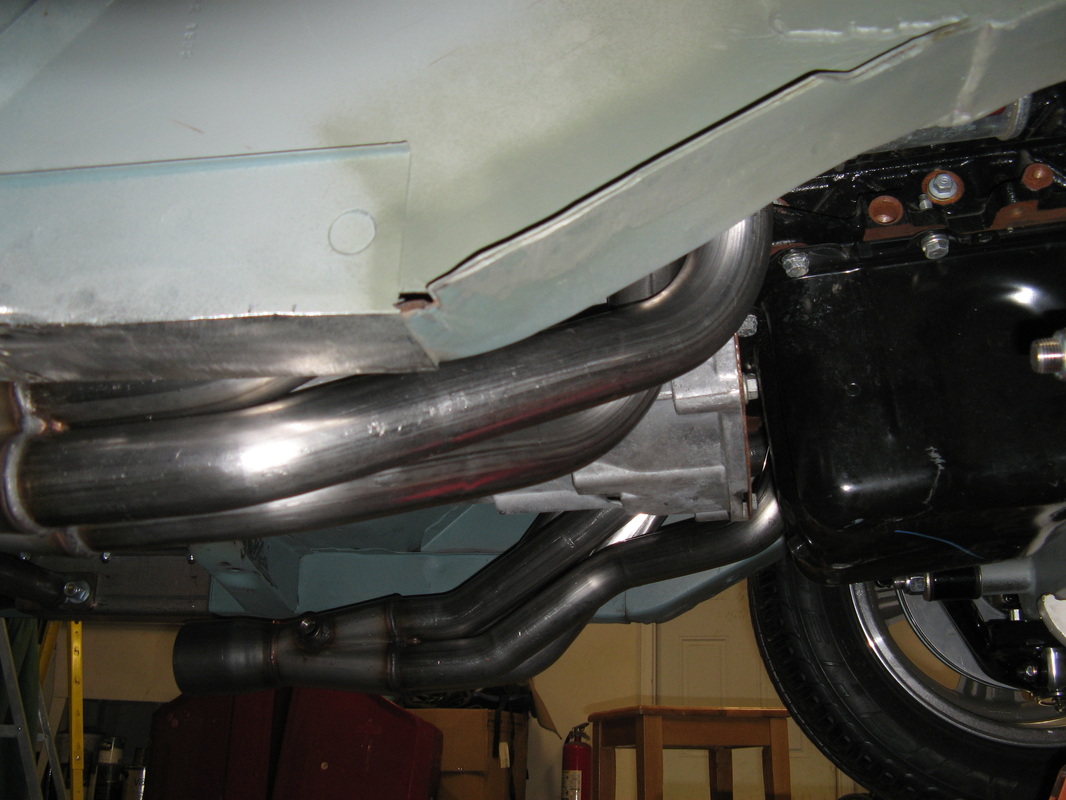
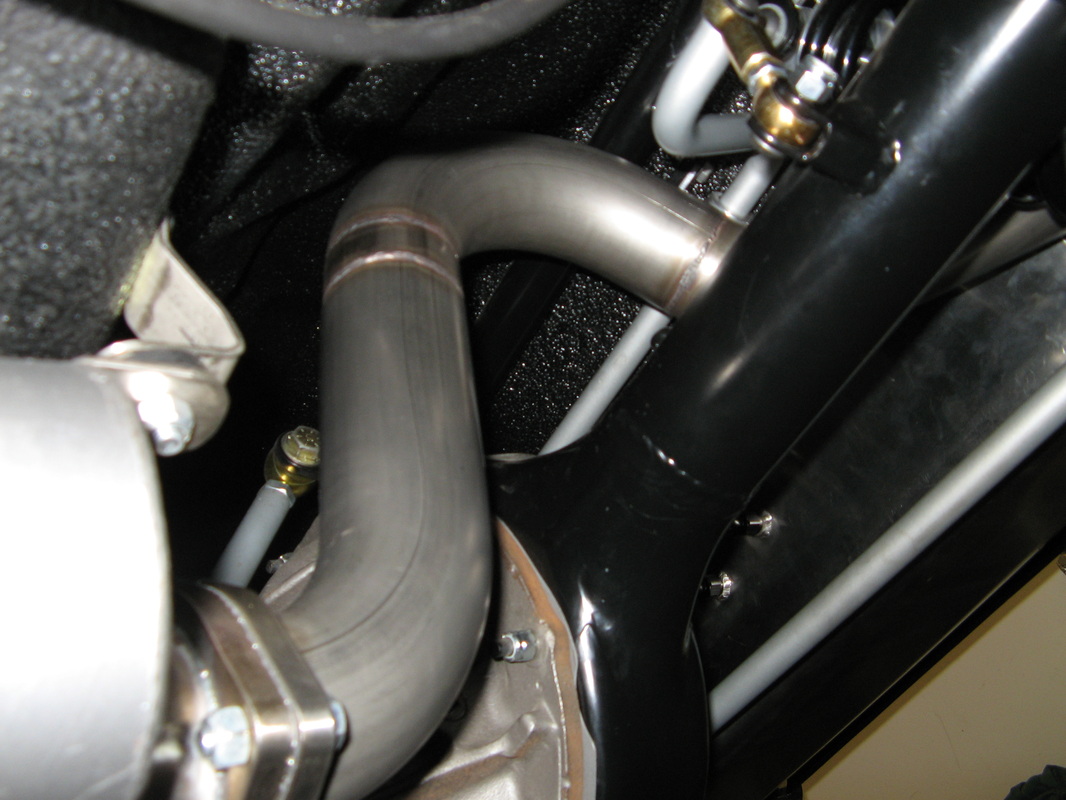
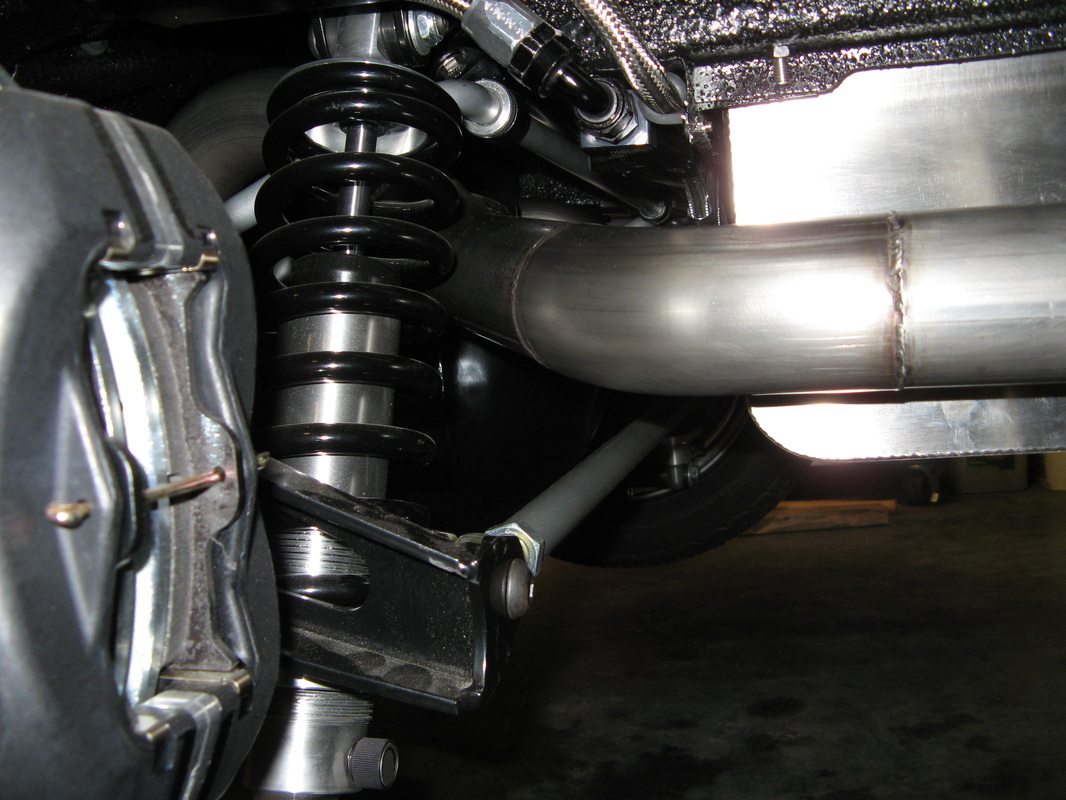
After listening to a ton of different sound files, I settled on a pair of Flowmasters 40 Series Delta Flow mufflers. Coupled with the engine, these are going to have a much nicer sound than the glasspacks that I had on before. Jim did a bit of extra work by flipping over the inlet on one of the mufflers so that the smooth side is down on both of them. Little details like that make all the difference in a really nice car. Here you can see the dual 2.5" pipes that run right next to the torque arm and 3.5" driveshaft. All tucked up nicely in the stock frame rails.
Over the Axles
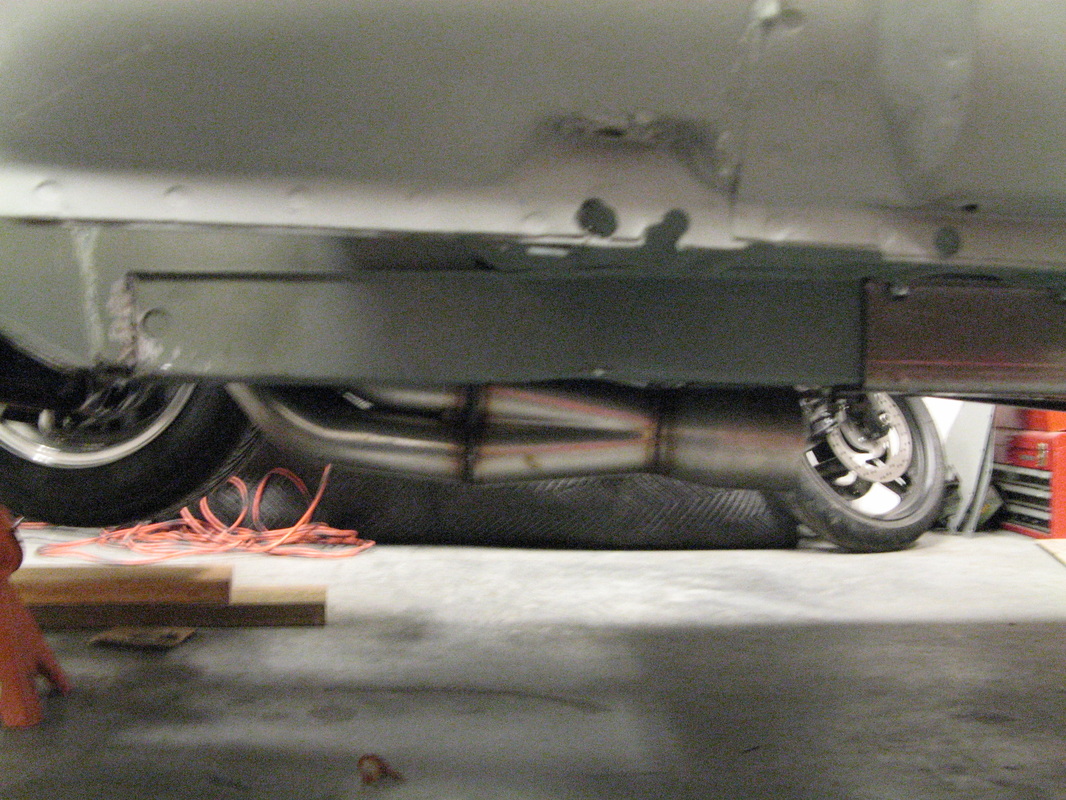
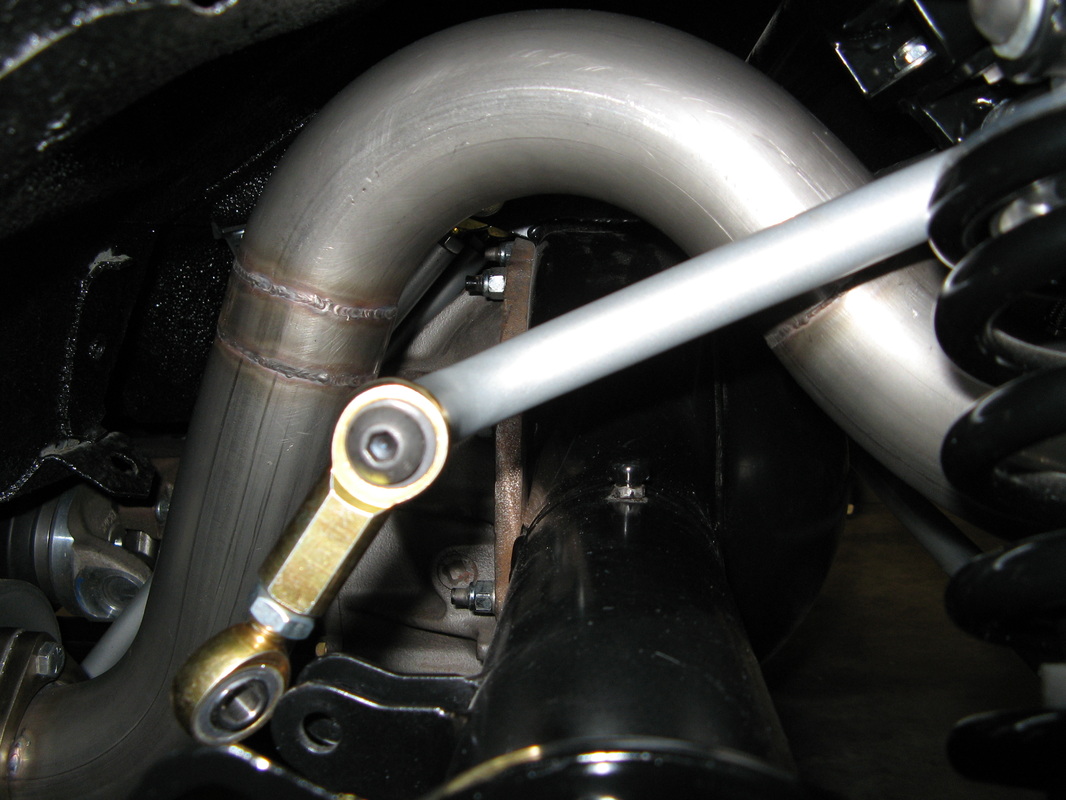
As if the headers and H-pipe weren't intricate enough, now the Barillaro brothers had the fun job of dodging the rear axle, shocks, fuel lines, and fuel tank. Yahh...this is another reason why it's worth every penny to pay a professional to do certain tasks. I'm really glad that I ran the emergency brake line inside the car instead of over the mufflers. I believed that help out in the piping department here. The driver side was definitely the tighter side, but there is still plenty of clearance between the exhaust pipe and the fuel lines. I also really like that they added rubber bushings inside the hard mounts to keep the exhaust noise from resonating inside the car. This is just a very slick setup.

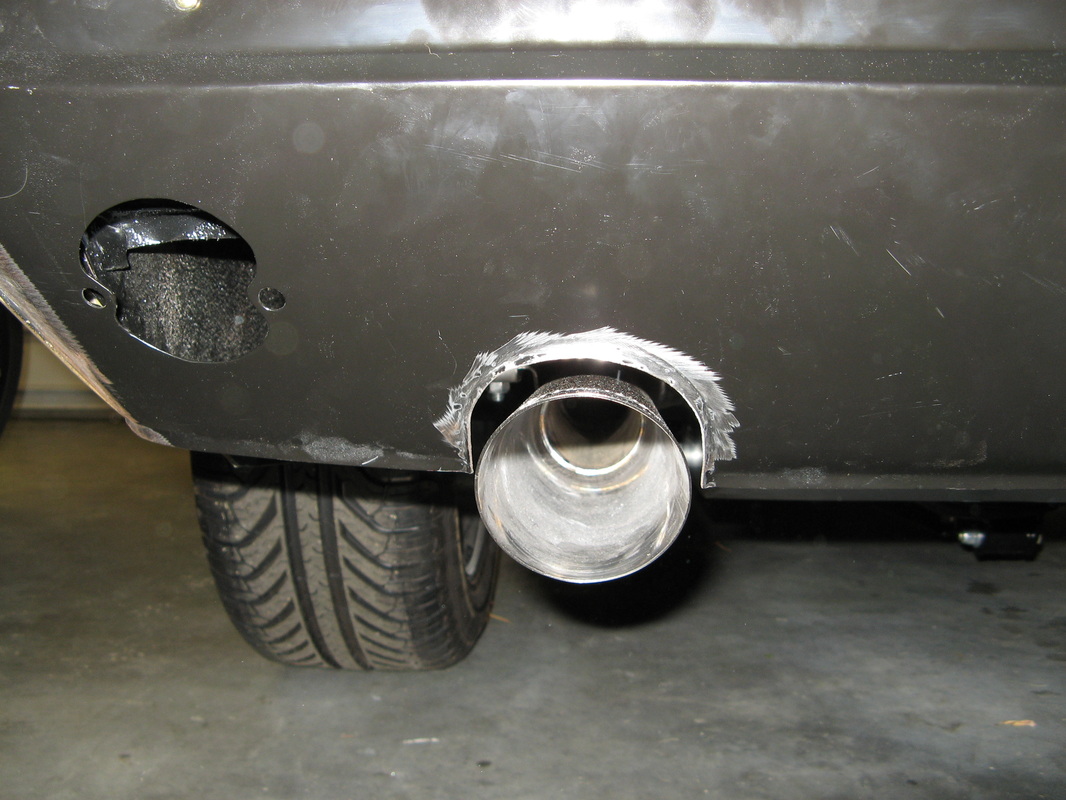
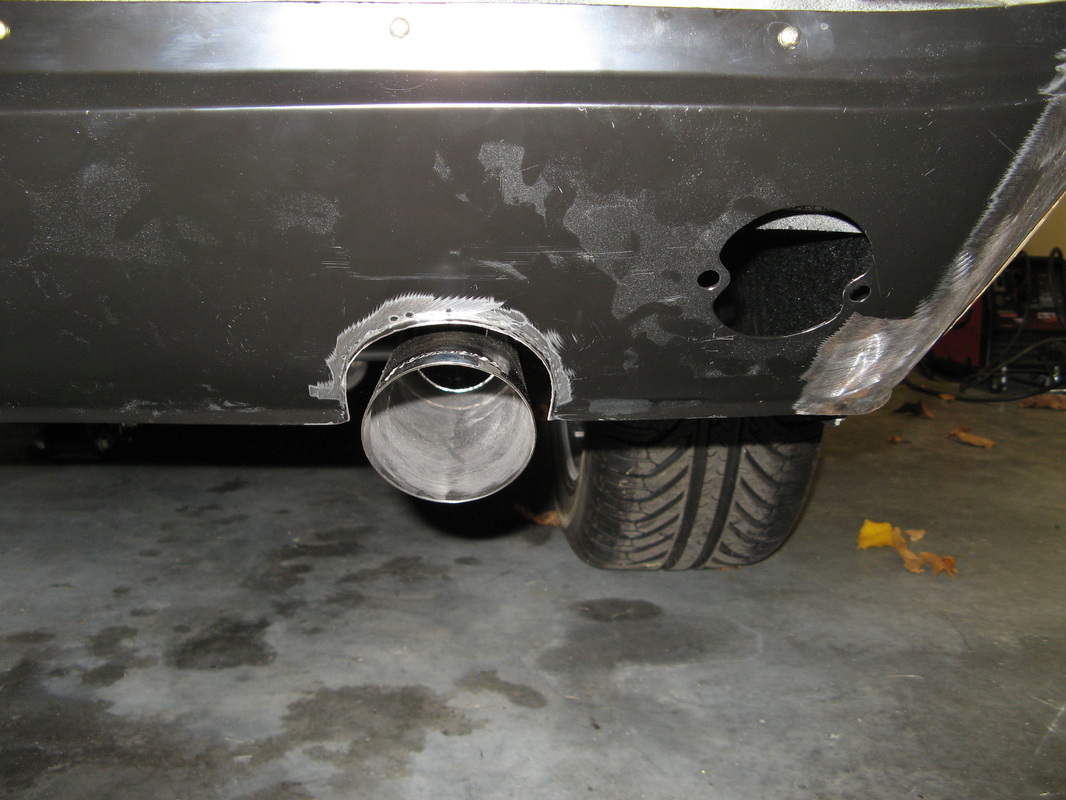
Tips and the Special Valance Treatment
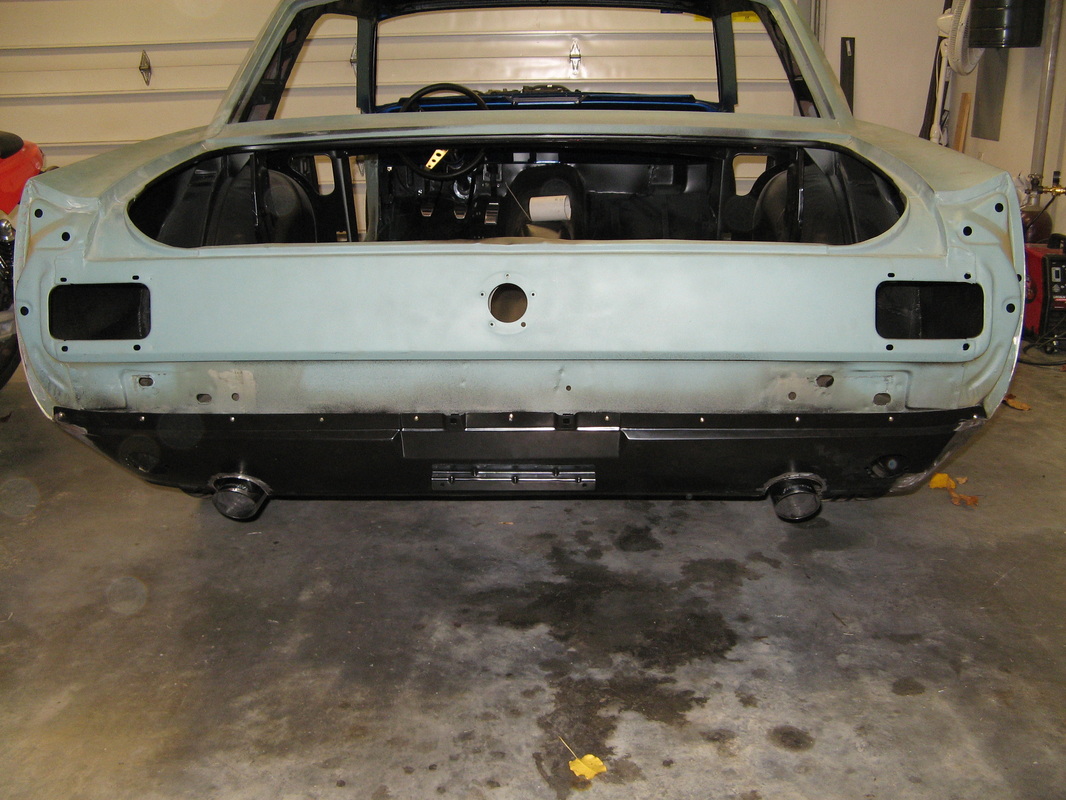
Running a 2.5" exhaust throughout the car I wanted to finish out with some nice tips just to add those finishing touches to complete a really nice exhaust system. Here I bought a pair of Flowmaster's Slash-cut 2.5"-in to 3"-out polished tips. The angle of these actually match the angle of the valance panel really nicely. Now here is the special part, way back in '66 the original exhaust either exited under the valance panel or if you had a GT it exited right in the middle of the valance. At first I was thinking of going for the GT setup, but I kept looking at pictures and it never really grew on me. I did however, always really like how the '67 and later had the exhaust tucked into the valance panel from the bottom. Ford put a really nice extra bend or two to really trim out the exhaust opening. So I figured why not do the same. This is the other area that the Barillaro's really shine at, body work. I shot my idea over to them and he thought that it would be very good looking. So with a stock valance panel, Jim worked his magic and came up with the following. I got 7 letters for you, P-E-R-F-E-C-T!
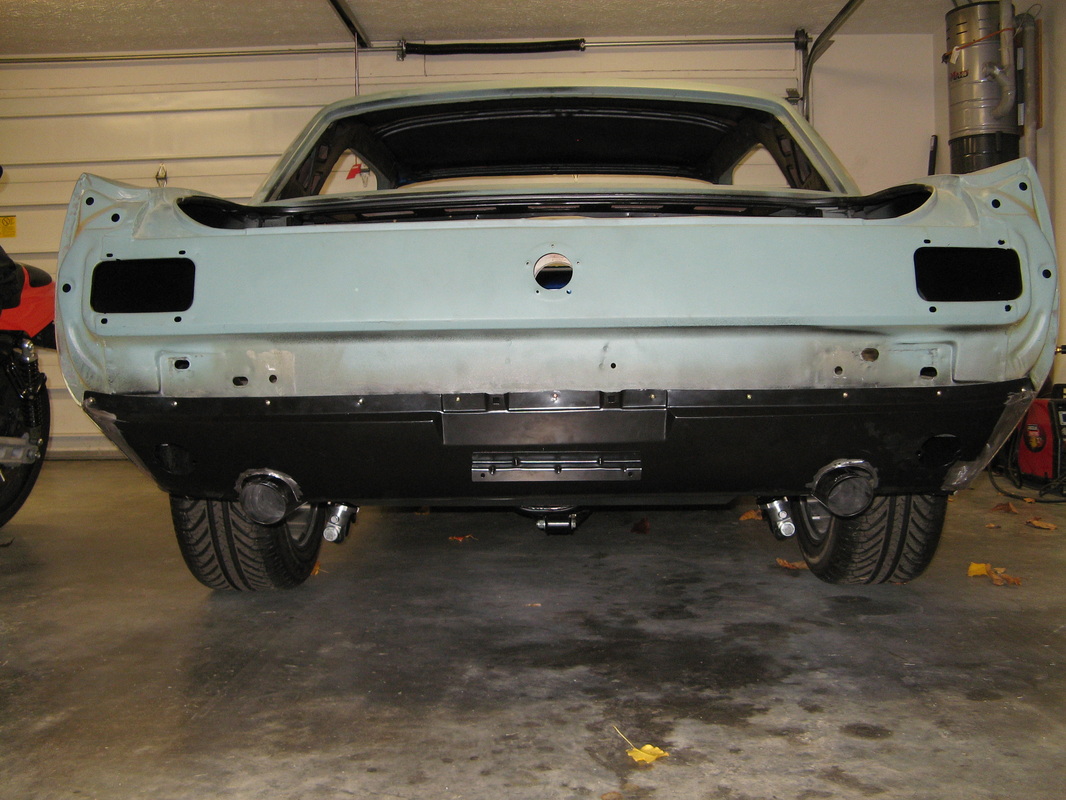
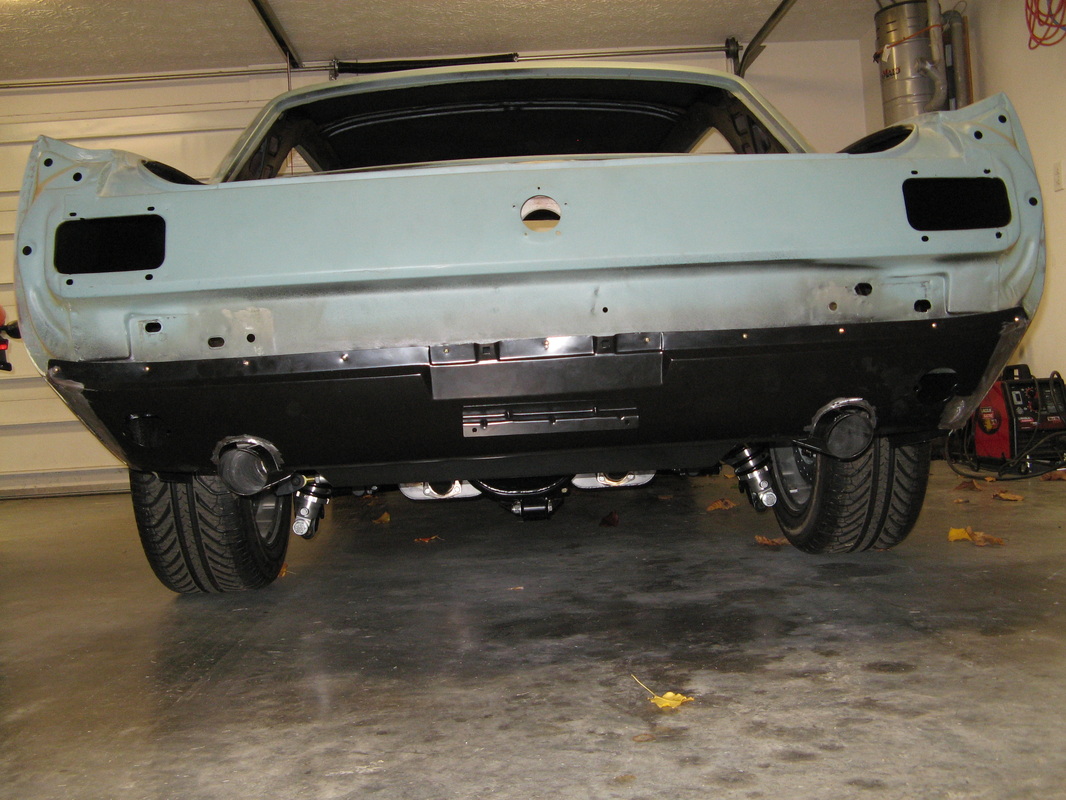
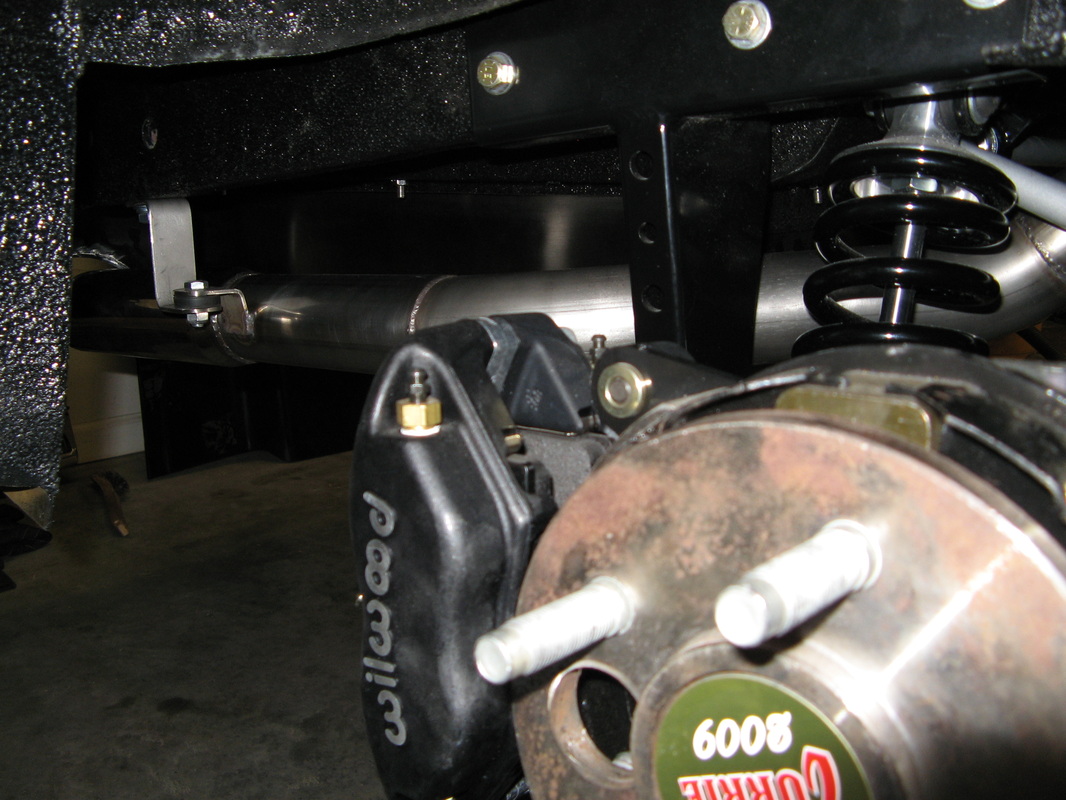
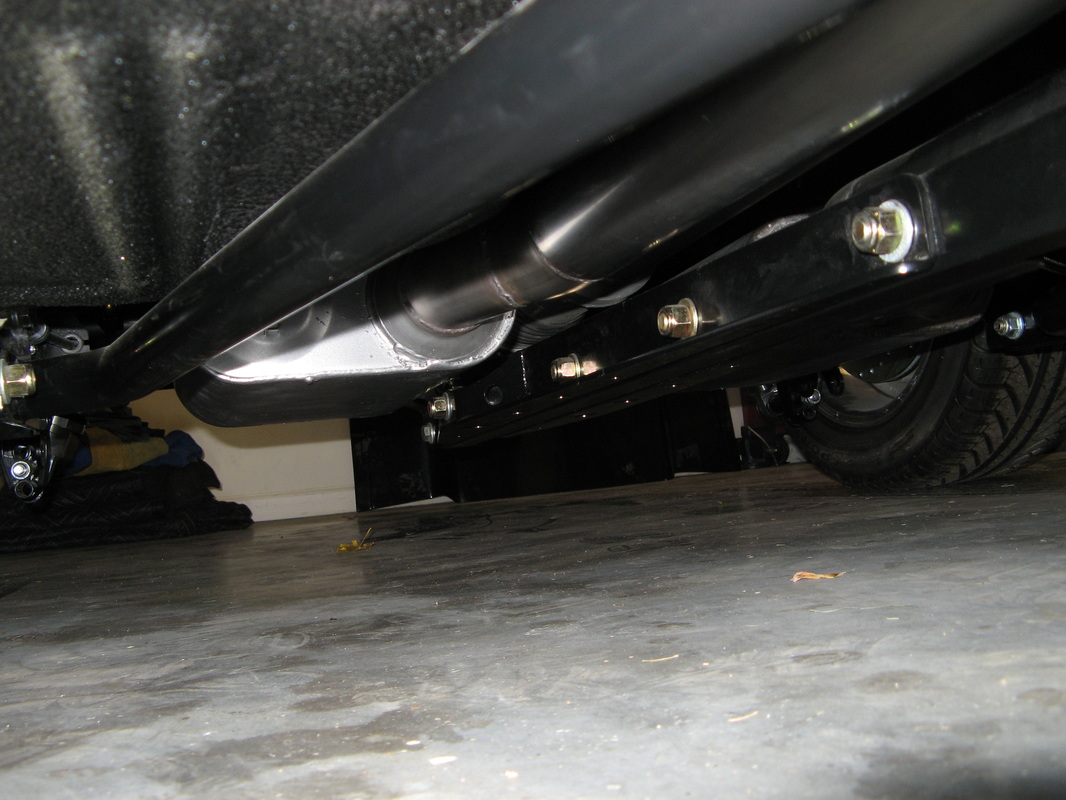
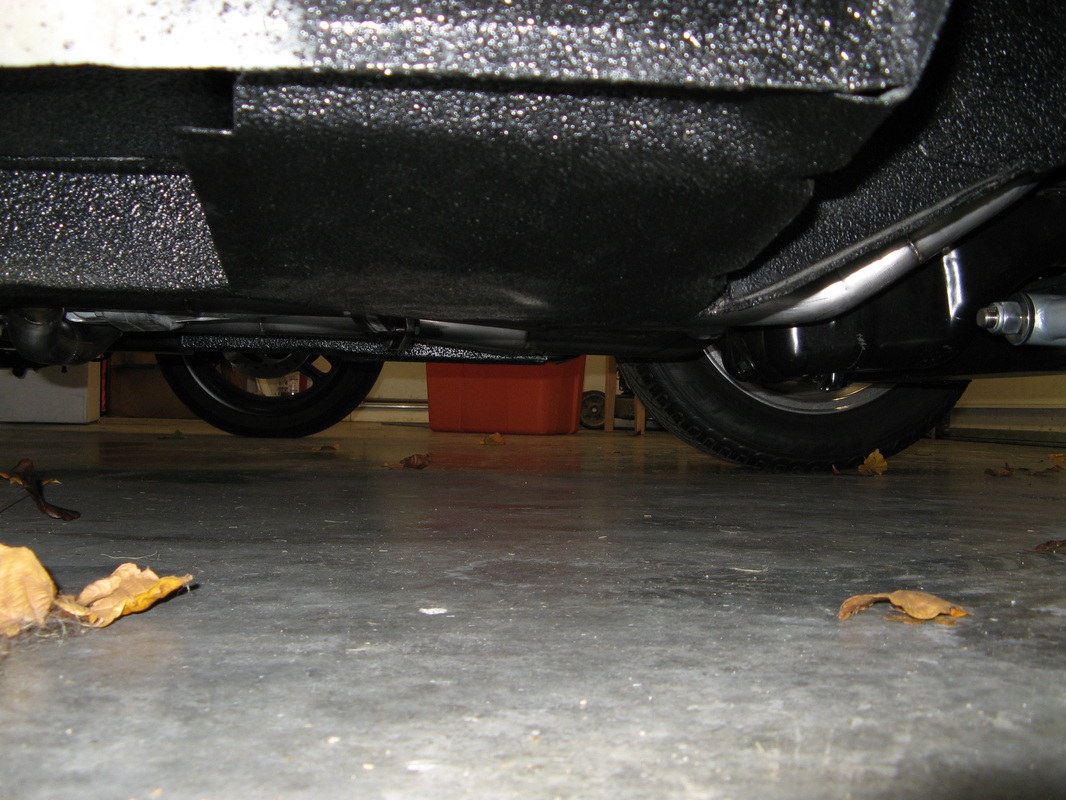
Ground Clearance
Here's a few pictures showing just how tightly everything is tucked up inside the frame rails. I'm still amazed at how high the H-pipe is. Kudos man, Kudos.

Final Thoughts
I'm so impressed with the way that the Barillaro's worked, and got my car in and right back out in just two weeks. A+ guys, A+. Oh and just for that final tid bit.....here's what it sounds like:
| first_time_cranked.wmv |
