The long road to a comfortable seat
Well since I was upgrading the drivetrain so much I decided to spend a bit of money and get some much needed comfort for my butt. I checked out a few different aftermarket seats but I loved the styling of these Flo-fit seats I got. The biggest plus is the extra padding, side bolsters, and lumbar support that was all but missing from the original seats. The head rest and recline feature was a very nice touch to the seat. The only problem with these seats is that I'm 6'2"...
The First Test
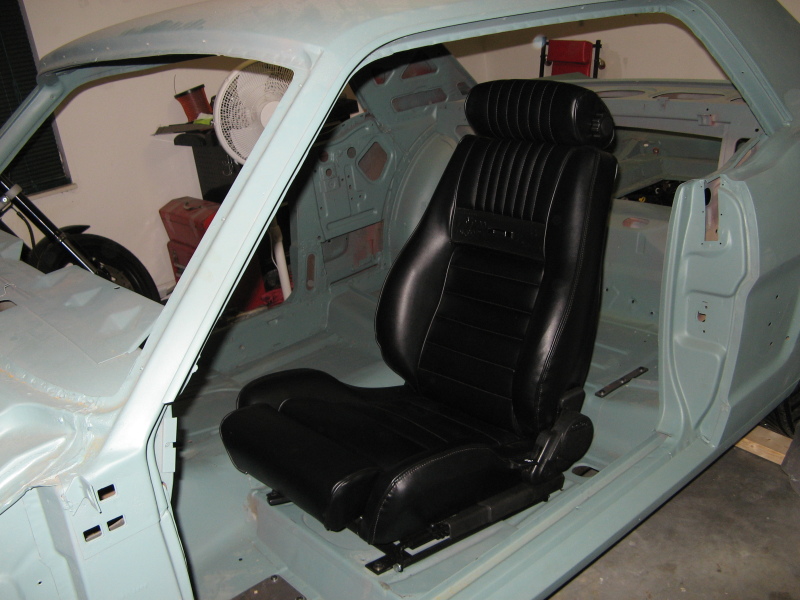
Way back went before I did any cutting on the car I received my seats from Stang-a-holics and just had to try them out. They bolted right and looked very good. Notice that I haven't even worked on the transmission tunnel yet. I just had to get in and see how they felt, that's when I noticed something just not quite right. These seats sit up VERY HIGH. I think I gained about 2-3" of height from the old seats. Well my wife really liked how high they sat, but I couldn't even straighten up my back without trying to press the roof with my skull.
Down about 1-1/2"
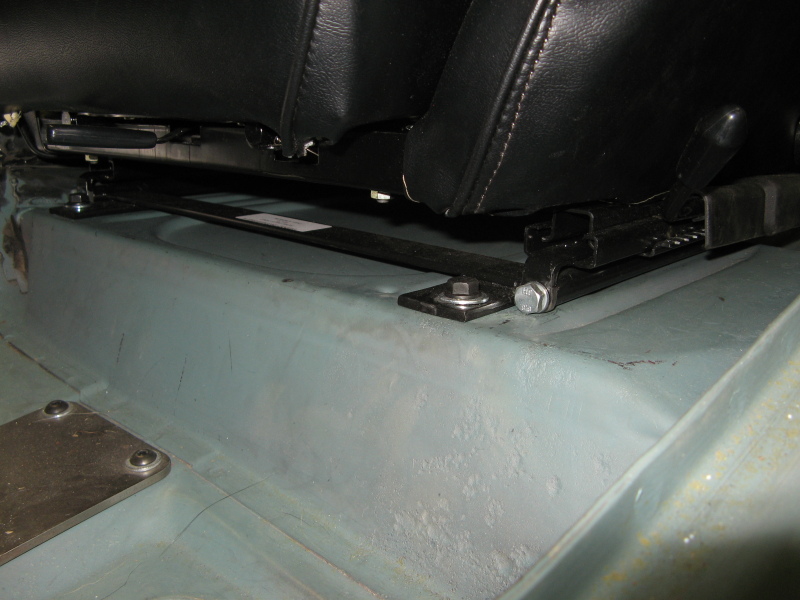
I looked over the stock bracket and decided to cut off the two bottom mounting holes and bolting the seats in the lowest hole. This gave me about an inch and a half. I can at least get my back straight now, but I was still very close to the roof. Basicaly in driving position I could only get one finger between the top of my head and the roof. Still way to close, so I searched for some solutions.
Possible Solutions
1- Modify tracks - This solution would only net me about 3/8". Though it would of been better, I needed something to give me about an inch or so. The other problem with this solution was that there needs to get an air gap between the bottom part of the seat and the floor to allow the springs to give.
2- Use OEM tracks - I ordered up a set of original seat tracks because they sit really flat. The only problem was that for my to make them work with this seat I would be right at the same height as I am now, so this was a no go.
3- Modify Power Seats - I searched around to see if I could get away with a power seat assembly. I was looking to adapt a newer mustang's power seat track but they were too thick. Even at it's lowest setting I would of been right back at the same height.
4- Lower Body's seat pan - I was trying to avoid this if I couldn't use power seats but I needed the headroom, so here we go again...
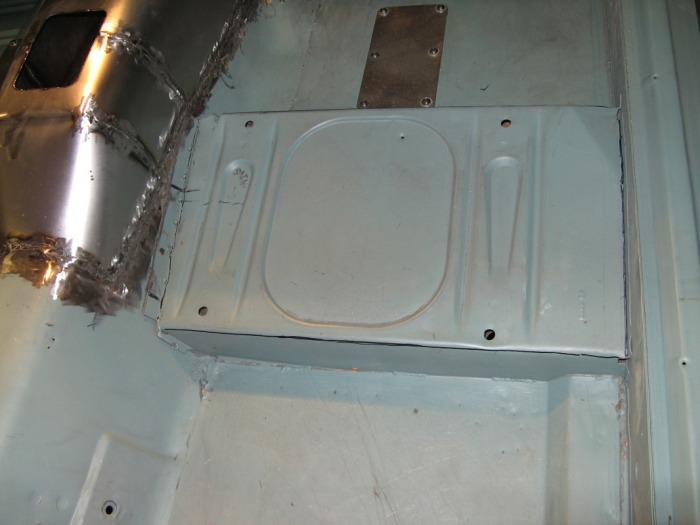
Measure Twice, Cut Once
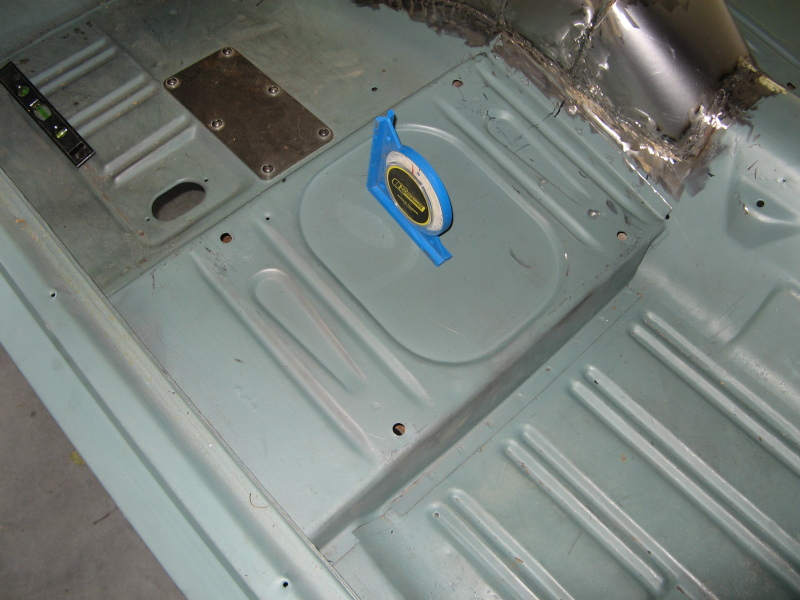
So here we go with the grinder again for another fun metal project. I measured a couple of places and the front edge of these seat mounts is right at 5" from the floor while the rear is 3" and it has an angle of about 9 degrees. The idea here is it to cut the top portion out, then trim the sides and weld it back in. At least that's the plan...
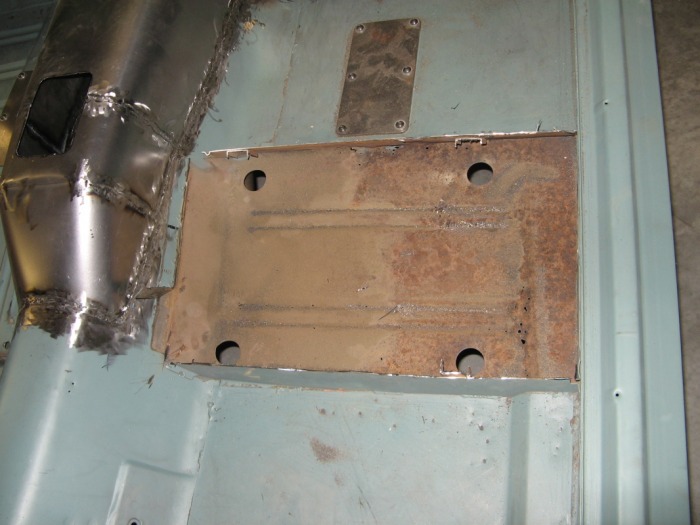
So much hidden rust
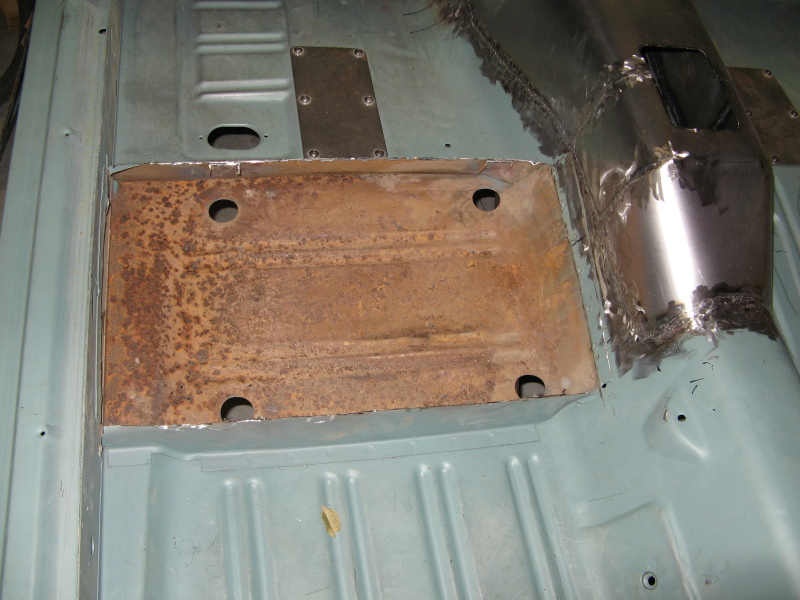
So after taking the top off I find this nice little treasure box of goodness. Turns out it's bad to drive the car for decades without having the lower four seat plugs installed. Well The bottom side of the floor is actually in decent shape except for a couple of rusted through spots. So first I need to fix the rust problem.
Wire Wheel Fun
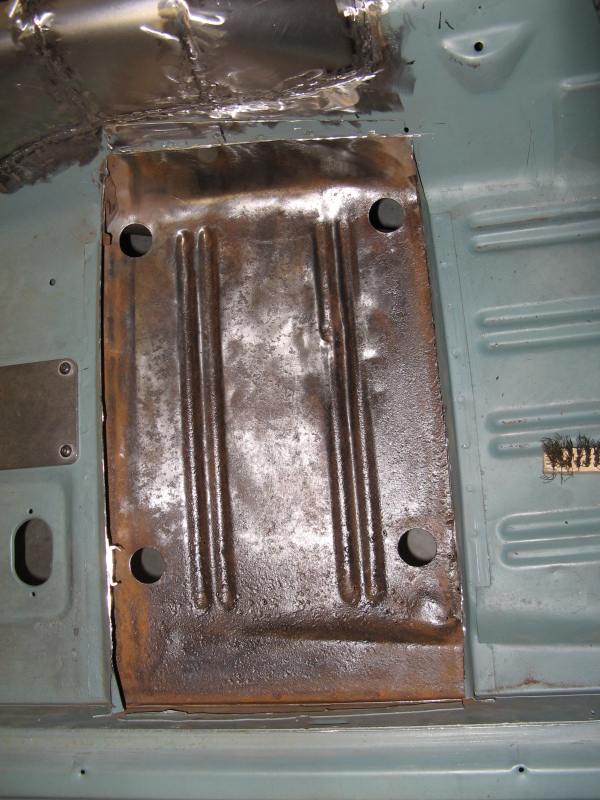
I mounted up my wire wheel to the grinder and went to town. Here is an in-progress picture. Luckily most of the rust was just surface rust. There's were some deep spots but I can fix them with the welder. One good thing about doing this was that I could knock the dent out of the floor and get it straighten out.
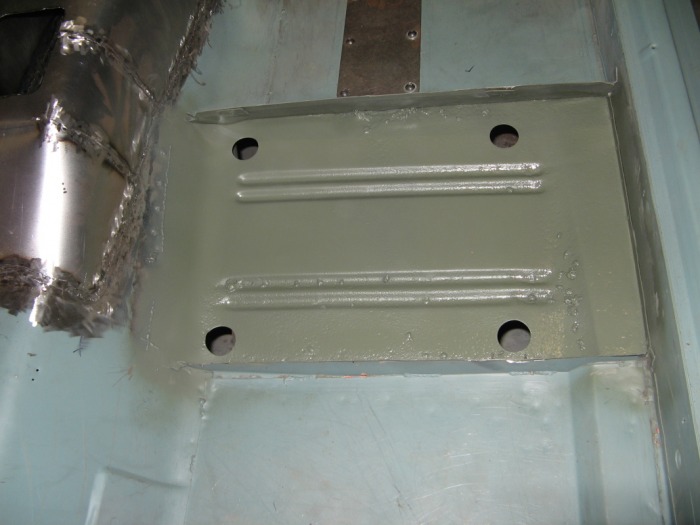
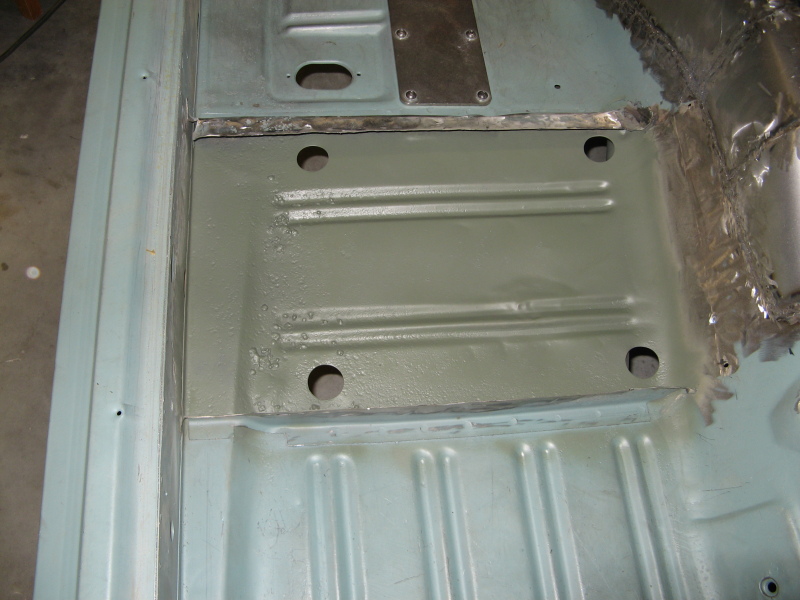
How to gain over an inch in only a day

Here you can see just how much I'm going to lower the seat platform. I wanted to get a least an inch, but I decided to go a little over an inch and a quarter. It's alot easier to add shims to get the seat higher once I get the car together than it is to lower it after everything is nice and painted.
All Cleaned Up
So after a bit of time with various tools I got the floor fixed and the front edge bent over to fit the seat platform top. Basically the front edge of this seat platform is set at an angle, so I couldn't just cut the top and drop it straight down, I needed to add in a filler piece of some kind to get it all to work right. Anyways, a 2x4 and a metal hammer and it came in really nicely.
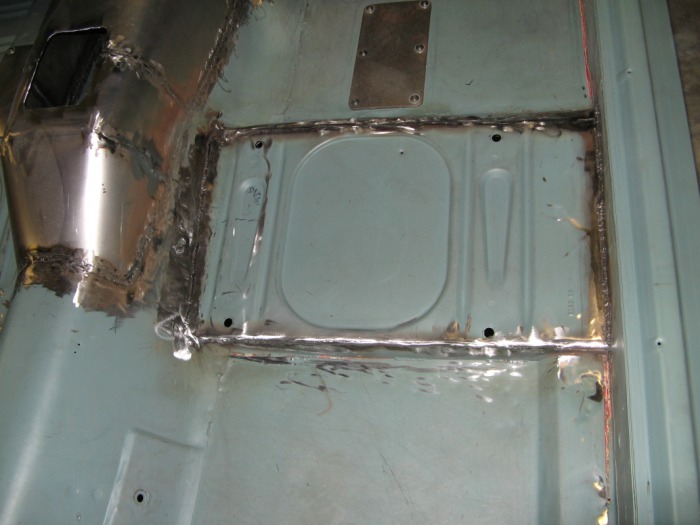
All welded up
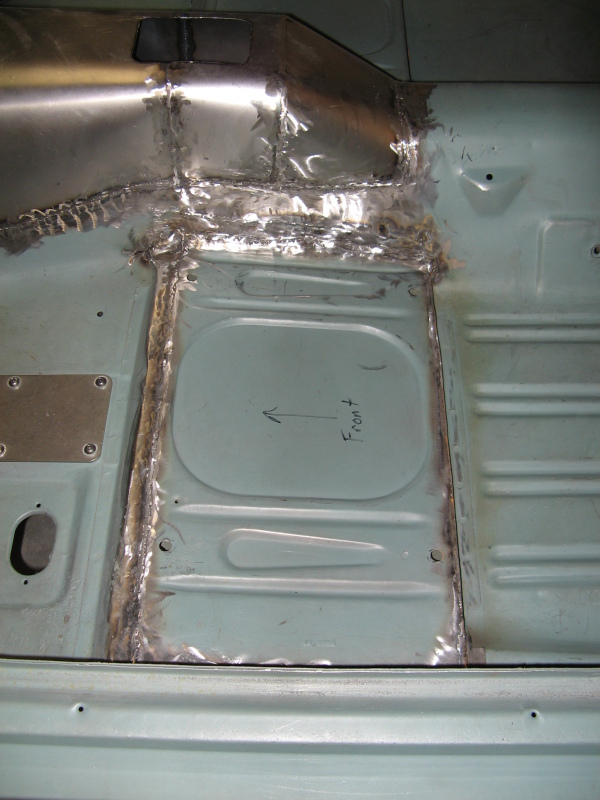
So after a bit of welding and grinder I finally have my seats lowered to a comfortable height. Here you can see just how much filler I needed to connect to the original top I cut off. This was actually quite a bit of welding since I seam welded it all the way around. Oh one thing, make sure you replace the batteries in your welding helmet from time to time. It really sucks trying to find some AAA batteries around midnight to continue welding. Ahh well my calculator didn't need them at the time.
Ahh Headroom at last
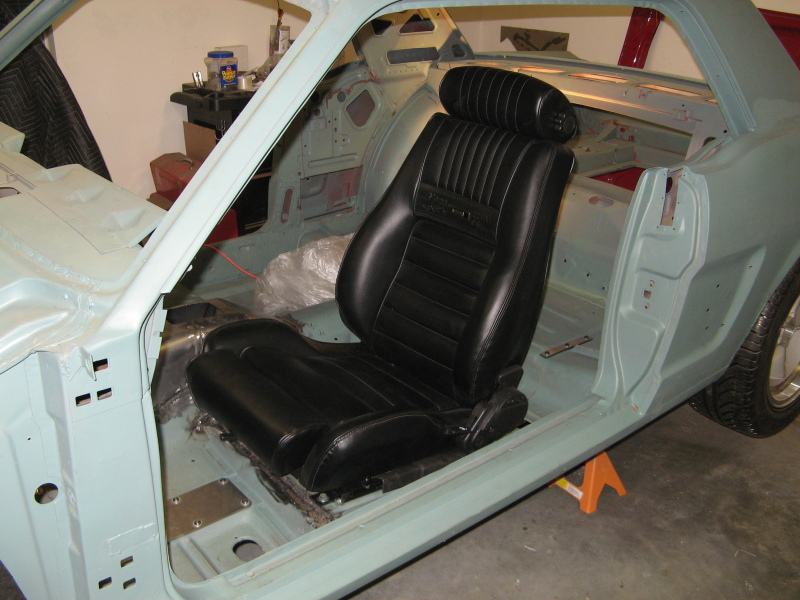
Now with the seat back I finally can get 3-4 fingers from the top of my head to the roof. This is basically the same height that my original seats were at. Now I can get in and out of the car without banging my head on the door sill. What's interesting is how much faster the second side goes. I spent all of saturday and sunday working on the driver side, and only needed about 6 hours to do the passenger side. This seems to be happening alot lately when I work on something that has a mirror, but that's ok. Anyways, here are some picture of the right side buildup.