Hooking up is fun....
Yes. Especially when your single and it's your friend's hot friend. BLACK DYNAMITE!!! Actually I think Johnny gets the merit badge for that one though. Crap, I don't know why I have that stuck in my head right now, anyways back to my ramble (probably because we are going to work on my friends truck tomorrow and he's bringing the movie over for some background entertainment). I knew from the first time that I got my car, dropping the clutch will definitely spin the back wheel. I say "wheel" because of the freaking open differential that I had. Dude, doing a one-wheel burnout, is like a peg-leg pirate talking trash while leaning in the corner because somebody stole his wooden leg. Anyways, that was definitely a problem that I would have to remedy when I rebuilt Rydia. One more thing, I don't have a lift at the house, so you'll have to bear with me for some of my mock up pictures. I'll get some good final assembly ones when I get the exhaust done and place them on this page.
Old Reliable...
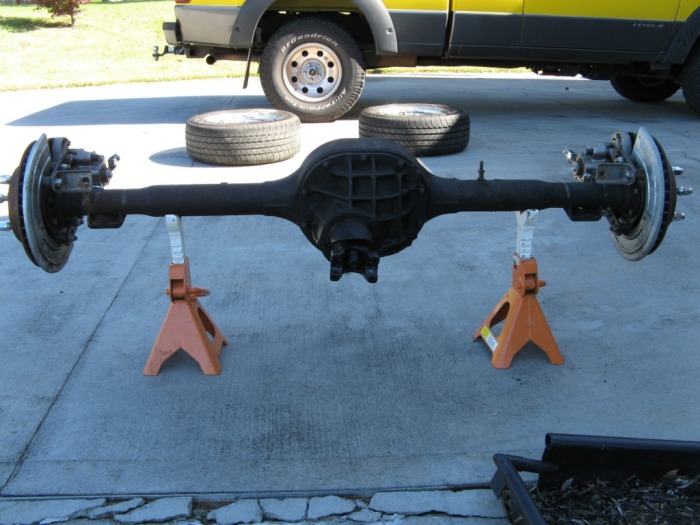
Even though it was an old 8" rear end, it was very reliable with all driving I did with it. I never had any problems with it at all. I think it had 3.00 gears in it, but the Achellies heel in that one was the open-differential. Yes they are cheaper to build, but accelerating hard or driving on anything loose/slick would very likely end up having one wheel skid. I still remember upgrading the drum to disk brakes on it. That definitely made a world of difference in braking performance. Anyways, I was glad to sell it, to have the cash to spend on new wheels for my car.
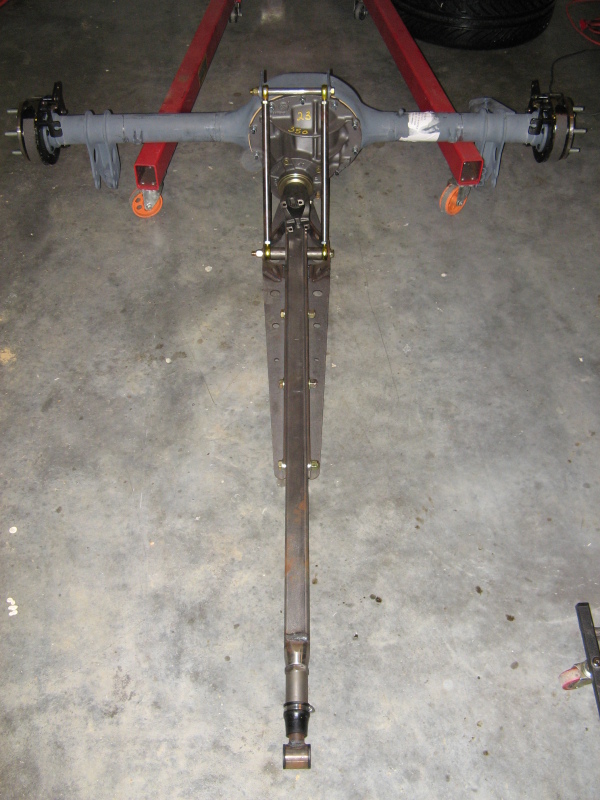
...And the New Fat Man
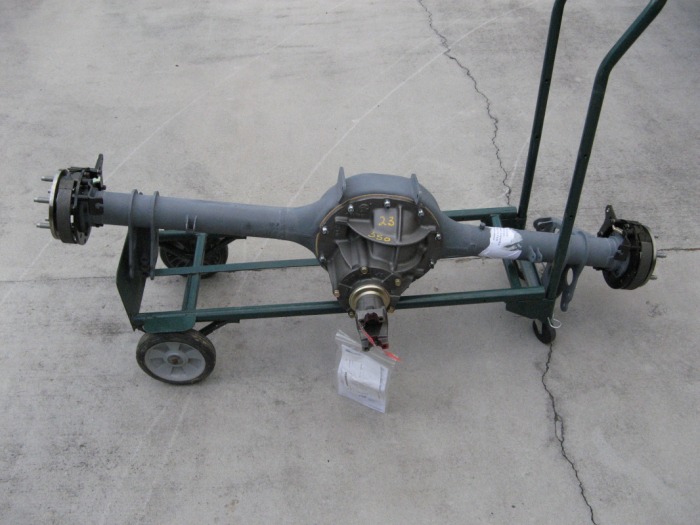
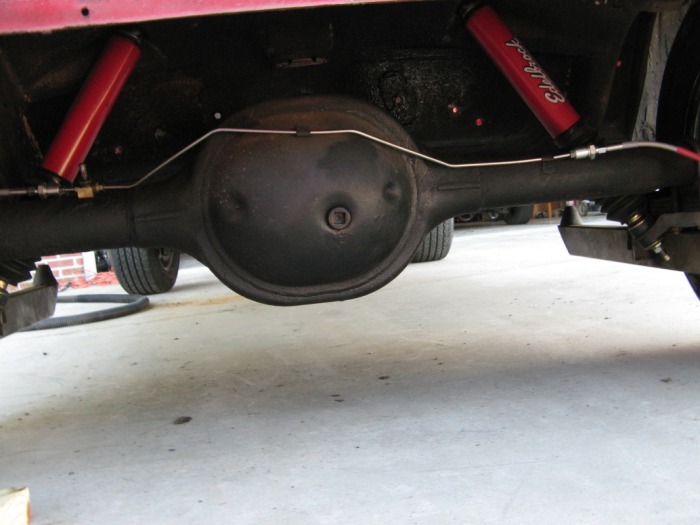
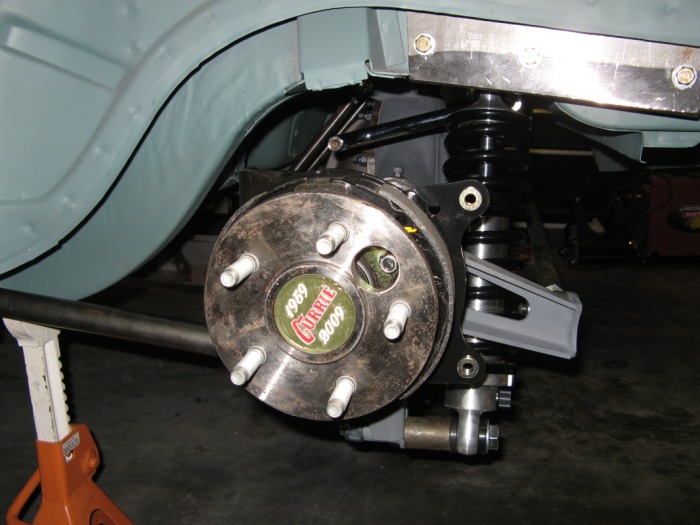
Since I went with a TCI suspension up front I decided to go with their three-link suspension in the rear. Again, they really impressed me with having pre-assembled alot of stuff. I knew that I needed something alot beefier than the old 8" rear-end to match the torque that I'm going to be punishing the tires with, so I opted for the beefy 9" Currie rear end. It's packing Currie's 31-spline axles, Detriot Tru-trac differential, 3.50 gears, and Wilwood rear disc brakes. It's actually a neat braking setup, you can see the drum parking brakes in the picture. These actually use the inside hub of the disc for a parking brake, which totally seperates the parking and main braking systems. Another nice thing was that TCI went ahead and welded on all the appropiate suspension brackets to the axle housings. It was shipped in primer gray so that I can mock up the rear suspension and do any tweaking before being powder-coated.
Subframe connectors are the key

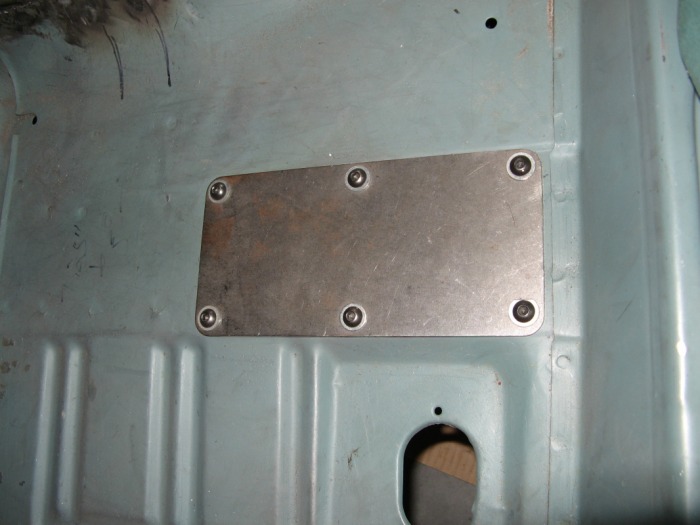
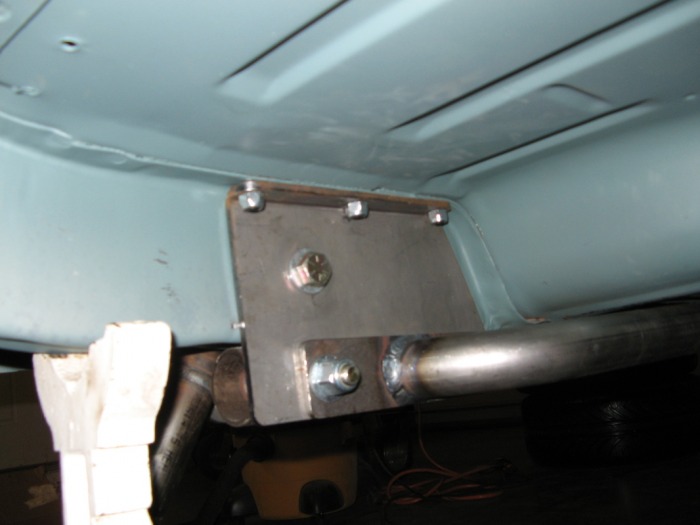
Unibody cars always seem to have a bit of body twist to them when you are driving hard, and also just putzing around the neighborhood. Subframe connectors actually connect the front and rear subframes together, basically completing the frame to the car. This links the front and rear suspension together and makes everything just work alot better. I've been some kits that both weld in and bolt in. TCI kit bolts in, but uses really nifty backing plates than sandwiches everything together. This not only ties it together, it adds alot of metal to the bracing points.
Subframe connectors - Connector?

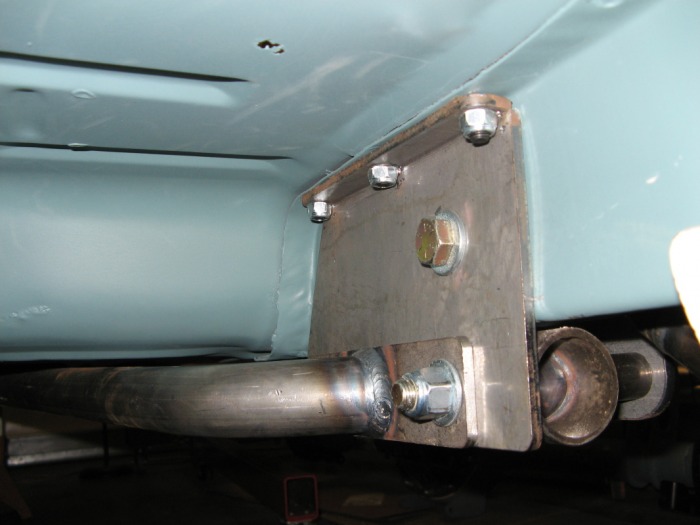
That's right. This bolt in crosspiece actually ties the left-side and right-side frame rails together. This really stiffens the car up, since the side to side load is now braced heavily straight across instead of over the bent transmission tunnel. Believe it or not, this actually becomes the keystone in the puzzle of getting my new drivetrain installed in the car. More on that in the "Engine-Drivetrain" section. If your curious that big lopsided oval in the middle is a driveshaft safety loop. In the unfortunate event of breaking the front U-joint on the driveshaft this catches it so that it doesn't dig into the ground and wreck all kinds of havoc on things and people.
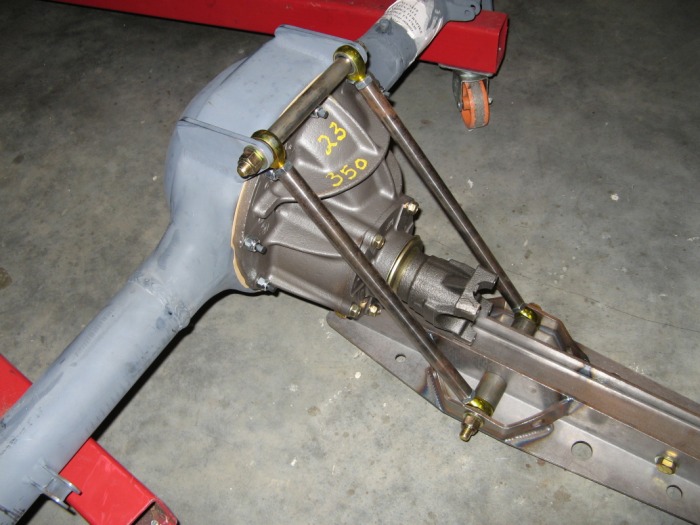
Link #1 and #2

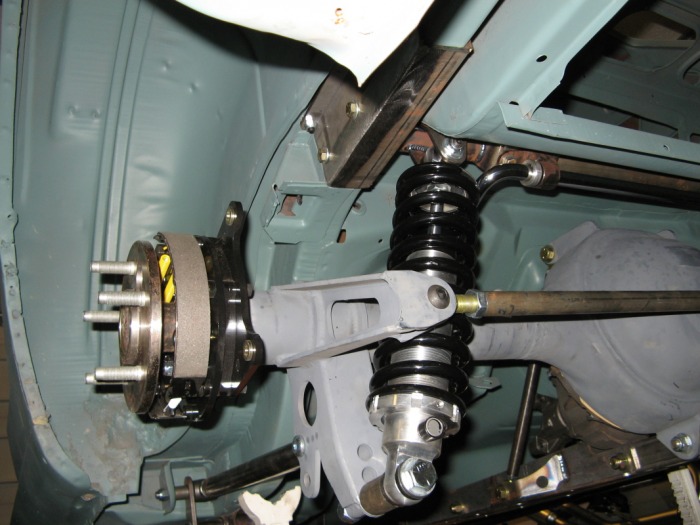
This is the first link in a "3-link" rear-suspension (the other side is number two). These bolt into the old leaf-spring pocket are at the trailing arms that connect to the rear-end. These are adjustable and set the forward-rearward position of the axel in the car. Basically makes it really easy to line up the wheels in the wheelwells. There's actually two settings here. I'm currently bolted in the upper "street" setup. There is a lower "strip" setup to help with straight line driving. I could care less about have fast I can go in a straight line. I live in the foothills of the Smoky Mountains, roads have turns, and I intend to use them.
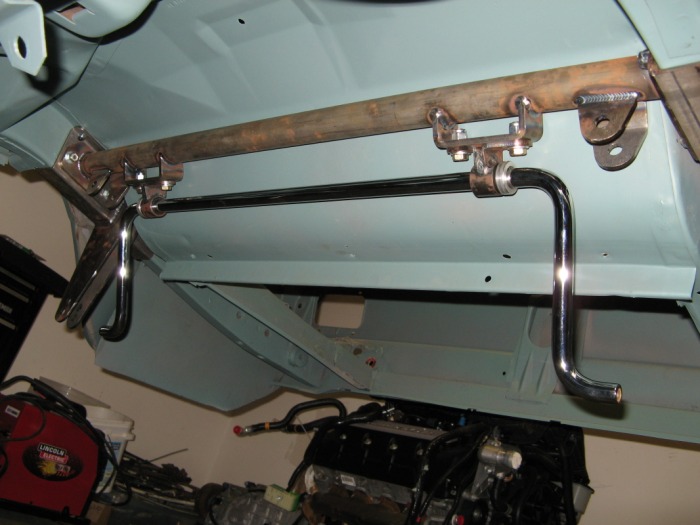
Link #3

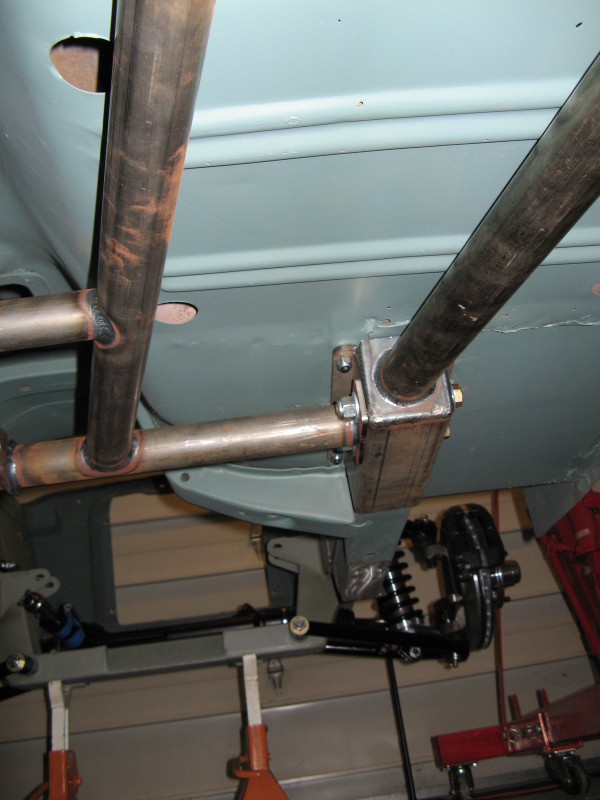
This is the third link in a "3-link" setup. Well at least the mounting point for it. This is the rear cross-bar that ties the left and right rear frame-rails together. You can see the large rear sway bar (the chrome thing). On the far left is the mount that the panhard rod connects to. By adjusting this rod you adjust the left-right centering of the rear-end. This makes it really easy to have the rear-end sit balanced between the wheel wells.
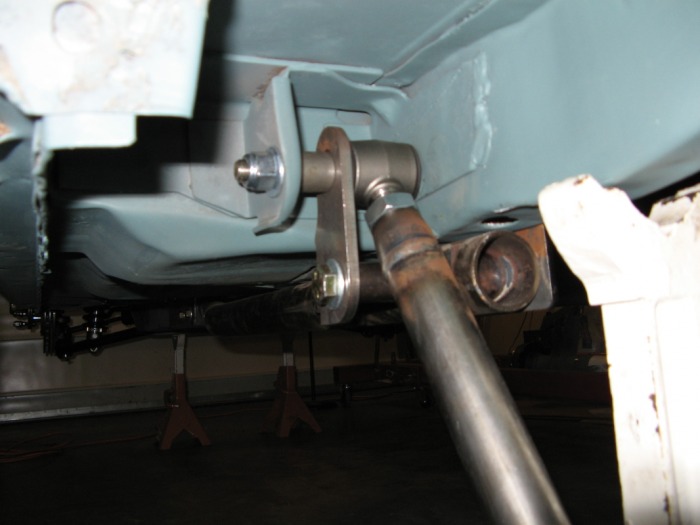
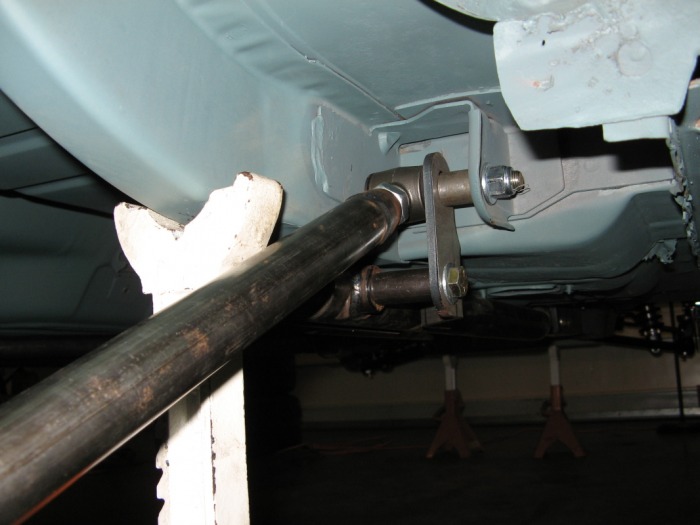
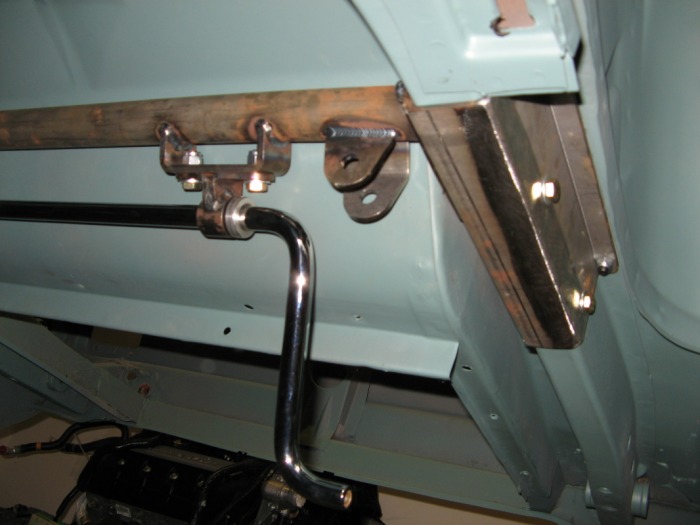
Link #4 - Sssshhh....it's a secret link

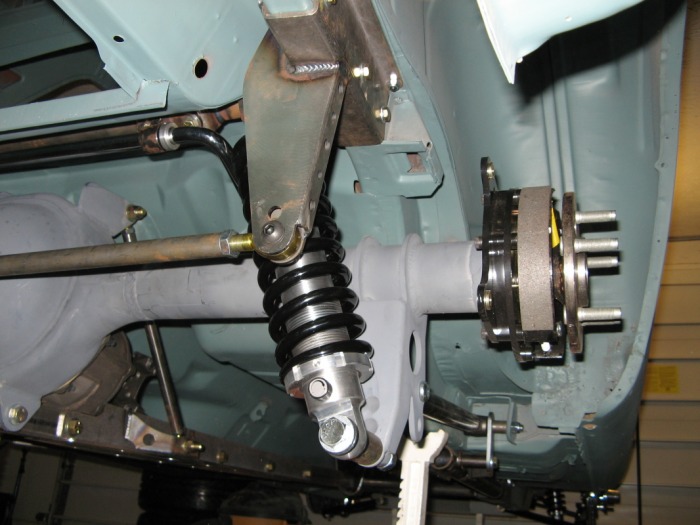
On my original car I had traction bars to help with "axel-windup" during hard acceleration. Basically when you hit the gas, the rear end wants to rotate around the axles and keep the wheels stationary, but the leaf-springs on the original car prevented this to a certain degree. Which in turn causes the wheel to rotate and propel you forward. One way to help the leaf-springs overcome this is by the use of traction bars. These bascially clamp where the leaf-spring attaches to the rear end. During acceleration the leaf spring will twist - aka windup, thus forcing the front tip of the bar into the front leaf-spring eyelet preventing further windup (there's a picture showing these traction bars at the bottom of this page. Well on the newer coil-over suspension there isn't a built-in feature to keep the axles from winding up. So the solution was to put a big lever arm on the rear housing and attach this to some point in the middle of the car. This firmly keeps the axles from winding up, which passes more torque to turning the tires. So that's the story behind the long-dong silver we have here. The front pivot actually attaches to that bolt in crosspiece that I showed you earler (hence the oblong oval for the driveshaft safety loop). The attachment point of this is easily seen when I'm talking about fitting in the transmission. Another nice feature about this setup is the two parrallel bars that connect the top of the third-member housing to the torque-arm sets the pinion angle. This will definitely keep all those nasty drivetrain vibrations at bay.
All Mocked up
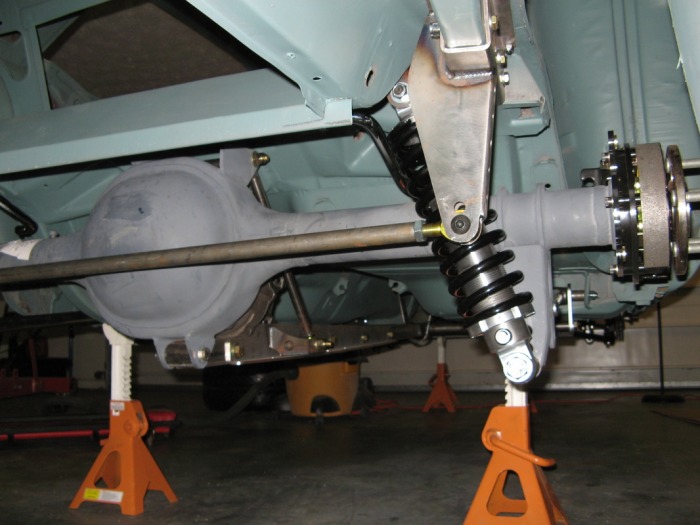
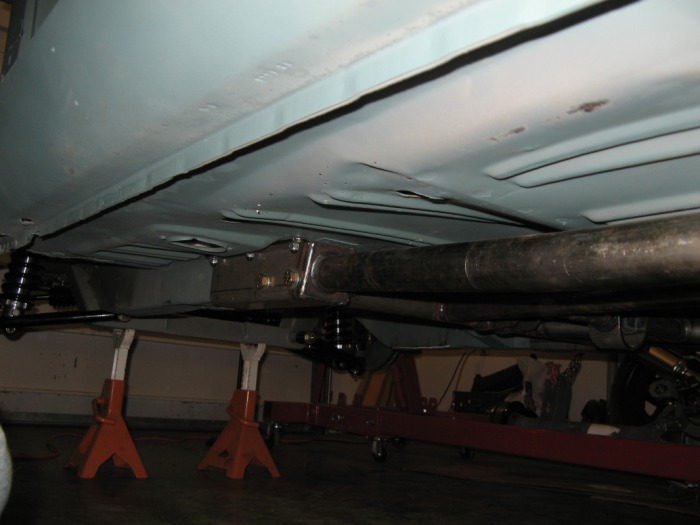
So here we are, finally all bolted in. There was alot of drilling to get all the bolt in pieces connected up right. But definitely following the directions made this really easy. This suspension is a breeze to dail-in any adjustment that you can dream of. But I'm waiting to get everything back on the final time to have a computer aligment done on the car to make sure everything is in tip-top shape. Also a quick note, I have the same coil overs and brakes in both the front and rear of the car, so it makes it look very balanced. I'll have to drive it a bit before I say that I had the right springs picked out. Currently I have 350 pound springs. But at least they will be very easy to change out in the future if I need it.
Mocking up final thoughts
I wish I would of bought a lift for the house. It would of made things alot easier than working underneath the car on jackstands. But hey you do what you do with what you have. It was actually kinda funny because to drill near the rear frame-rail you needed a really long drill bit. So I went down to Home Depot to get one and came home. Then all of a sudden I had a drill bit that was too long and I couldn't get my drill straight. Errrghhh. Just another two inches of height and I would of had it. So in the end I had to hacksaw off a few inches of my fancy new drill bit. I wonder if I can return it because it "broke." LOL, ahh I'll find something else to use it for. Here are a few more mocking up photos for your enjoyment.