Front Suspension - The easy point and shoot interface.
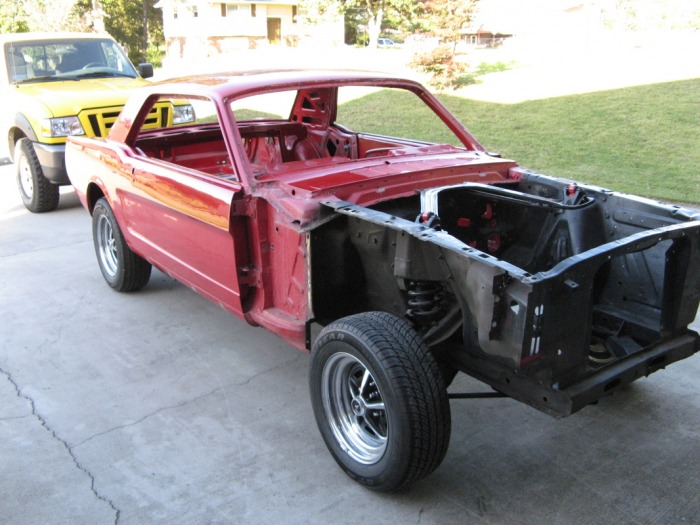
This was probably the hardest, yet easiest decisions to make. I knew that I wanted to go to a newer style coil-over suspension in the front, but I was lost in the sea of mustang-II conversion kits, or just straight coil-over conversions. I was about to buy a Heidt's Super-ride kit, but then Gus over at Cleveland-pick-a-parts sent me to talk with Ryan at Stang-a-holics. I was really impressed with his knowledge of what I was trying to do. Turns out that TCI had a front kit that was built from the ground up to fix all the problems with the mustang-II type conversions while at the same time permitting the use of the newer 4.6L and 5.4L modular motors. So I ordered up one of their kits, and got their engine mounts for the 5.4L motors to give me a nice starting point into getting that Shelby motor into my old engine bay. Just few short week later I was trying to figure out how to get everything from the pallet into the back of my truck to take home. I was really impressed that TCI took the time to assemble alot of the kit, which made mocking up fast (I actually like assembling all the little tid bits here and there, it's theraputic to me). But before we get into all the new fangled stuff, let's take a step back in time to see where we started.
Old suspension
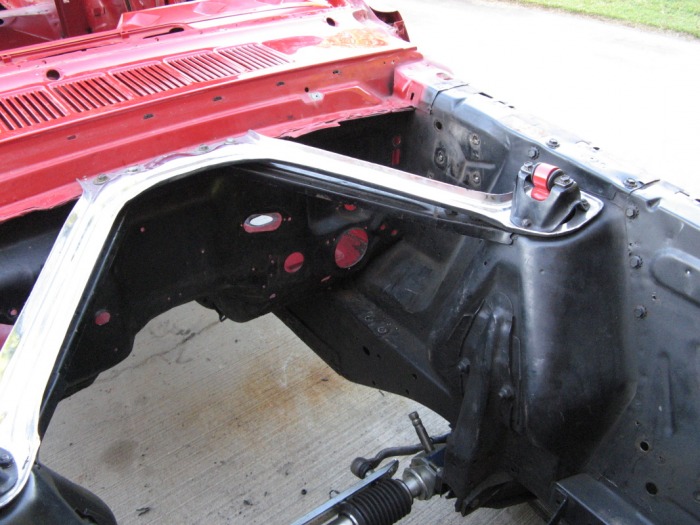
Here you can see the old shock towers along with the TCP rack and pinion steering setup I had. The first problem with this suspension was since all the shock loads where transmitted to the upper portion of the inner fender, you had to brace the mess out of or they would sag over time. There are alot more complicating bracing schemes just the simple chrome piece that span from the shock towers to the firewall and back did an nice job for a daily driver. The original power steering setup used a worm gear design that was very prone to developing horrid backlash over time. Backlash for those who don't know can best be described as the amount of steering wheel movement it takes to turn the wheels in the opposite direction than you were previously turning. On my car it was something like 3-4 inches of steering wheel travel before it "caught" again. Yah, needless to say that was the first thing to go. I don't have any pictures of that setup, but it's one of those good faded memories. Anyways, the standard shocks over struts is a very common place design, mainly because it's cheap to make. One thing Carroll Shelby did back in the day that was a great improvement was moving the upper control arm down and back a bit. This allows the tire to dig in a bit and stay flatter during a turn instead of "tipping" out like the standard suspension did. Basically this kept more tire in contact with the road which made a world of difference in cornering. Or at least that what I gather from things that I read, I'm not an old gear-head to verify these. All I can do is look at it from a practical mechanical perspective and say "Yah that make sense." Anyways, here are a few more pictures of the old suspension.
New Suspension - Mocking it Up
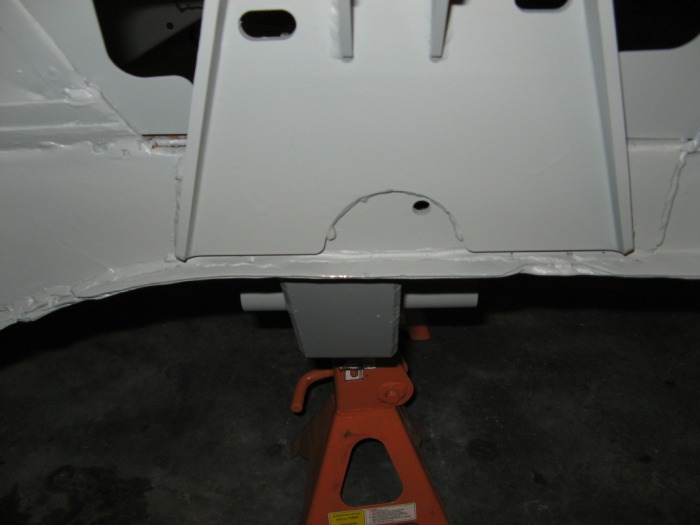
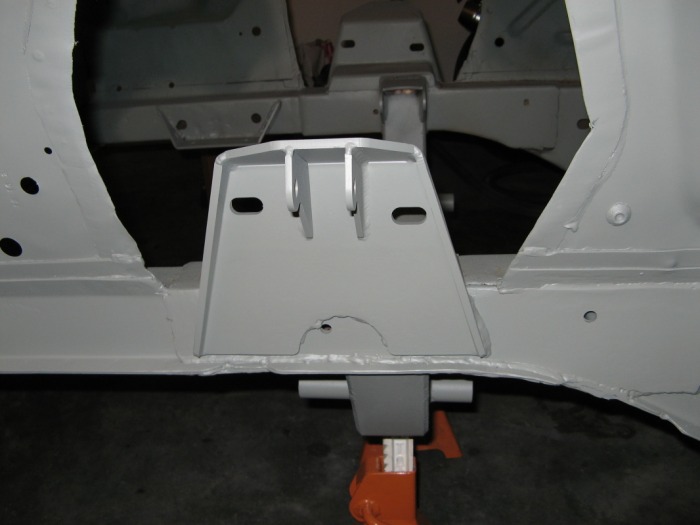
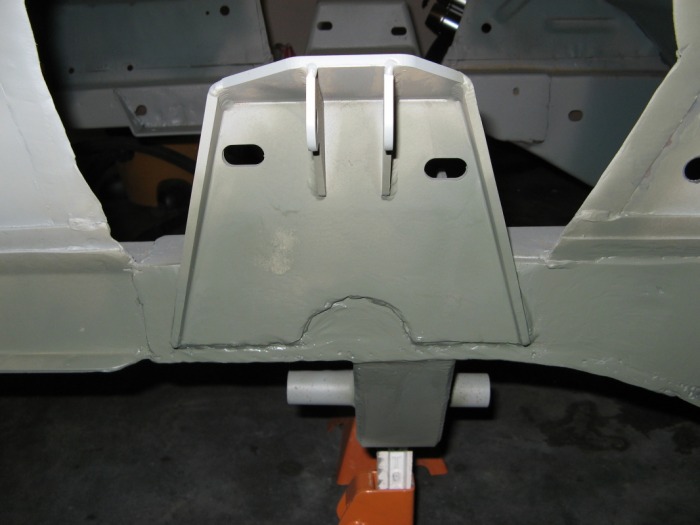
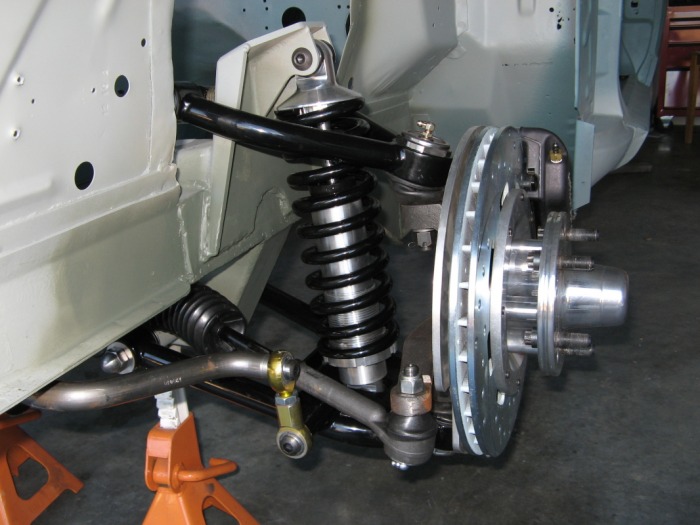
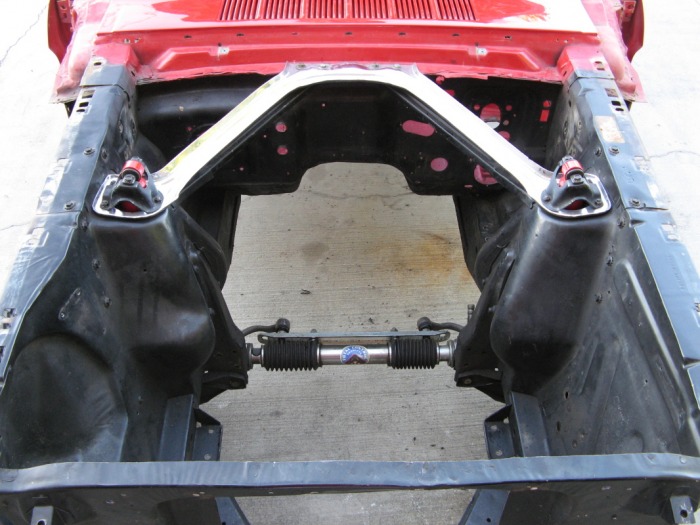
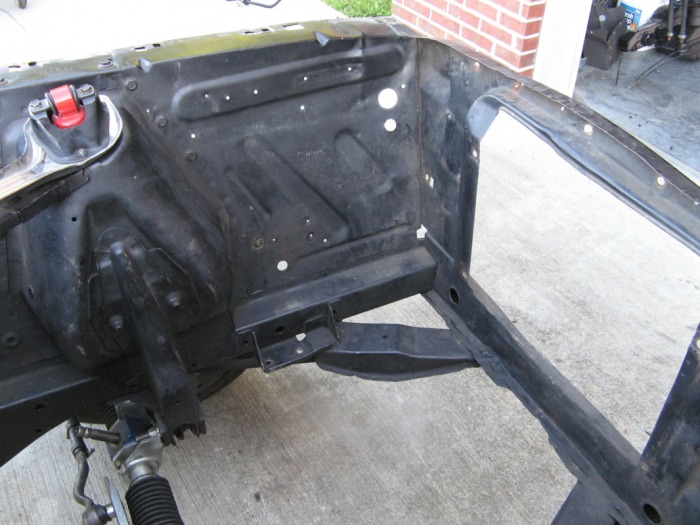
Well once the car was media blasted at ASR, I had it taken over to Kool Kolors to have the front crossmember welded in. I haven't done alot of critcal welding before getting to this project so I thought it was well worth the money to pay somebody to weld it in correctly. Here you see just how much room this new coil-over kit creates in the engine bay. What's nice about this suspension is now all the shock load is directly applied to the frame-rail which alleviates the whole sagging issue with the tops of the inner fenders. The upper control arms are also setback a bit to give me some anti-dive when i stomp on the brakes hard. This is also the only way that much wider motor is ever going to have a prayer of getting seated. A few notes about this suspension. I decided to go back to power steering because parking lot negotiating wasn't any fun at all (besides the new motor has a nice small power steering pump on it). The other is if you notice the rear of the crossmember has been cut at an angle to accomidate the oil pan of the DOHC motors. Basically they shoved the motor as far back and down as possible, which can only mean a really low center of gravity and great weight balance.
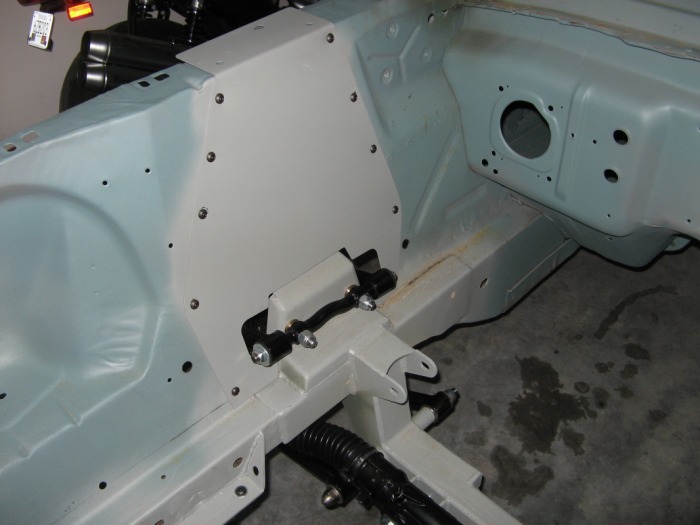
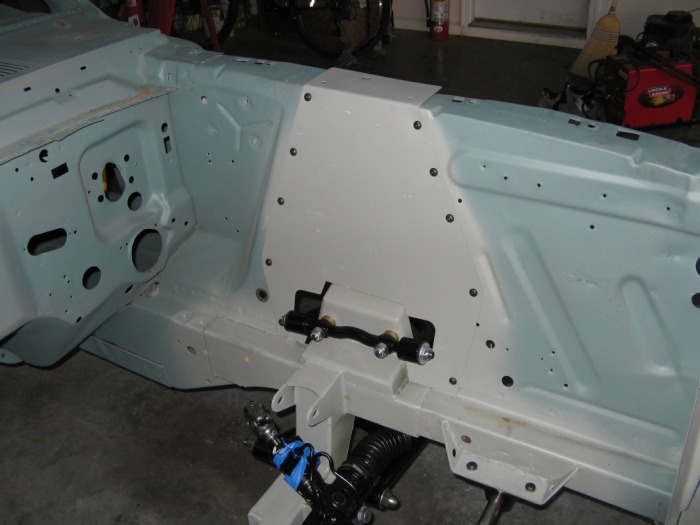
Control Arm Mounts
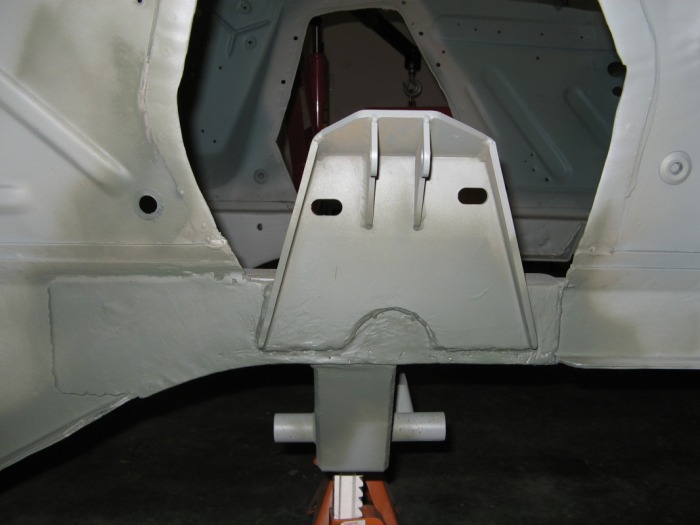
Here are the passenger's upper and lower control arm mounts after they were welded on. You can see that the whole frame rail was completely boxed in with additional metal. This is to take all the suspension load that is now concentrated on the frame rails instead of across the inner fender.
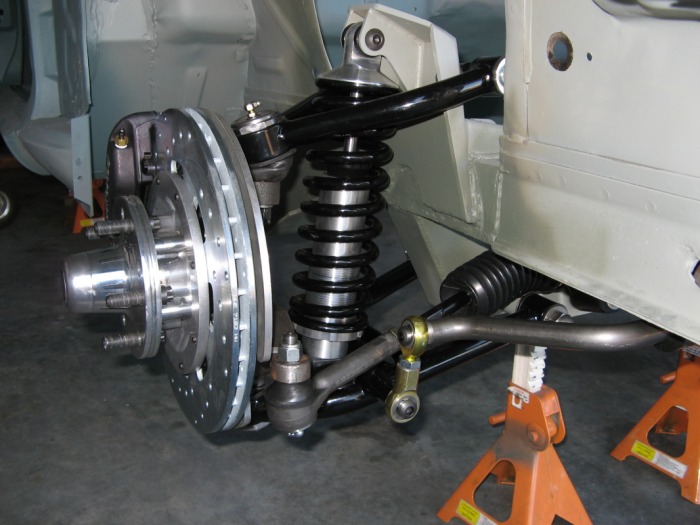
Coil Overs Installed

This was actually really easy to put together. I think there are only three bolts holding this whole assembly together. Two for the coil-over assembly and on very large pivot bolt for the lower control arm. Oh and these were ordered powered coated black with the billet adjustable shocks. I think it adds the right amount of sparkle under the wheel.
Spindles - aka Where the Wheels go
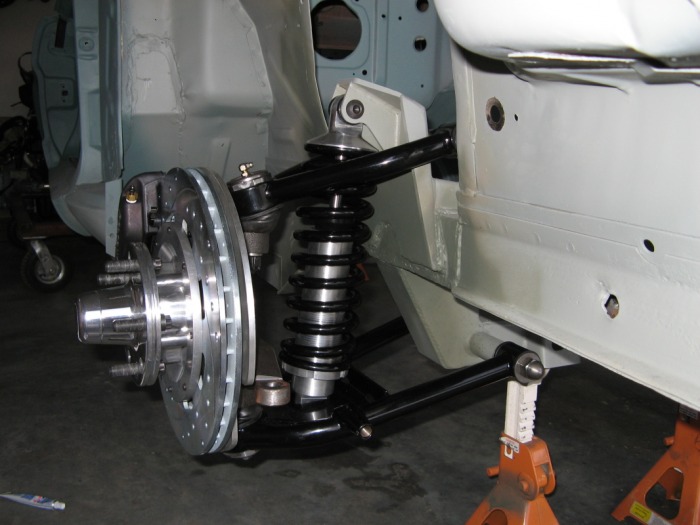
Since TCI preassembled just about everything, I only had to put on two bolts and four nuts and Vola' the passenger's side has a brank-spanking new suspension. I opted for the larger brakes on this go around. I'll tell you more about that in the braking section. But let's just say they were an awesome bang for the buck.
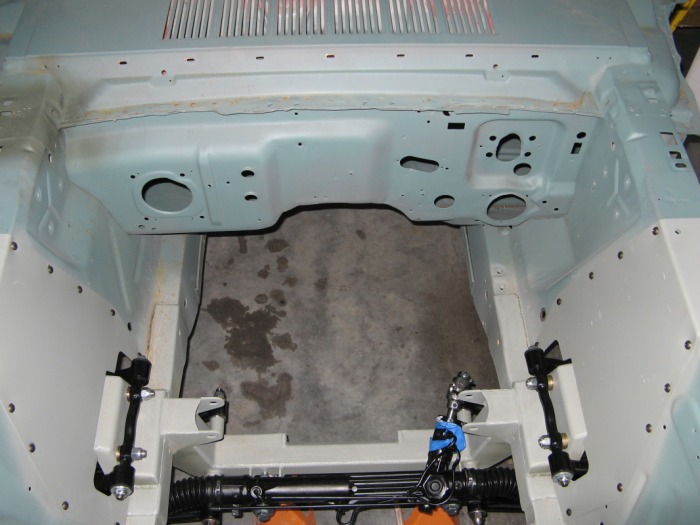
Power Rack and Pinion
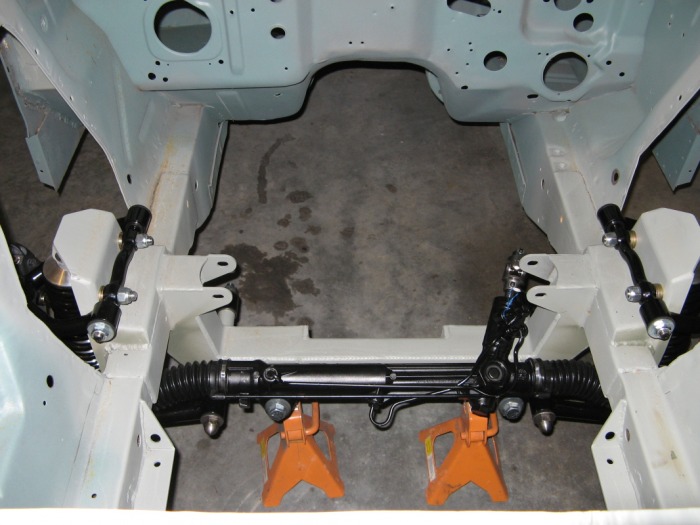
I thought my old rack was an easy install with four bolts. Somehow this only too two. Two things I must mention. First, those were monster bolts for the rack and pinion so I had to make a tool run just to get the stupid thing in there. Secondly, take note of how the input shaft of the rack is routed right up under the engine mount. This will be an issue that rears it's ugly head really quickly when it comes time to put the engine in. I did have a bit of trouble getting the tie-rod ends to thread down all the way. But I think they just had some crud on the inner threads, so a bit of anti-sieze and a on-off rotations with a crescent wrench did the trick.
Sway bar
The sway bar is an interesting bit of hardware. It's made to flex torsionally during a corner to basically shove the tires into the ground to flatten out the car. This sway bar is a monster compared to the old one, and it has really interesting ball-rod ends instead of the usual urethane bushing stack to connect it to the lower control arms. This is one of the pieces that will be black-powered coated when i finally get everything mocked up.
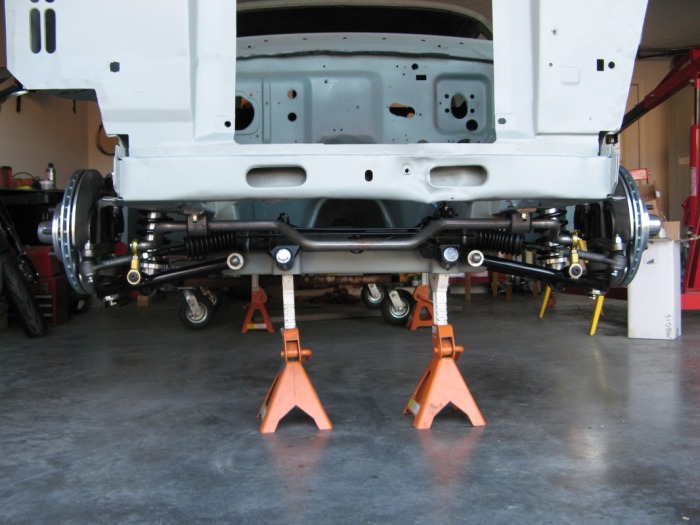
Mocking it up - A few closing words
Overall the front suspension went together in just a few hours and really hasn't been touched at all since then. I can't wait till I get the rest of the body work done so I can take everything back apart and really put it together that one last time and take her for a spin. I have put some fenders on the car while doing the cooling bit and it definite has a lower stance than what it did before. Might be a tad too low for my taste, but I haven't adjusted the coil overs at all to get that sweep-spot for a ride height. Below are some other interesting pictures of the front suspension I had. I'll actually add some final pictures to this page once I get the underbody painted and coated.