The cooling predicament
The object here is to place three very large items in the place of a small single one. After doing a bit of measureing I went in search of a radiator to cool my motor. I knew that I needed a radiator with the same surface cooling area of at least what the OEM GT500 radiator was. The other trick was to get the inlet and outlet in the right spots so that I don't have to do anything funny with hoses, since hoses were already going to be running everywhere on that engine. I really was looking at the Shelby's aftermarket Radiator for the GT500, the only problem was that nobody had dimensions for it. I even called Shelby performance products and they didn't even know. I was kinda confused since it was their logo on the stupid thing. Anyways, after talking to a couple of people there I was given the number to Van down at Revan Racing. Turns out that he was the guy who did all engineering work to figure out the radiator and heat exchanger sizing and testing. Well after I explained what I was doing he gladly took a tape measure and gave me the general dimensions.
That night I measured everything and it looked good to go. So a few days later I had both the radiator and heat exchanger sitting on my doorstep. Wow, all i can say is that these are some massive pieces of hardware. Anyways, that's the background to how I ended up with the radiator and heat exchanger and the start of the fun long nights of making them fit.
That night I measured everything and it looked good to go. So a few days later I had both the radiator and heat exchanger sitting on my doorstep. Wow, all i can say is that these are some massive pieces of hardware. Anyways, that's the background to how I ended up with the radiator and heat exchanger and the start of the fun long nights of making them fit.
Such a cute little radiator...yes you are...
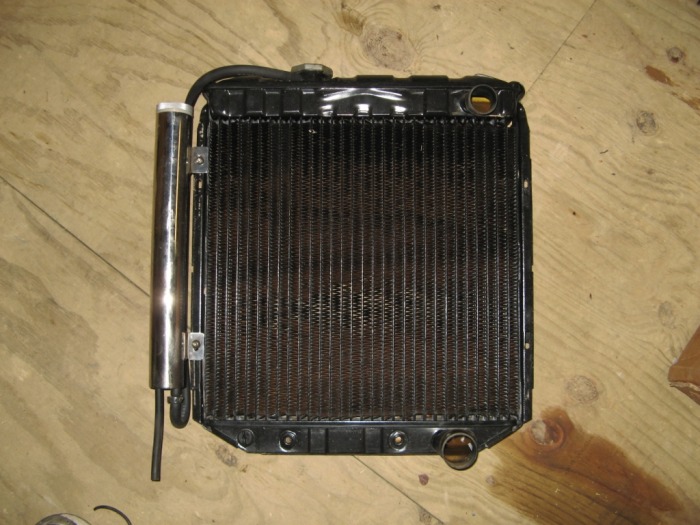
Back when I was cleaning out my old engine I decided to replace the radiator with a new one because of all the crud in the odl one. This bolted in nicely, and had a nice overflow tank on the left-hand side. The only real problem was the fan shroud never really fit right and always hit the fan on the engine. So after fighting it a bit I just said screw and toss the fan shroud. Well it was a fight to keep the engine cool and it always was on the warmer side. I tried to stay from stop and go driving in the summertime during the day just to let the engine stay a tad cooler. That and with no A/C in the car it was very hot indeed. Just for reference the core on this radiator is 16-3/8" tall by 17-1/4" wide (about 282 in^2)
Starting Point
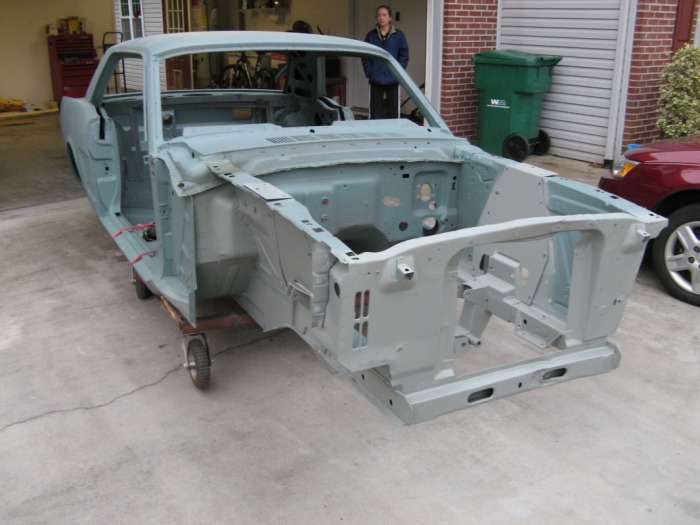
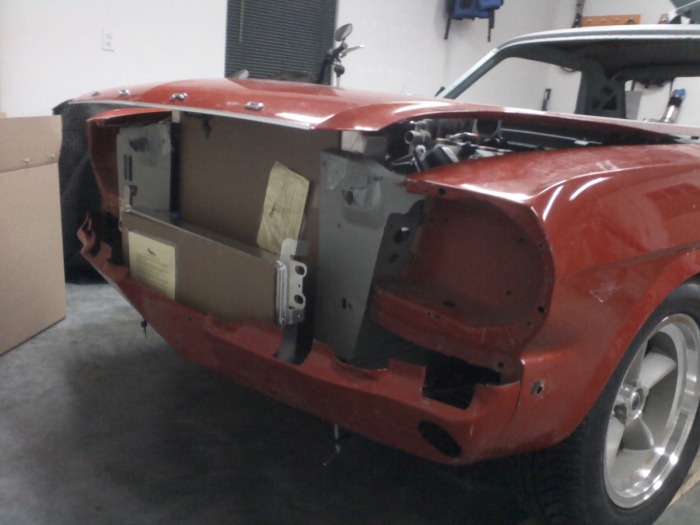
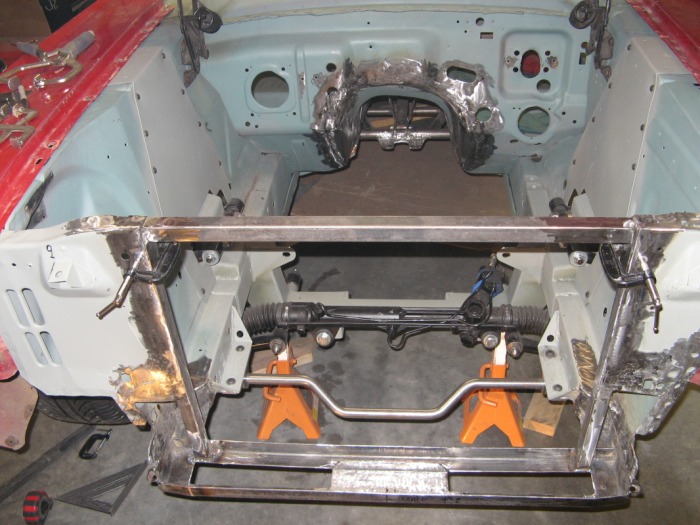
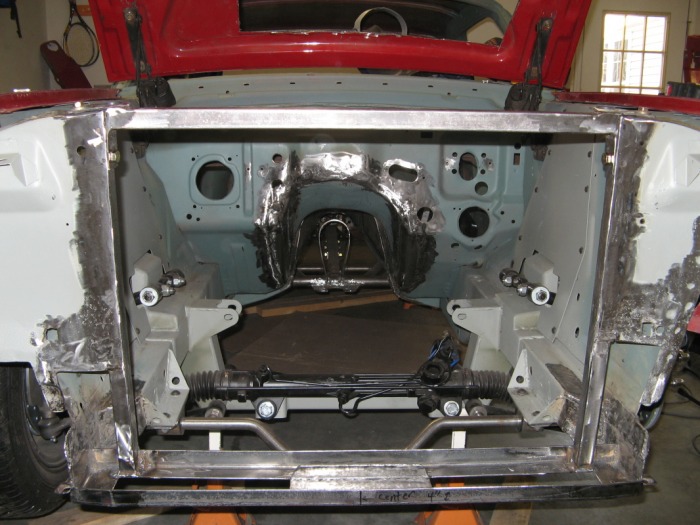
Here is the car as I had it right after media blasting. You can notice the dent on the both the upper and lower radiator crossmembers. These were here when I first bought the car but never fixed them because they were covered up by other things. It's almost impossible to hammer out the bottom dent so I didn't look back twice before taking the grinder and welder to this area to fit a larger radiator.
The first cut
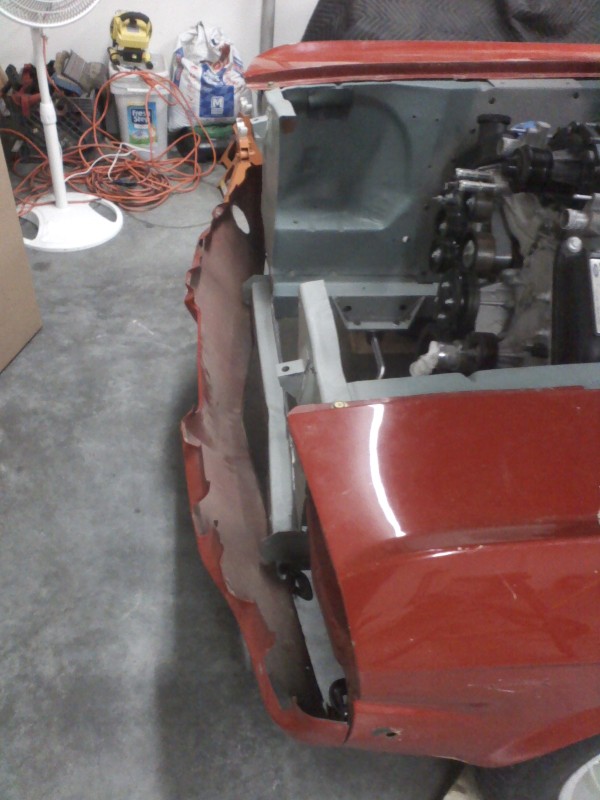
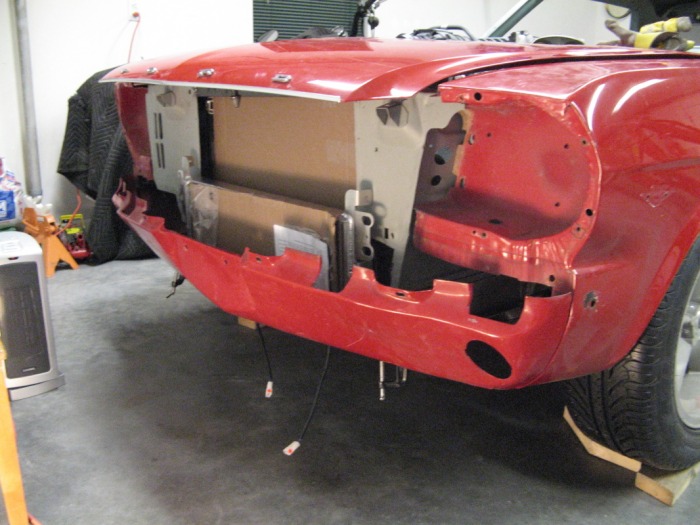
Well I didn't actually cut the upper portion off to being with. I figured since the new radiator core is 25" wide I needed at least that much in the radiator support. So I cut a nice rectangle out. But in the process of taking that engine in and out I became very tired of jacking it all the way up just to get the oil pan over the upper radiator crossmember. Since it already had a dent in it, I took my saws-all and in about 3 seconds there wasn't any more issues in taking the engine in and out. Here I put on my old fenders, hood, and lower valance just to give me reference points for the outside lines of the car. I only wanted to mess with the unibody portion of the car and not have to do custom sheet metal everywhere. Oh and if your wondering about the hole in the hood, yah that's to fit the engine. More on that when I start to work on the intake system.
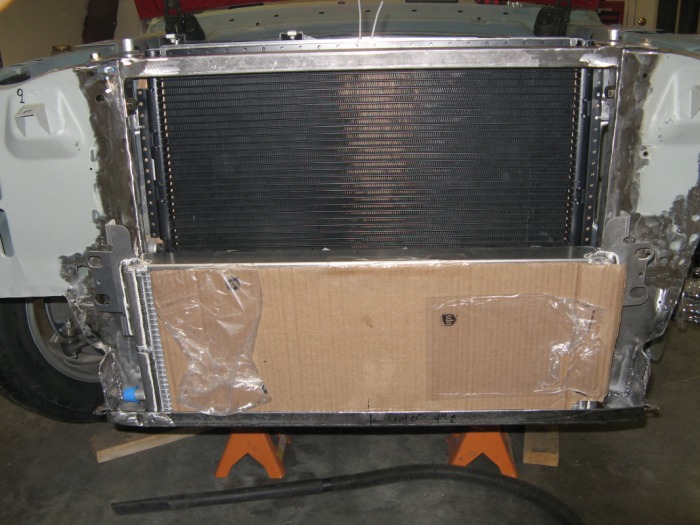
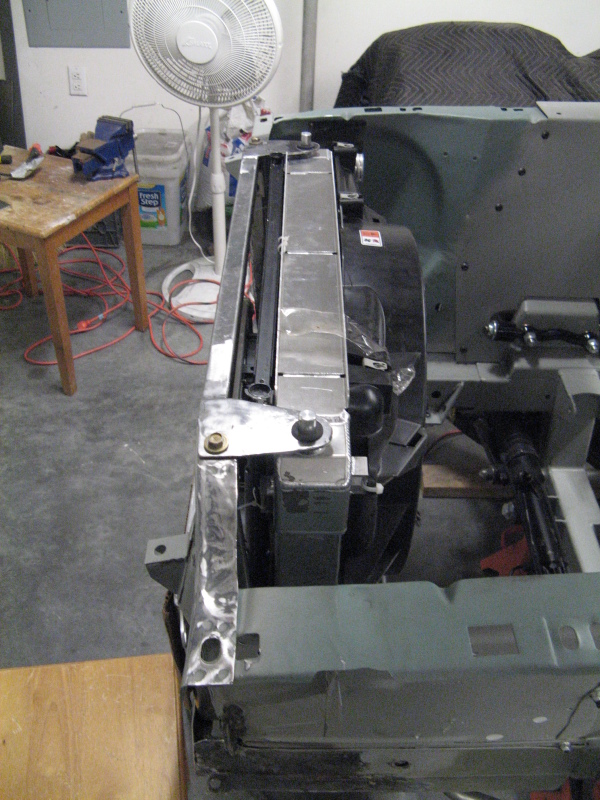
The laughable test fit
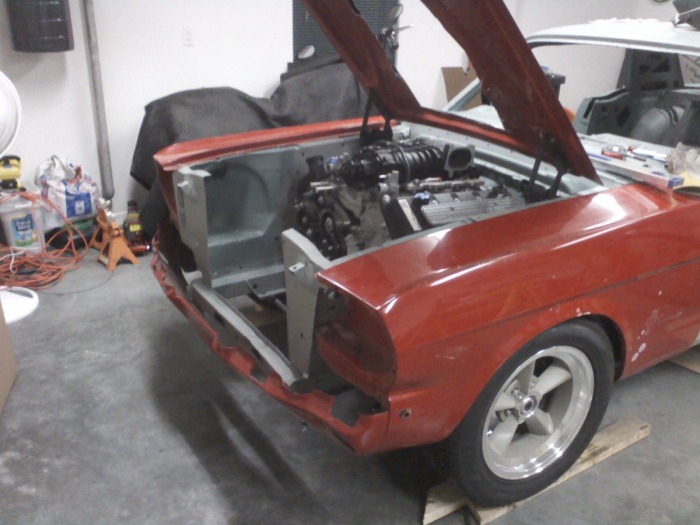
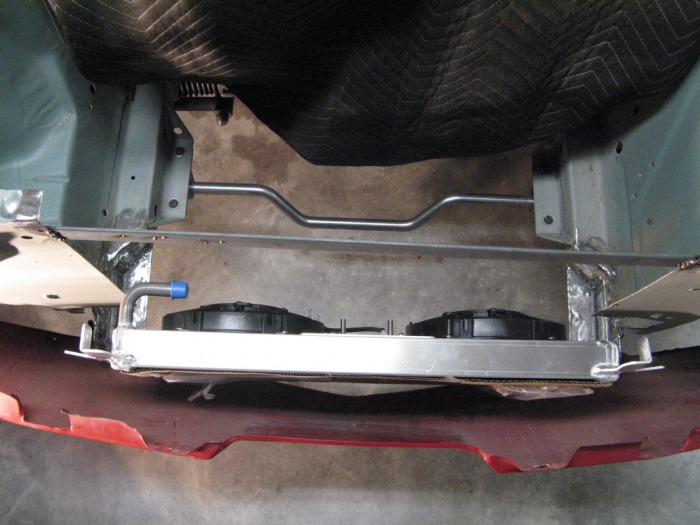
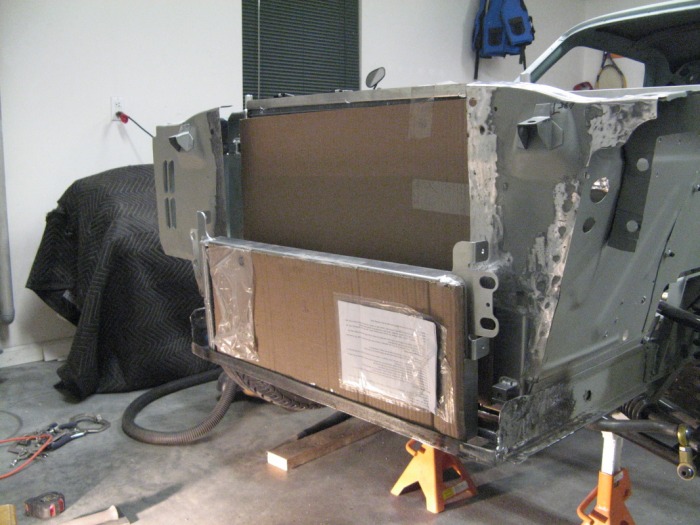
Well even though I thought I measured right. Turns out I measured the height from the bottom of the lower radiator crossmember and not from the frame rails. So basically what your seeing here is the radiator sitting down on the frame rails and still sticking up about 3 inches or so. Here is also where I'm planning to mount the heat exchanger.
Don't think a cowl hood will help here
Yah the hood doesn't close yet. And I don't think a cowl hood is going to help any this close to the nose of the hood. So I'm back to the drawing board with the radiator.
The constant variable
So at this point I gave Van a call back to discusss possible solutions. C&R Racing could do a custom radiator, but it would definitely be more expensive, not ot mention I had a $675 radiator I needed to unload now. Somewhere along the way we got on the topics of fans. I was thinking about a custom fan shroud with dual 14" or a single 16" SPAL fans (I've seen these all over the place from custom radiator shops). Van told me with the way I'm going, I should seek out an OEM fan because they will outflow any SPAL fan out there. Then we can modify the fan shroud and go from there. Well I called around and my local Ford dealership actually had one for $160. I was really happy that the shroud and fan was that cheap, so I ran down there tha day to get it.
Now getting back to everything for this engine is huge, the fan was no exception. The blades were 18" in diameter alone with a rim connecting them all. No wonder they flow so much air, there's barely any material for a shroud. It's all fan. Which is actually the way to go. Anyways, I had only 18" from the top of my radiator support to the top of the frame rails, so there was absolutely no way to modify this fan assembly to make it fit my area without making it look like a pack of rats go ahold of it.
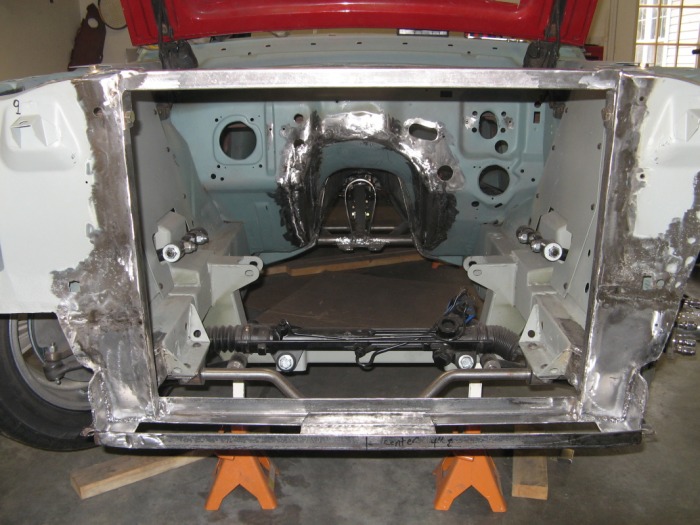
At this point there were way to many variables to make a sane decision, so I picked the fan shroud and my defining point and everything would just have to fit that. About this time I glanced back at the car and did a bit of measuring. If I could get the radiator to sit at the bottom of the frame rails and not the top it would fit with no problems. Well that lower crossmember was bent anyways, so it's time to have a some fun with the saws-all again.
Now getting back to everything for this engine is huge, the fan was no exception. The blades were 18" in diameter alone with a rim connecting them all. No wonder they flow so much air, there's barely any material for a shroud. It's all fan. Which is actually the way to go. Anyways, I had only 18" from the top of my radiator support to the top of the frame rails, so there was absolutely no way to modify this fan assembly to make it fit my area without making it look like a pack of rats go ahold of it.
At this point there were way to many variables to make a sane decision, so I picked the fan shroud and my defining point and everything would just have to fit that. About this time I glanced back at the car and did a bit of measuring. If I could get the radiator to sit at the bottom of the frame rails and not the top it would fit with no problems. Well that lower crossmember was bent anyways, so it's time to have a some fun with the saws-all again.
Eyeing it up
Here you can easily see how much that lower crossmember was bent. With the face shield on and ear plugs in, I took my saws-all and had me a little dissecting party.
Shaped metal is actually pretty strong
I'm always amazed at how just bending metal a little bit here and there can make it really strong. This crossmember is actually a C-shape piece just spot welded here and there. I took my time cutting off the spot welds and slowly folding back the pieces just to see how everything was put together.
Fun with a shop-vac
After opening up the ends of the frame-rails I saw why the original bumper mounts were having issues. The bracing for the welded nuts on the inside of the frame rails had all but rusted into dust. I had a really fun time just sticking the hose from the shop-vac down inside the frame rails and feeling how much crud and junk was being sucked out. I probably took about 5 pounds off the front end of the car by cleaning out the insides of the frame rails.
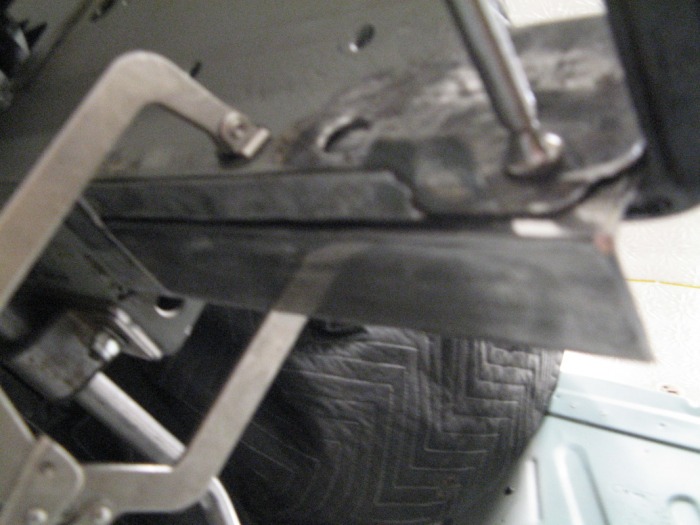
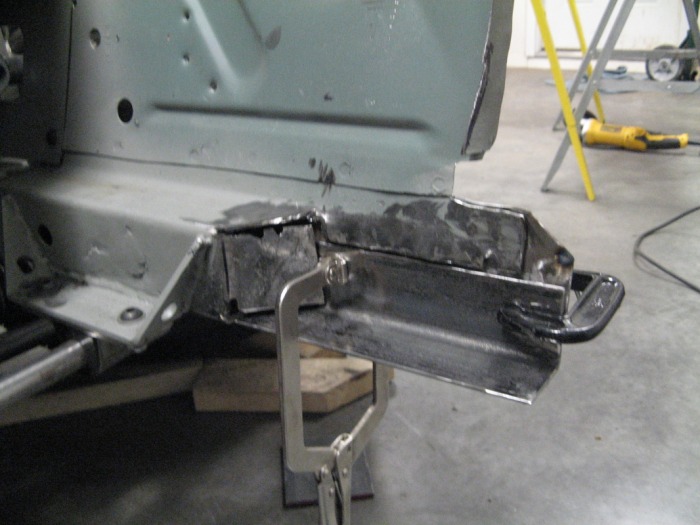
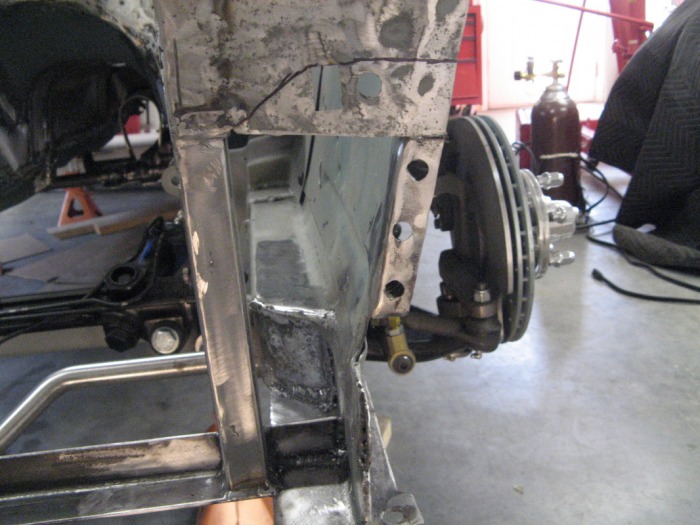
Angles, angles and more angles
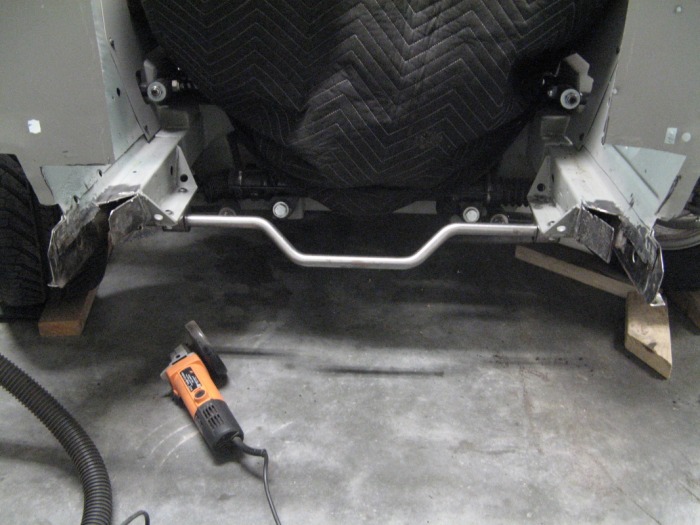
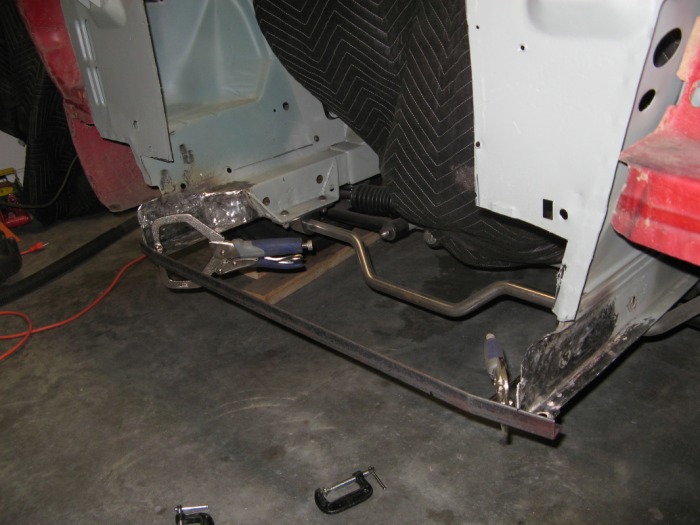
The main thought to this design is I needed to just provide a bottom support for the radiator and somehow tie the two frame-rails back together. So I completely removed the front portions of the frame-rails from the sway-bar mounts forward. Here you can see I left a tab on both sides that will be hammered over at an angle. Looking from the top of the car this is the same angle as the leading edge of those sway-bar mounts.
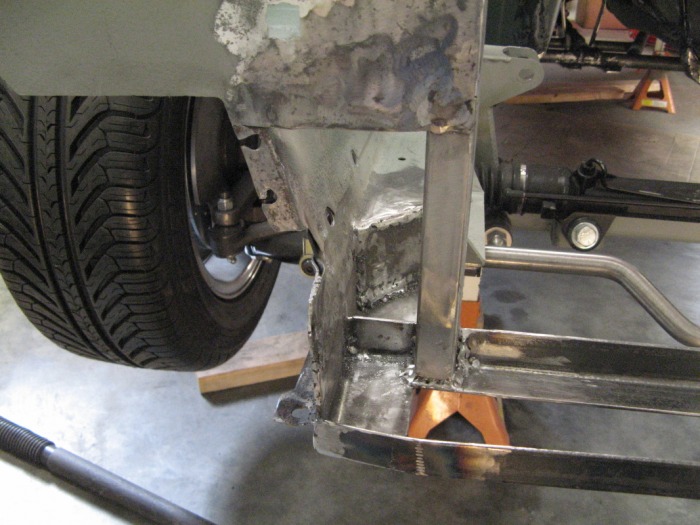
Extending the frame-rails
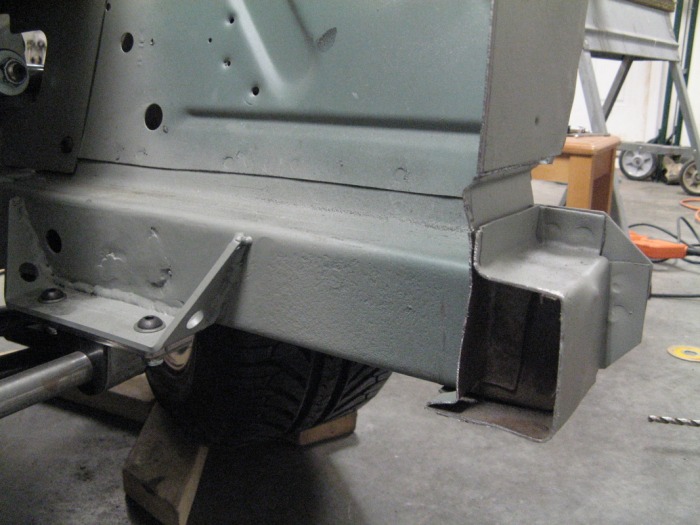
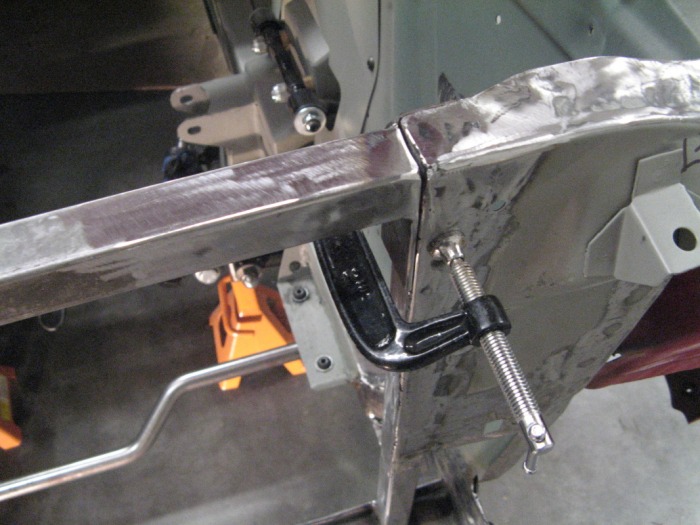
I wanted to keep the strength of the frame-rails all the way to the front where the lower valance connects, but needed to keep the height as low as possible. So a bit of heavy 2" angle-iron fit the bill very nicely. I left a large gap between the old upper portion of the frame rail and the new angle piece. I did this so I can get a weld bead to connect the angle piece to the inner fender panel (which I left intact) and to the old frame rail. This really ties everything together tightly. Since I was dealing with heavy gauge material again I switched back to the regular flux-core MIG wire. The splattering of it also helps because I couldn't clean out every pit and dimple on the old metal.
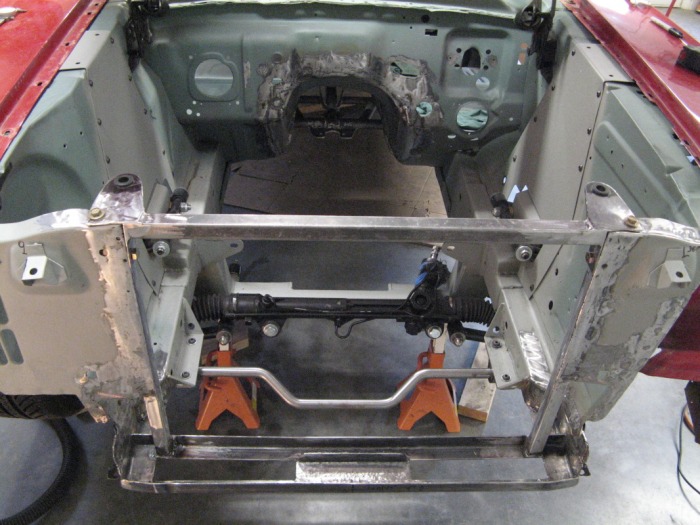
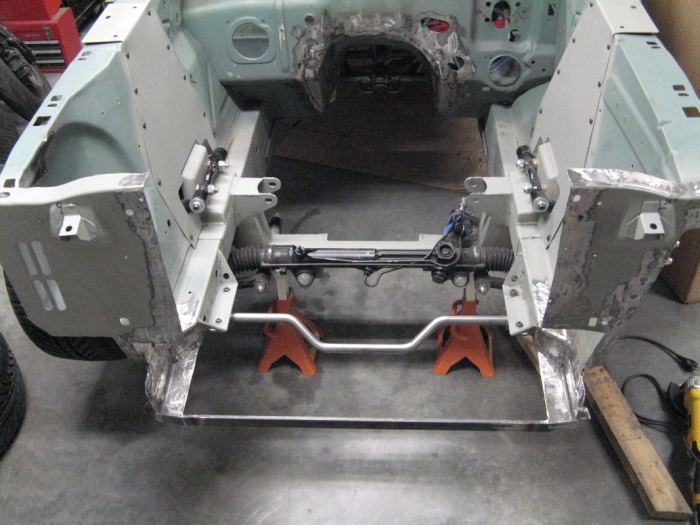
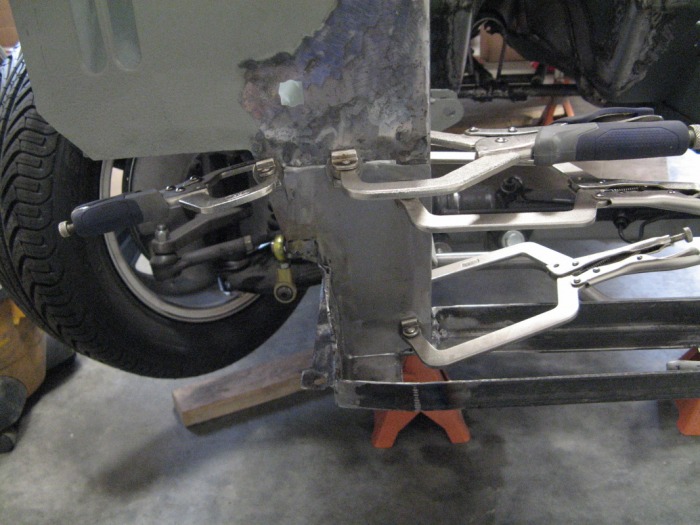
Test fit #178678123
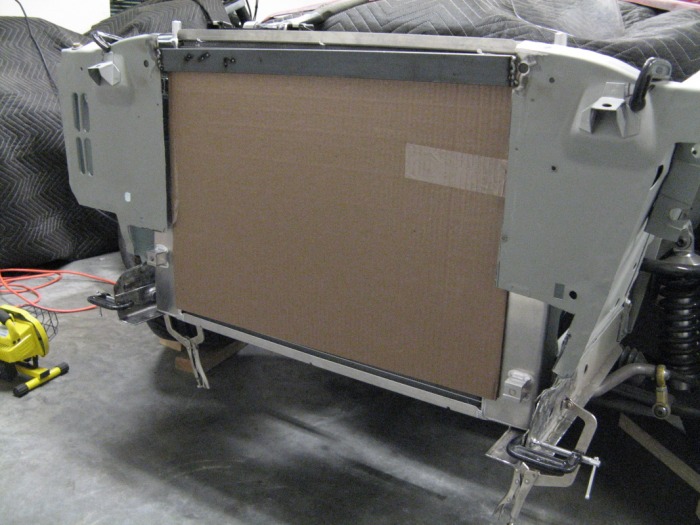
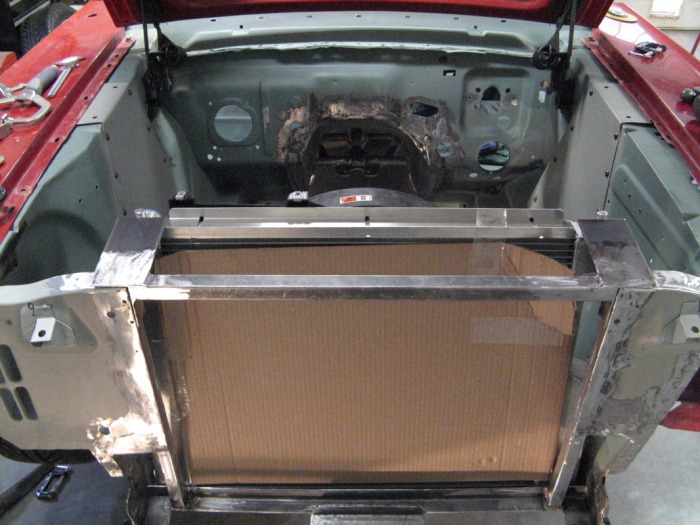
If you haven't noticed by now, there is an excessive amount of test fitting you need to do with parts both big and small. I'm so happy that this radiator is very light and I can take it out quickly, unlike the engine and the transmission tunnel. Anyways, here I have everything clamped in with the radiator finally sitting down. Call my crazy but it's actually starting to look like it belongs there. I also welded on a scrap piece to keep the inner fenders from twisting out of shape and I do alot of welding on the front end. Oh FYI, the core on this radiator is about 21-1/2"" tall by 25" wide (about 537 in^2 surface area - this is a tremedous improvement over the old radiator at 282 in^2).
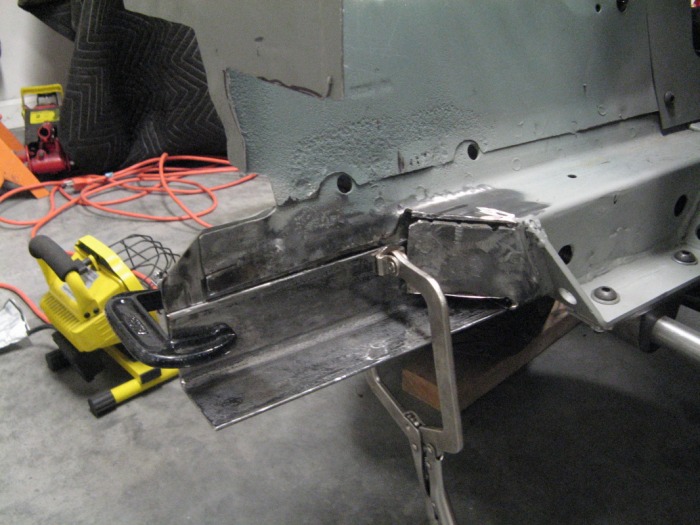
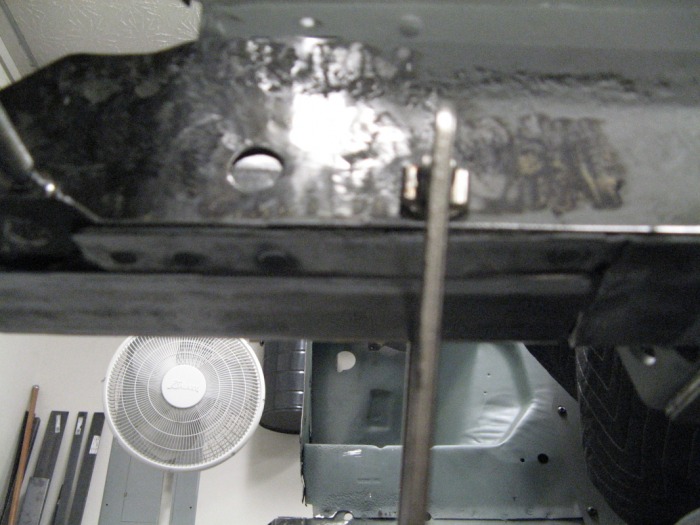
Closing up the frame rails
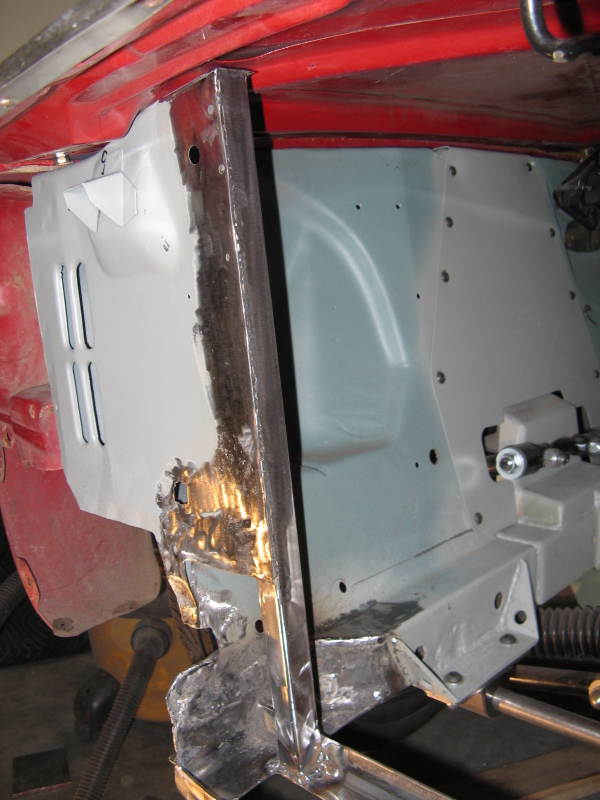
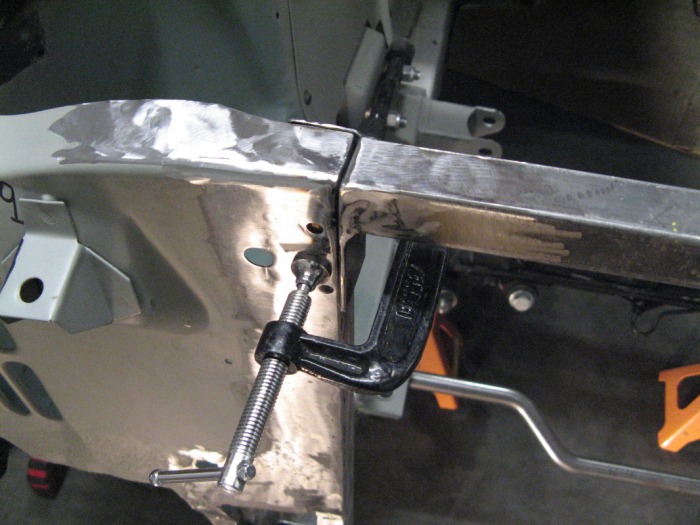
Now after a bit of welding and grinding you can see that this portion of the frame rail blends nicely into the original square frame-rail. Now you can see how the angle pieces really flows into each other. Yes, I like to weld, so I always do complete welds and not spot welds. These angles also set how far back my radiator is going to sit. More on that later.
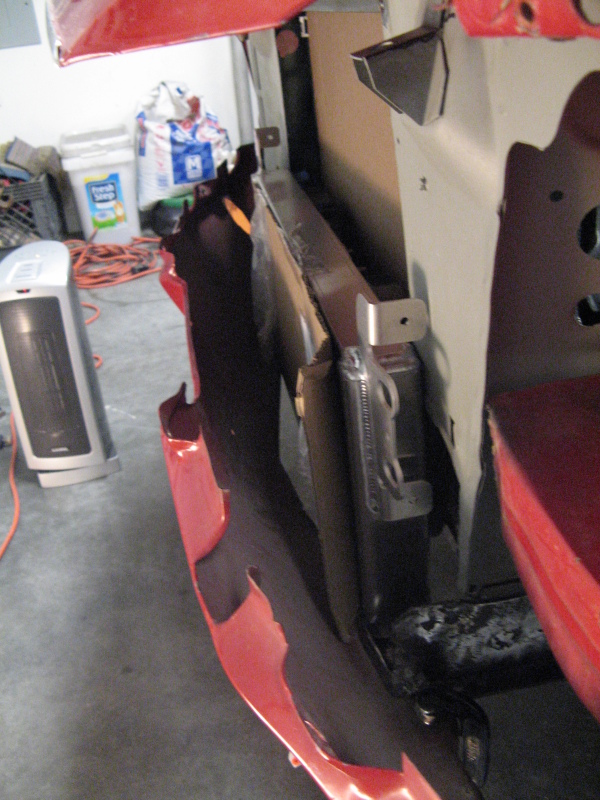
Heat Exchanger mock-up
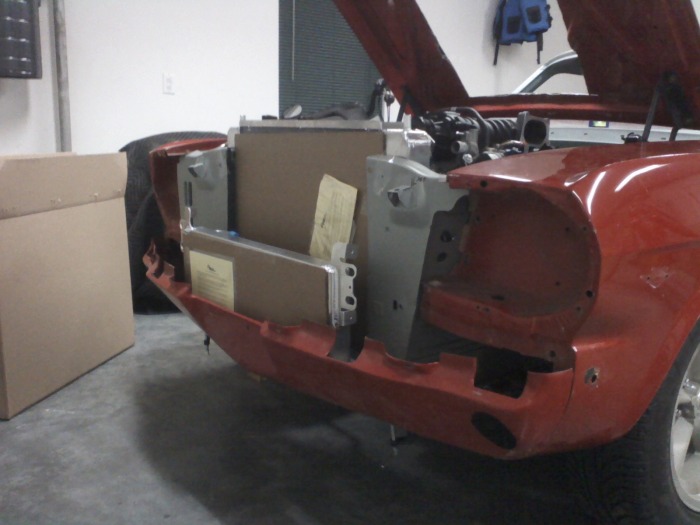
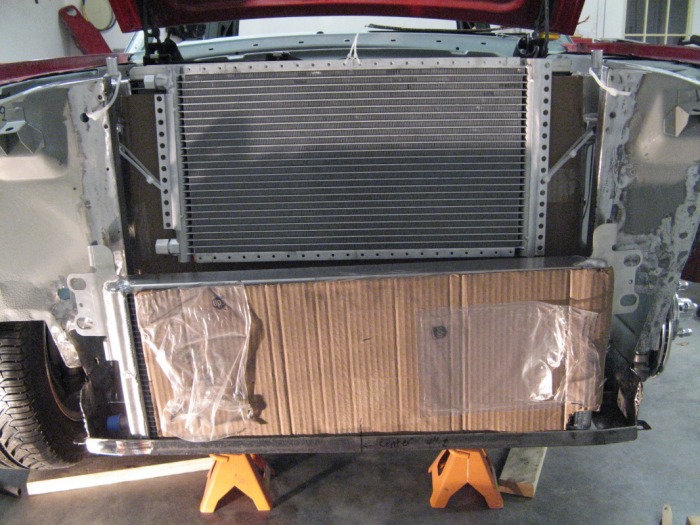
Now that we have the first piece of this three-piece cooling nightmare set, onto the heat exchanger. This is to feed cool water to the intercooler on the engine. Since this engine is supercharged, the compressed air heats up. Hot air cause the fuel to spontaniously ignite (aka knocking) which is a bad thing for engines. So right before the air enters the cylinder heads it flows over the intercooler coils removing the excess heat. This provides cold air to the cylinders which keep the engine from doing bad things to itself. Anyways, here you can see the cooling fans on the back of the heat-exchanger. This is a dual-pass type so both the inlet and outlet are on the right side. I'm actually going to flip this over and have them on the left side (driver-side) of the car since my A/C dryer will be on the right side (the picture was taken from the front of the car, so the directions are reversed). Here I am seeing just how far forward I can mount it without having to modify the lower valance at all. I'm actually going to get a shelby style lower valance with a cutout in the middle, but if I can fit it with this one, then I know I can fit it with the other one (or at least on the bottom that is). Oh FYI, the core on this heat exhanger is 10" tall x 25" wide (so 250 in^2 of cooling surface - which is almost the size of my old radiator).
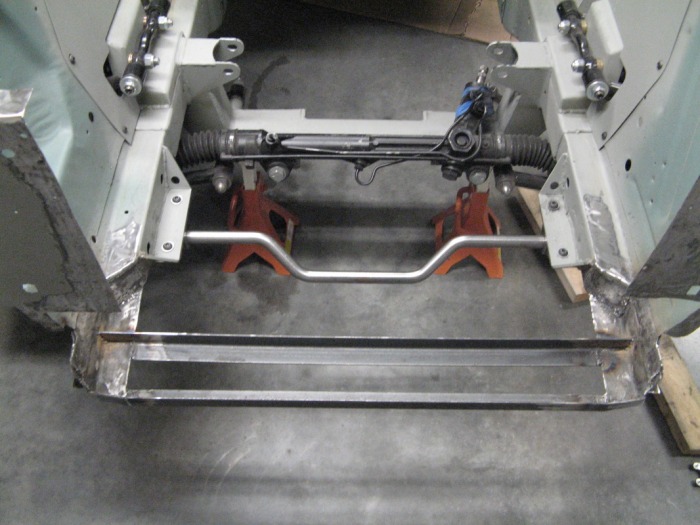
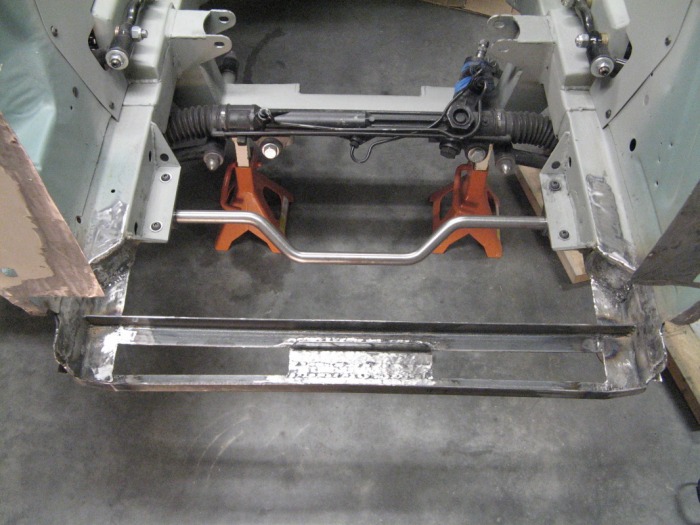
My new lower radiator crossmember
To provide spacing between the the heat exhanger and radiator, I took a piece of angle-iron and cut two slots in it to give me the two bends you see. This pushes the heat exhanger as far forward as possible, while following the lines of the lower valance.
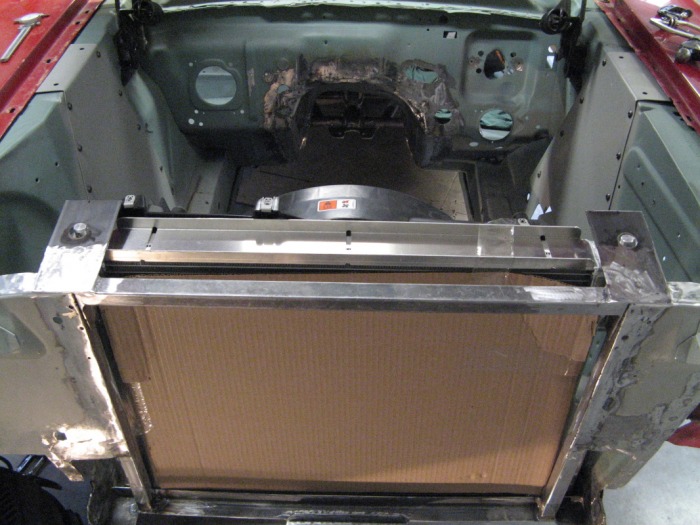
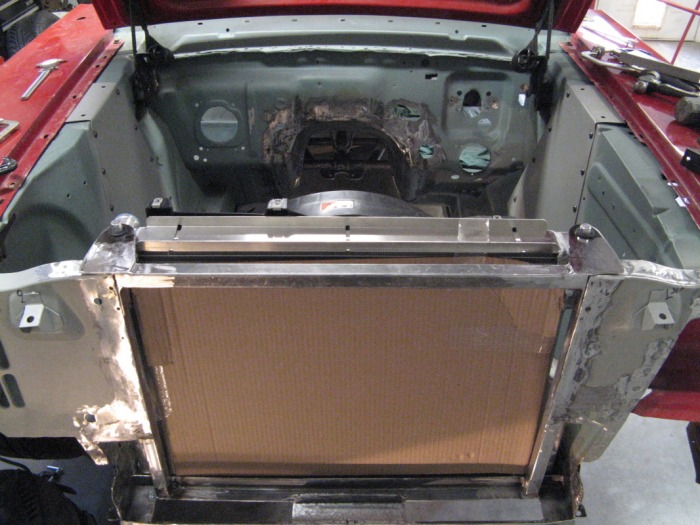
Test fitting - again
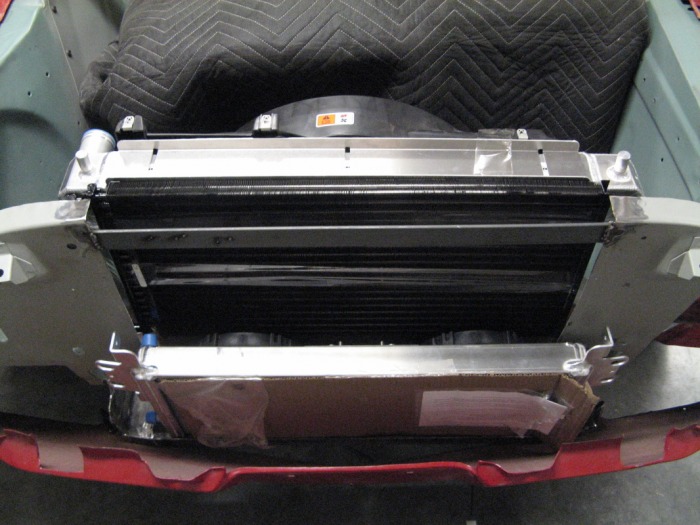
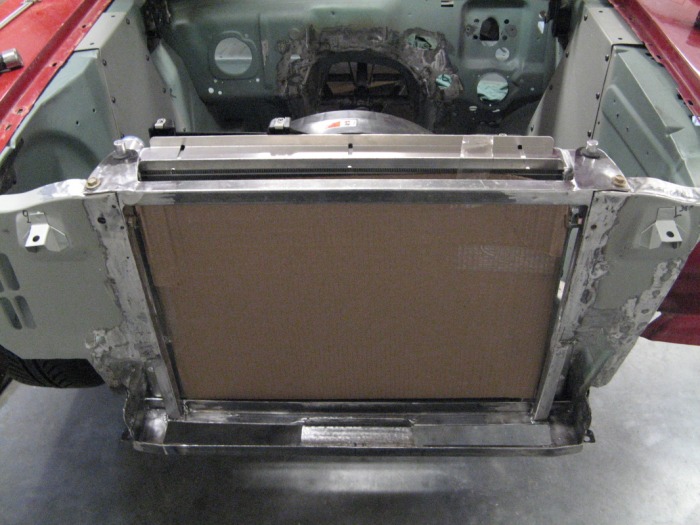
Ahh finally the radiator and heat exchanger are playing nicely together. You can also see the OEM GT500 fan on the radiator there. The best part of this is that the radiator and heat exchanger are basically the same width, which will give a really nice appearance from the front.
THE HOOD CLOSES!!!!
Yah!!! The hood finally closes correctly. Now I don't have any problems up front.....well that's until you get to the engine but that's another story entirely.
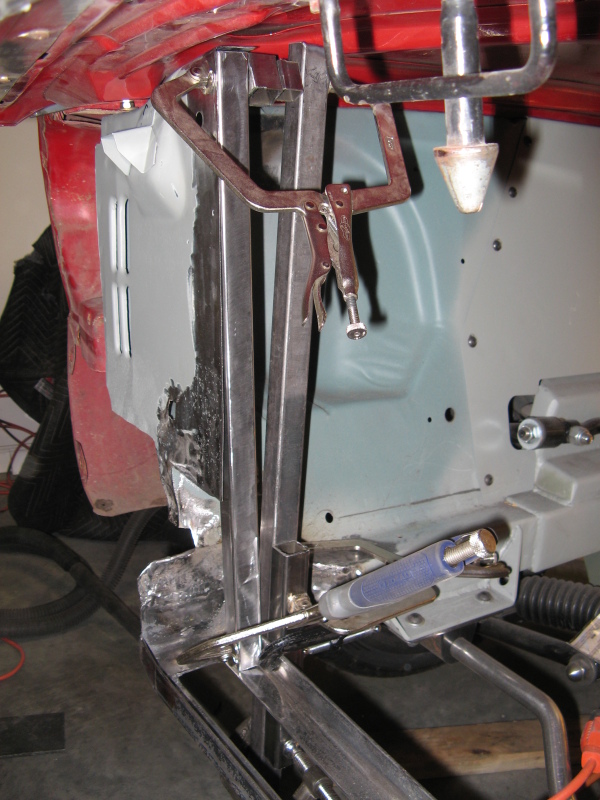
Bracing the frame rails

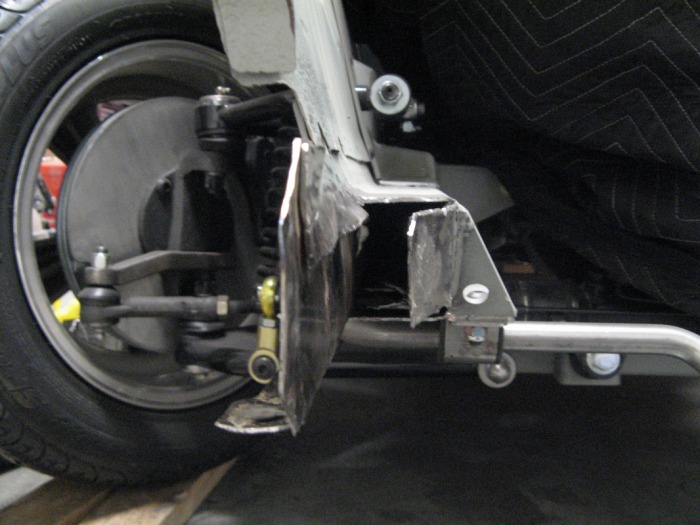
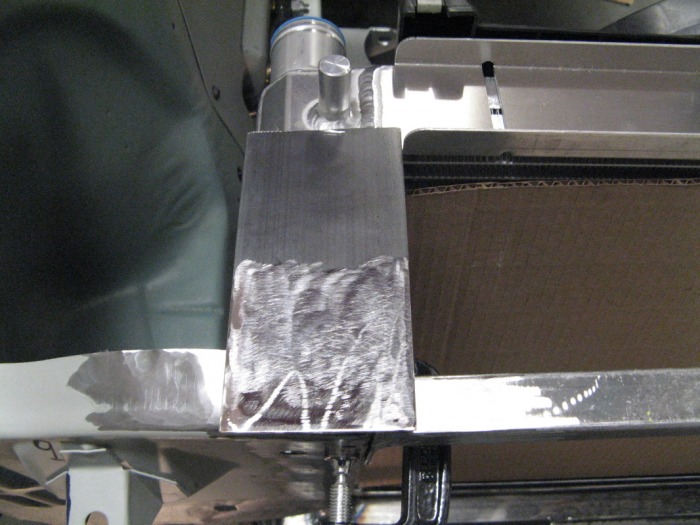
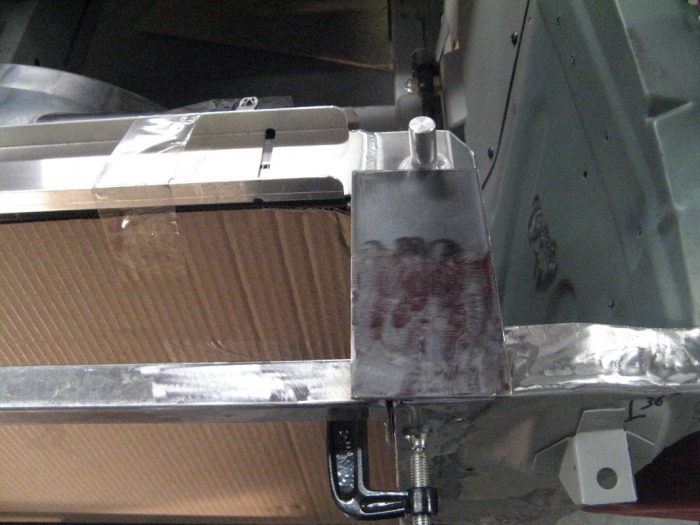
Since I had to completely remove the original front frame rail brace, I needed to add alot of support back in this location. Trying to kill two birds with one stone, I figured out a really kewl way of holding both the radiator and heat exchanger. Basically this lower portion will be covered in stiff EPDM foam. This forms two independant U-channels for both the radiator and heat exchanger to sit in. This locks the lower portions of both these units to the car, provides vibration resistance, and keep me from have to fabricated lower mounting bolt brackets. Oh it also protects them from crap off the road. Here you can see the leading edge angle bracket that sits in the front of the heat exchanger, and the larger rear angle bracket that sits agains the radiator. I welded in a couple of small pieces in the middle to bridge them together and form the rear of the U-channel for the heat exchanger. The reason I didn't go across the whole way with this piece is because of the dual fans on the heat exchanger.
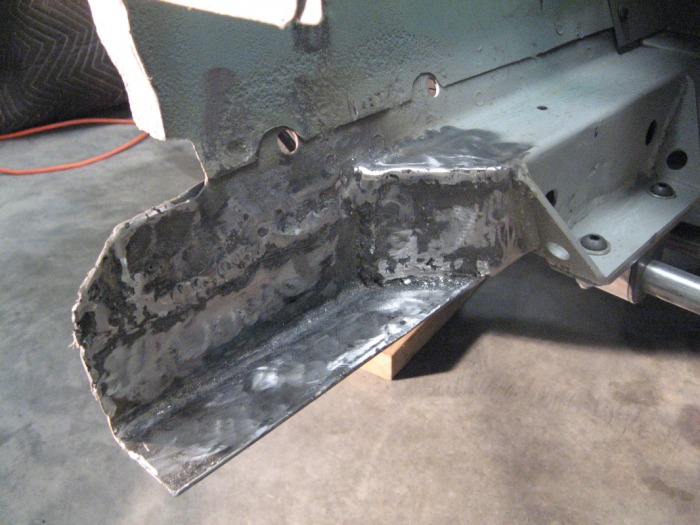
How the U-Channel Works
Here you can see how the heat-exchanger sits down in the U-channel. This front edge was actually really stiff once it was all welded in. You can also see how the outside of the car never changed. Now comes the fun part of bracing what is left of the radiator support.
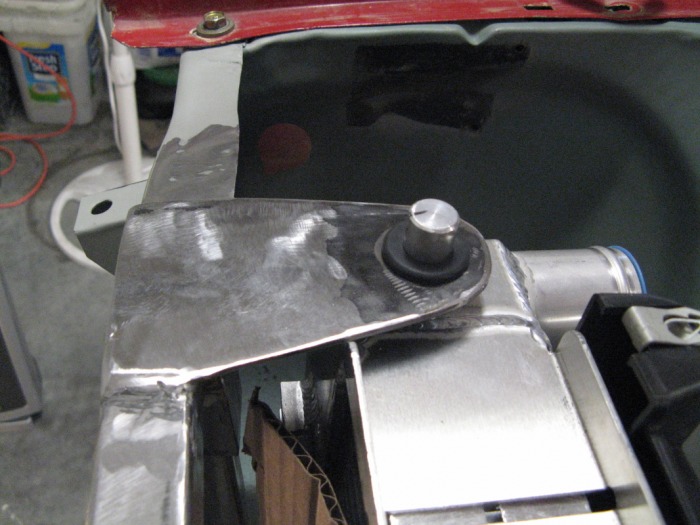
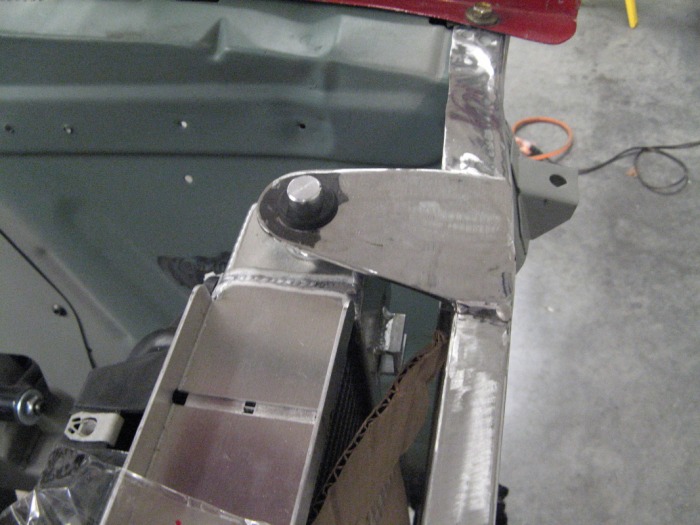
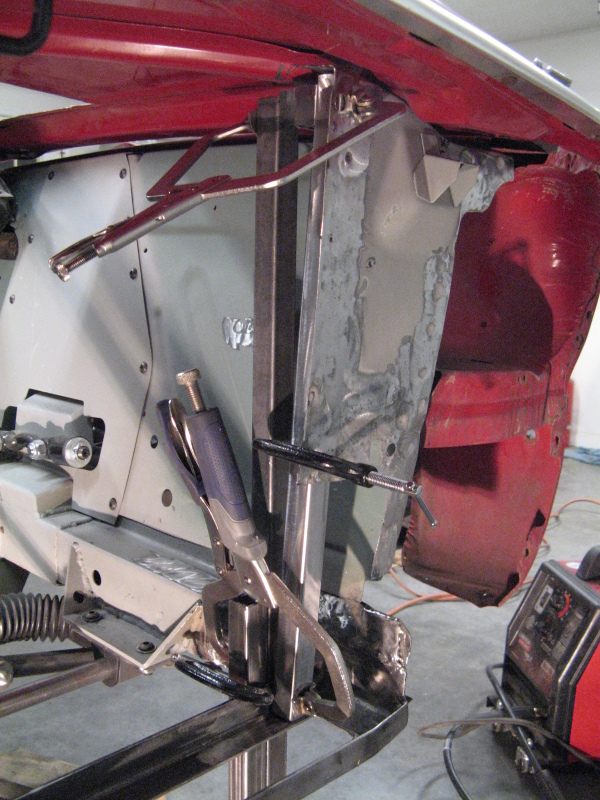
Just a slight tilt
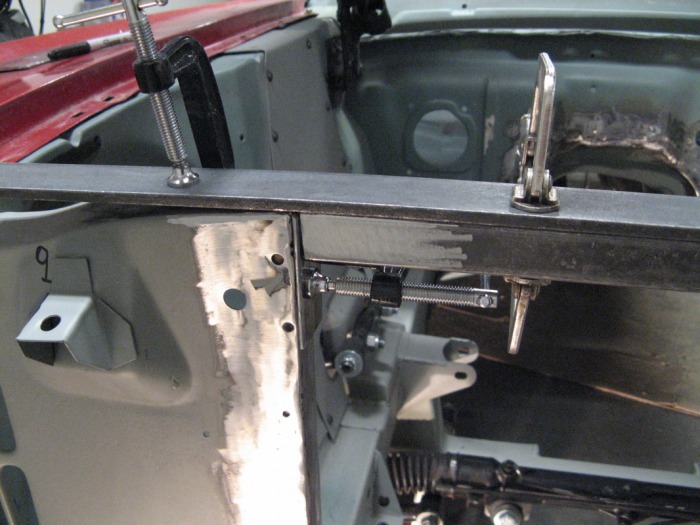
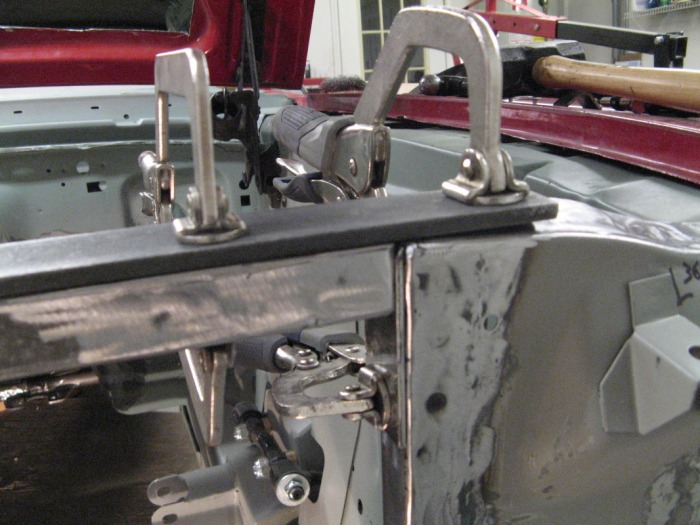
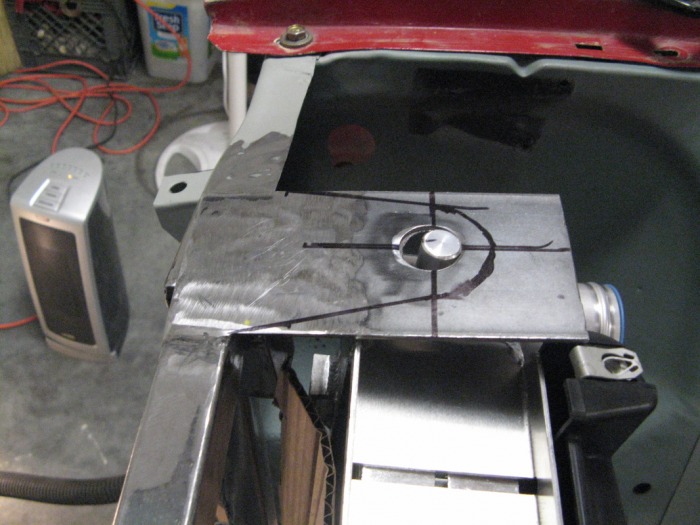
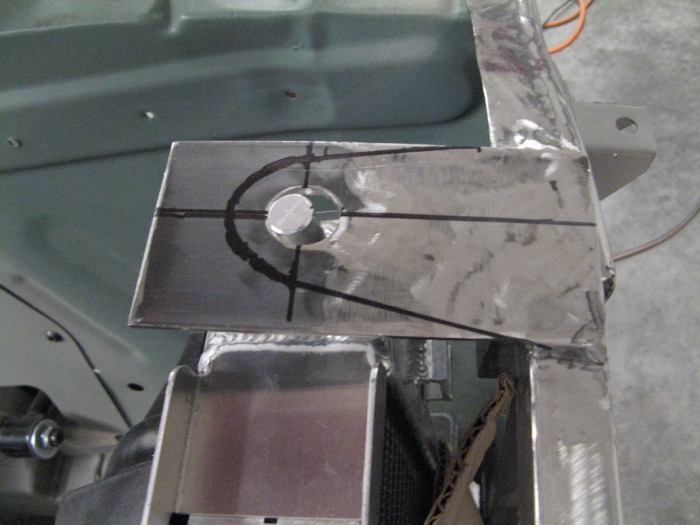
Now to make the heat exchanger fit with everything else I actually need it to tilt forward a bit. This keeps the fans from hitting the radiator. I tried a couple of things, but ended up with a straight square tube that connects the radiator panel from the top to the new crossmember. I wanted to keep the original hood stops, since these will be where my hood pins will go. One thing you can't see is the spacers I have between the fenders and the hood. Since I basically cut out all the front support of the inner fenders they were flopping all over the place. I lined the hood up to the car and the fends to the hood the best I could. This gives me the location for the fenders, so when I welded this piece in it locked them there. I actually had to use quite a bit of spacers to keep the body line right, but it came out really nicely. Theses square rods are actually straight up and down, and lean forward 1-3/4" at the top. You can see how I had to clamp this into place in some of the candid shots at the end of this page.
A/C Condensor Check
At this time my fenders were finally rigid again, so I went about testing the A/C Condensor. I at first ordered a 12"x25" condensor from Classic Auto Air, but even with it level at the top of the radiator the heat exchanger wouldn't fit. So I dug around and came across this 11x21 condensor. Though it easily fits, it looks a bit odd being smaller than the rest of the units. I was also concerned with hold cold my A/C would be at idle. At only 231 in^2 surface area it was a long cry from the 306 in^2 of the OEM GT500 one. Well after I tested this and saw how it was made, I purchased a 12x25 condensor from the same manufacturer. I had to notch a few of the mount brackets but I was finally able to squeeze that larger condensor in there. Basically the radiator only has one item in front of it at any point. The heat exchanger only overlaps the A/C condenser by about 1/4". So now I have my full 300 in^2 of A/C condensor area, and everything is in a nice tight package.
The final multi-purpose piece
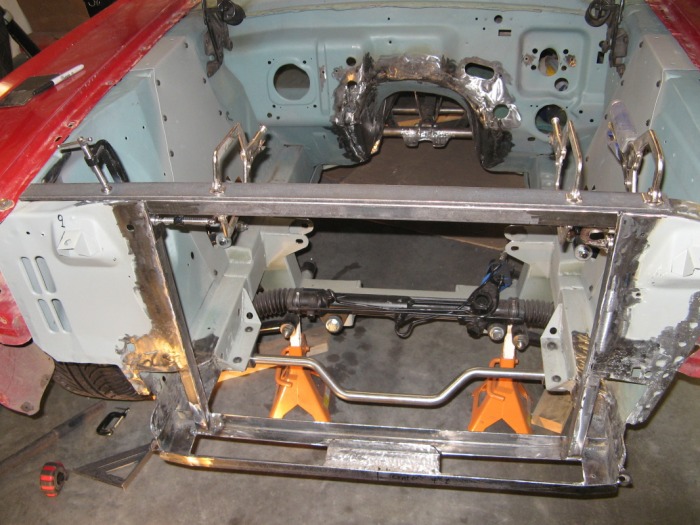
Now with the bottom of the radiator mounted I needed to figure out how to brace the top. I kept looking at the OEM post that stick up and thought it would be kewl if I could reuse those in my application. I thought about this for a day or so and figured I would kill another two birds with one stone. So I took some square tubing and made a brace that locked the left and right radiator support together. This also had two ears that stuck out to catch the OEM radiator mounting posts. Just a couple of rubber gromments and the radiator was all locked in place. Here you can see that I used two 1/2" bolts to attach the upper crossbrace to the two vertical square tubing pieces I welded in earlier. Then I added two bolts to the top to completely lock everything together. Now it is a snap to get the radiator out of the car. Here is a "short" slideshow on how I built it up.


Just a couple of fillers
Now that everything is all braced together nicely I went ahead and put to filler panels on either side to complete the front radiator support. Yes it's a very large hole now, but it suits the intended purposes very nice. This also beats trying to straighten out the old sheet metal and work around that. Tell you one thing, trying to clean up your welds in the corner is a pain in the butt. But at least this time I was comfortable on the outside of the car and not tucked up underneath the dash.
One life-support system down. Three more to go.
Ahh everything fits so nicely. Here you can see my much larger A/C condensor. I was really happy how this all came out. I'm actually taking that heat exchanger and radiator to the machine shop to have a couple of mount tabs moved around so that I can attach my A/C condensor to them. Also, had to move one of the ports on the heat exchanger to the side instead of the back to get it to work with my setup. Dude, that was alot of work to get those three items in there, but now my engine bay is looking pretty good. I still don't know what to do with the fluid containers though. Van has an aftermarket set that looks really nice that bolt right on the radiator. But I need to get a hood that fits the engine first, or have to do a custom one. Anyways here are a few more photos of this build up.
Now Flash forward a Bit
Here we are going to jump forward in time to after I have the car painted and actually doing the final assembly.