Creature Comforts
While doing this resto-mod I wanted to add Air Conditioning to the list. I can't tell you how many days I would sit out in the sun and humidity of Georgia wishing I had air conditioning. When I first bought the car 8 years ago it had an aftermarket Sears A/C floor unit in it. It was somewhat like the original A/C units that just bolted under the ash-tray area over the transmission tunnel. But this was quite an ugly unit and never really worked right so it was one of the first things to go way back when.
The main problem I was having with most underdash kits was that I had to completely redo my transmission tunnel and firewall, so any model specific systems just wouldn't work. I looked through a couple of companys before I settled on Classic Auto Air. They were more than willing to pick and choose between several of their off-the-shelf kits to make me one that will work nicely. I was debating between doing some custom electrical work to use their servo-operated unit but because of the very short distances I need to run the cable-operated unit will work just fine. This actually went in rather quickly once I figured out what I needed to do.
The main problem I was having with most underdash kits was that I had to completely redo my transmission tunnel and firewall, so any model specific systems just wouldn't work. I looked through a couple of companys before I settled on Classic Auto Air. They were more than willing to pick and choose between several of their off-the-shelf kits to make me one that will work nicely. I was debating between doing some custom electrical work to use their servo-operated unit but because of the very short distances I need to run the cable-operated unit will work just fine. This actually went in rather quickly once I figured out what I needed to do.
The Unit
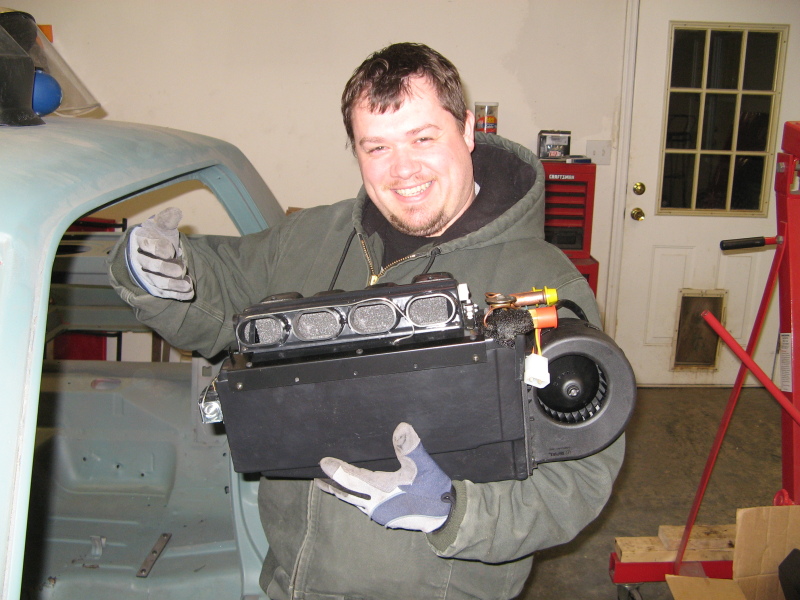
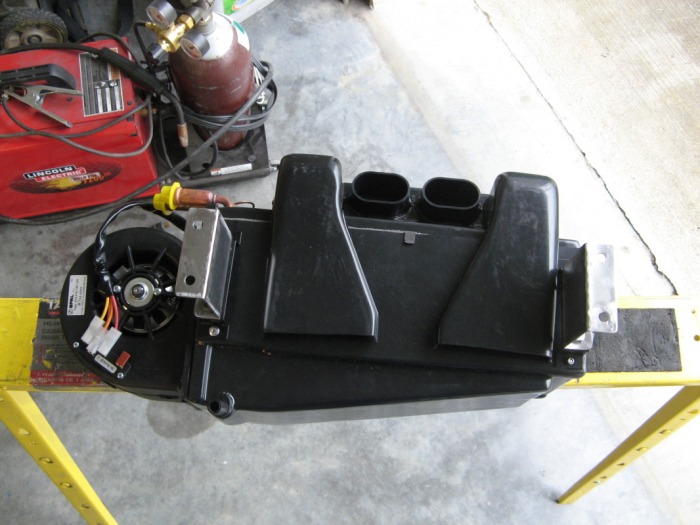
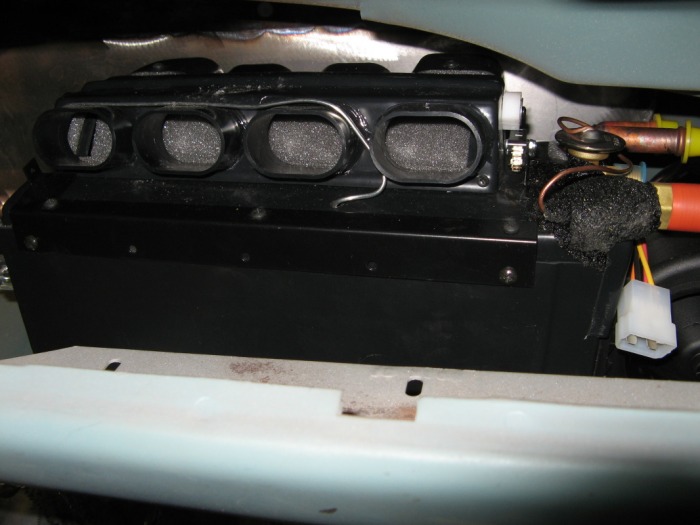
This is one Classic Auto Air's Street-rod coolers. It's actually a nice compact unit, but still has a seperate heater core and A/C coils. Not to mention it's completely field rebuildable if I ever have any trouble out of it (which I don't anticipate I will). The other nice thing about this one is that the exhaust ports are pointed horizontally which means I can really get it tucked under the dash. That and there's four heater ports on the back and four A/C ports on the front.
A/C goes here
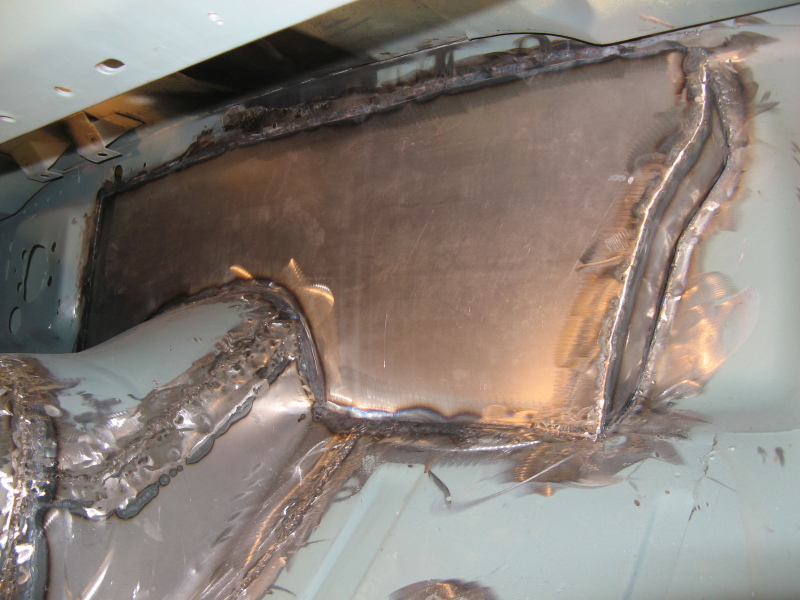
So here is where I plan to mount the A/C unit. I actually have a flat firewall which makes measuring a bit easier. I still need to brace this so that it doesn't flex with the weight of the A/C unit, but I'm probably going to add an additional support to tie the front of the A/C unit to the dash. Kind of like what the pedal assembly did. This really braces the A/C unit the best.
Pipes, pipes, and more pipes.

While getting the A/C unit I also picked up one of Classic Auto Air's bulkhead mounts. This is a nice black anodized piece. I picked this over the rest because the A/C condesor lines are integral to this bulkhead. Which saves me the space and the price of an additional A/C connector. The black part will be in the engine bay and is threaded to take the connectors from the rear. Since this is the 90 degree version they stick out about 2" from the rear of the firewall (or wherever you mount it).
Original Mounts
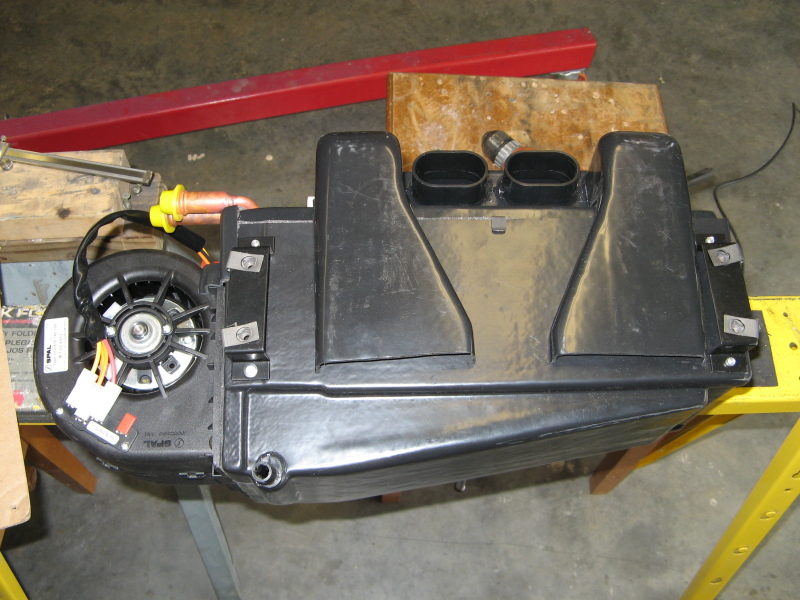
The original mounts on the back of the A/C unit are four bolts in a 2"x12-1/2" bolt pattern. The original mounts tabs will make this sit flush on the firewall. I wanted to give me the option of spacing it out a bit to get the pipe bulkheads in behind this to make the engine bay look nice. So I figured the easiest would be to make some standoff brackets.
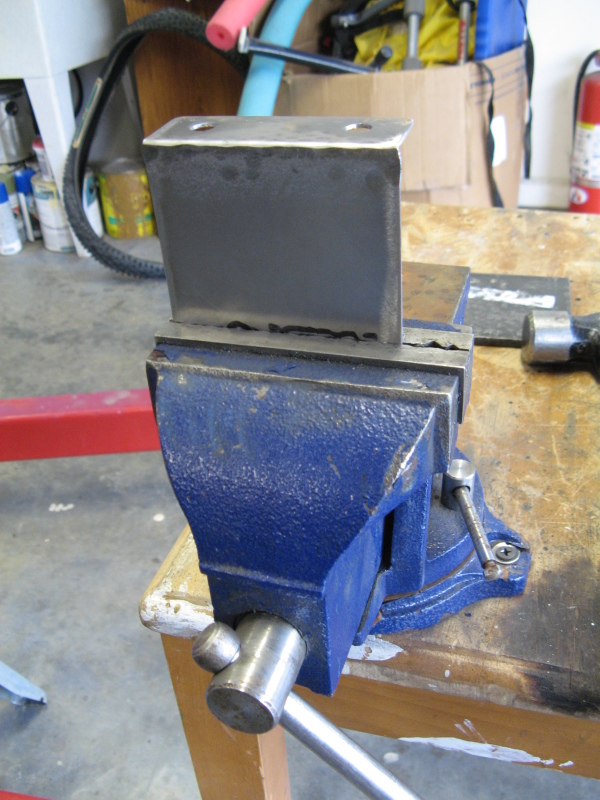
Bending some Brackets
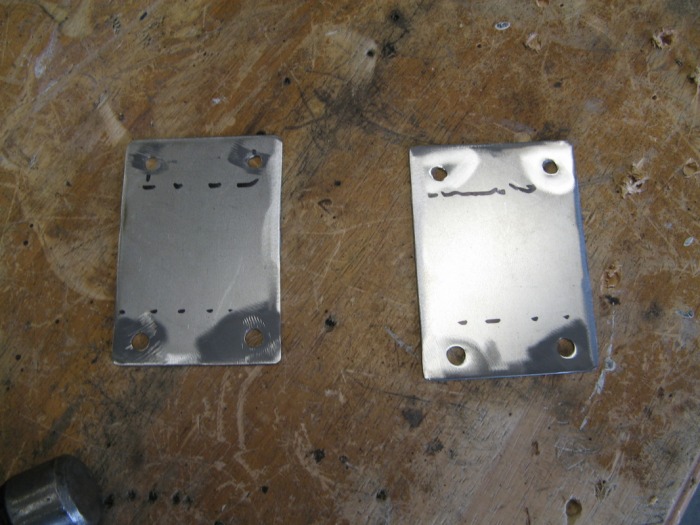
After checking the spacing with some 2x4s I figured it would be nice to have about 2-3/8" offset just to make getting the bulkhead on easy. These brackets are 3" wide with a 1" bolt flange and are offset by 2-3/8". So here is a quite slideshow of how I fabricated the brackets. The final picture shows them bolted onto the A/C unit.

Cardboard is Great
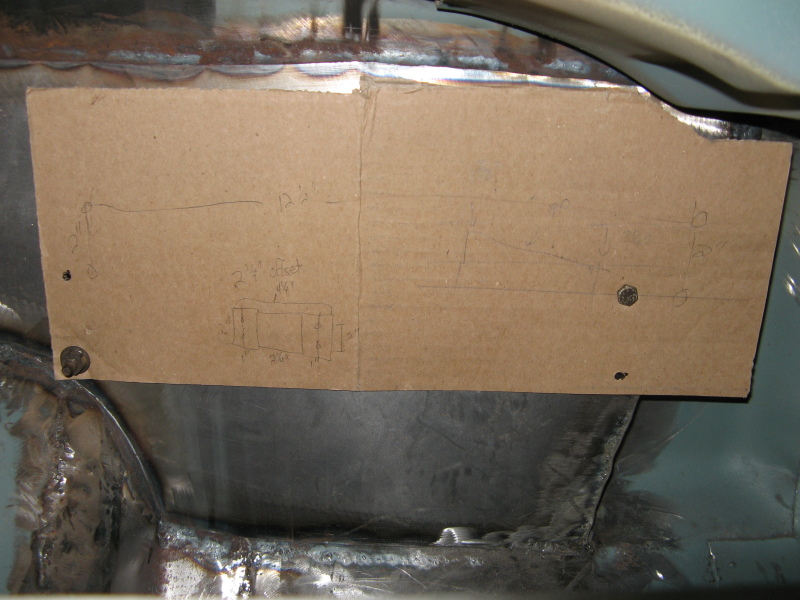
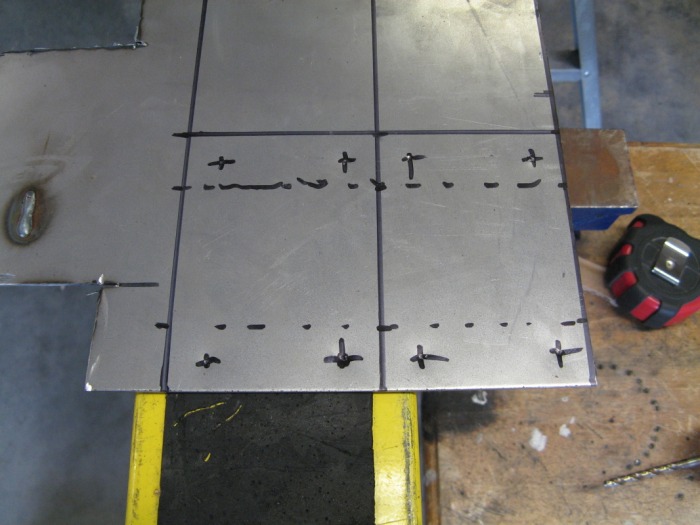
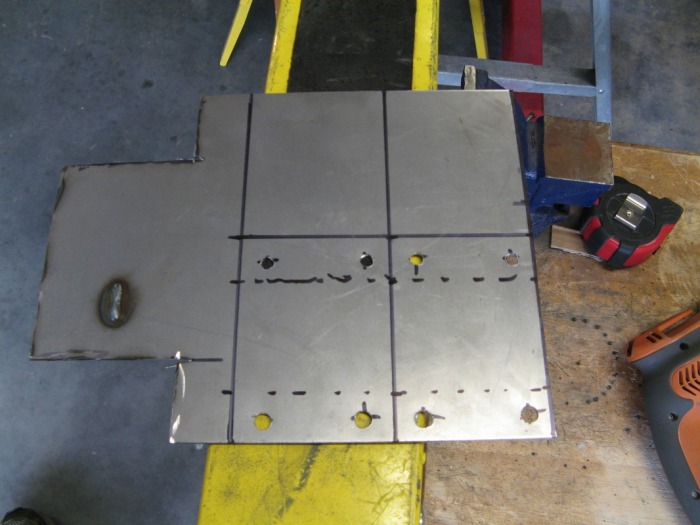
I figured if I keep the same bolt pattern as the A/C Unit I have the option of bolting it directly to the firewall or spacing it off as needed. So after a bit of cutting on some spare cardboard I had a nice template to follow. You can see the upper right how I was trying to tuck it as close as possible to the original cowl vent.
All bolted up
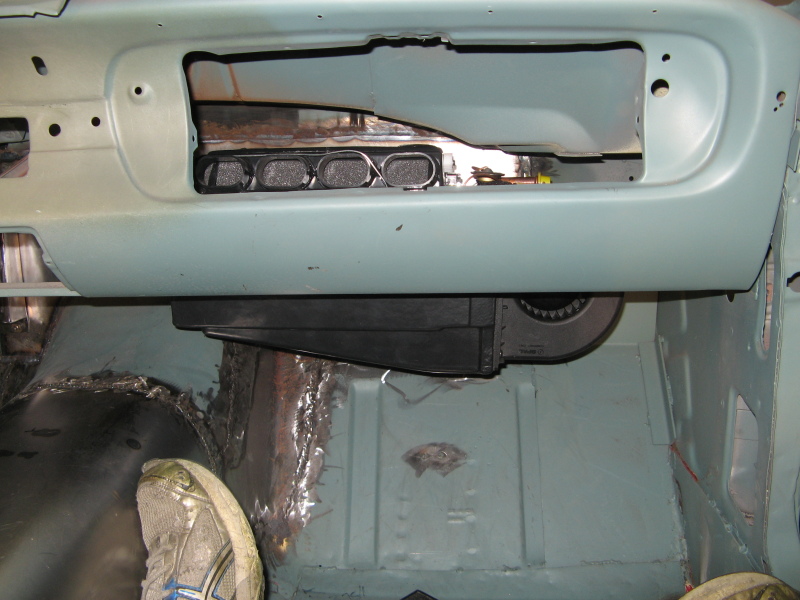
Ahh finally it's all bolted up. This actually went together really quickly. I haven't fabricated the final support piece in the front yet. I'm going to wait till I find out where the best place to run the A/C lines first. But at least I got the main holes drilled on the firewall. I need to check some old pictures, but I think this doesn't hang down as low as the OEM heater box that was originally in there. Eitherway this was the last major system to figure out and it's finally done. YAH!!!
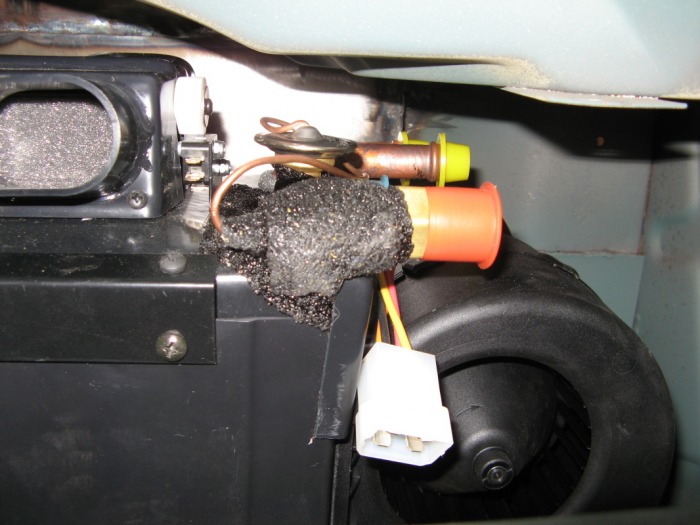
Clearance Checks
Just a few picture of checking the clearances for when I go to wire this beast up for real.
Flash Forward A bit - Final Assembly
Here we are going to flash forward after I had the car undercoated, engine bay painted, and the interior painted. Now it's time for the Final Assembly.
First the holes
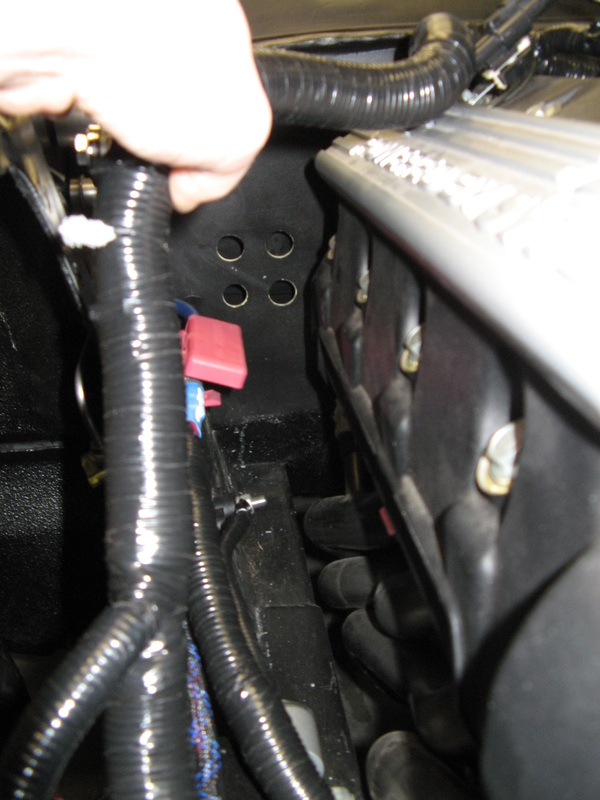
Well after a nice paint job in the engine bay. The first thing is to drill some big old holes in it. Yup, it's nice to have a step drill-bit for this job.
The Bulkhead
The bulkhead I got form Classic Auto Air was actually really nice. I really likes the 90 degree fittings, and how on the inside of the firewall the A/C lines were crimp instead of another threaded fitting. Makes life alot easier trying to tighten everything thing up. Here you can also see the water valve for controlling the heater. I wanted the valve to pull the opposite direction so I cut the bracket off and welded it to the other side. Yes I could of probably just flipped the valve around, but it's made to work better in this direction. Don't ask me how, it just does. Something about anti-cavitating water flow.
Interior Hook ups
Both A/C lines had 90 degree fittings at the firewall and straight fittings on the unit itself. I dug around Autozone's pre-bent hoses and found two nice 180 degree hoses that fit my bill really nicely. Everything has smooth bends and no kinks. And best of all no extra splices.
Back In the Engine Bay
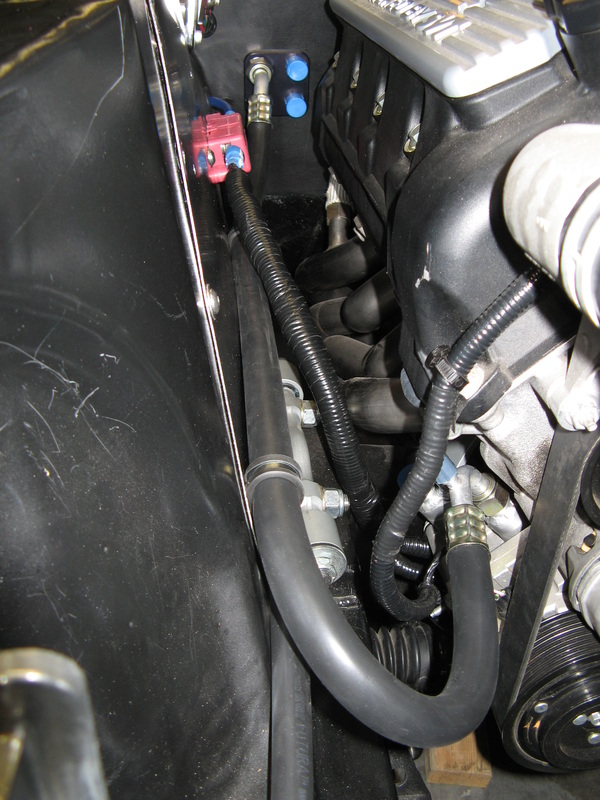
Leading with a nice 45 degree off-shoot from the bulkhead, both the liquid and suction lines run up to the front of the car. The Suction lines turns a 180 degree turn and heads back to the A/C compressor, while the liquid lines contines to the front. But what of attaching to the A/C compressor?
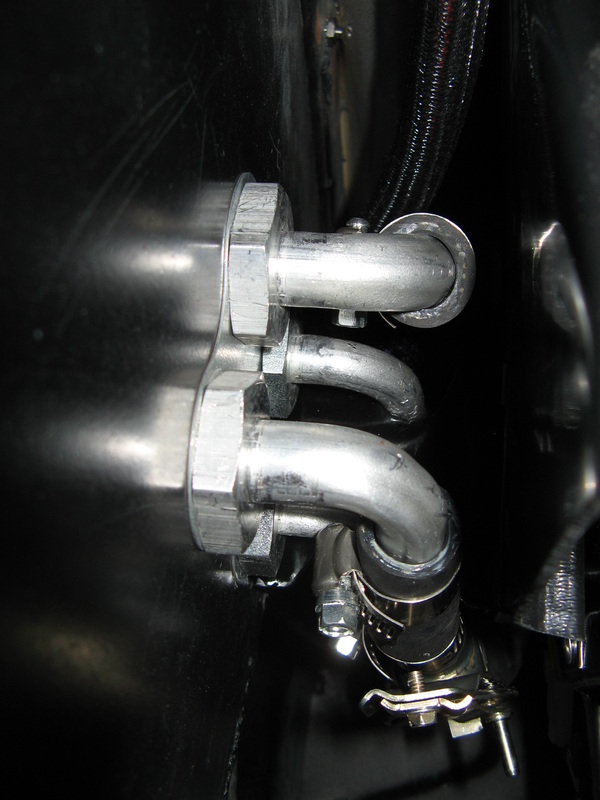
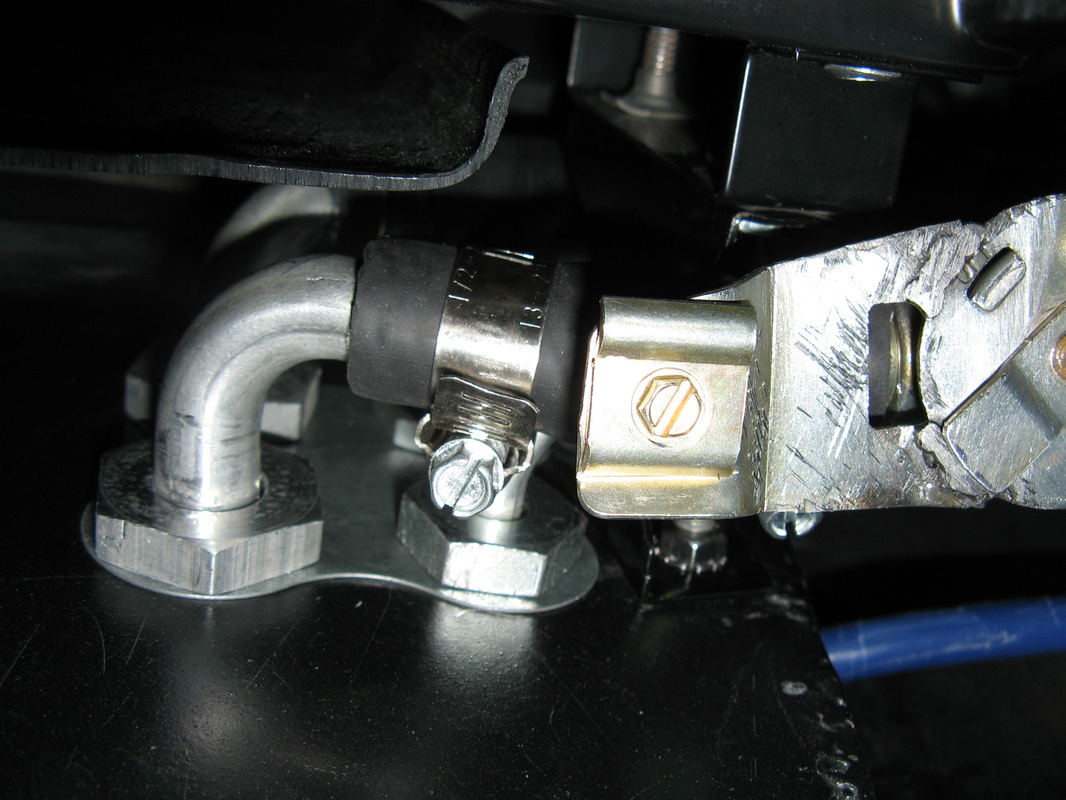
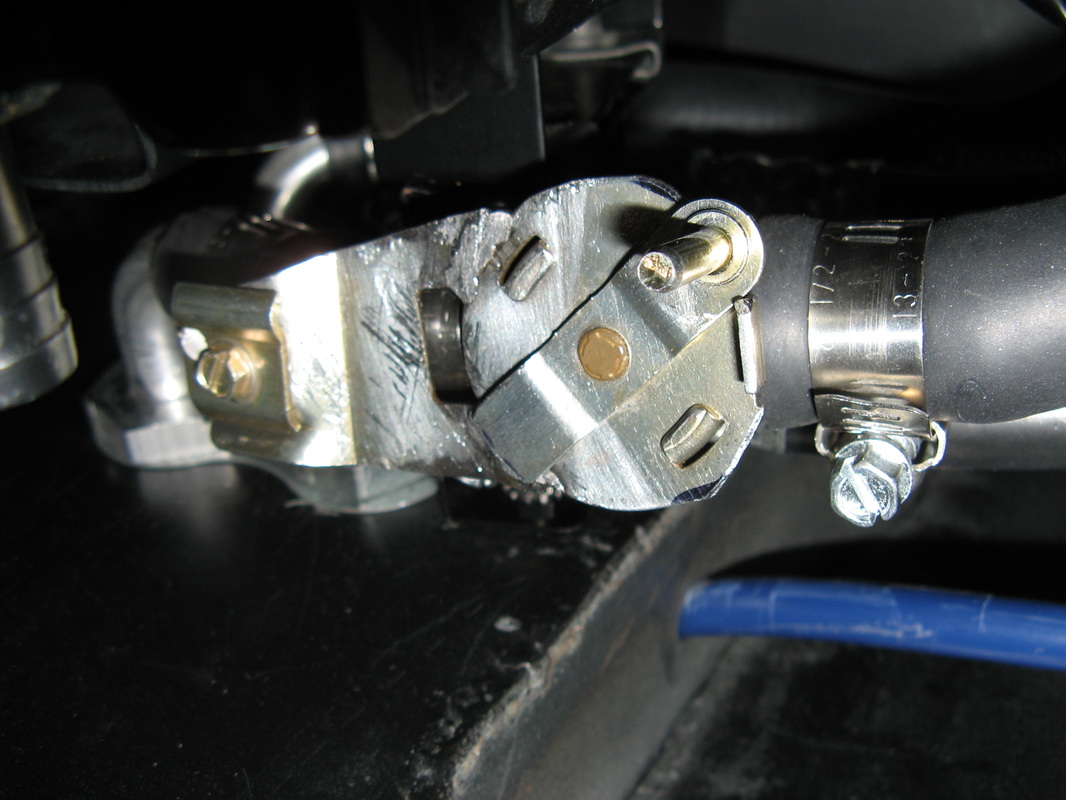
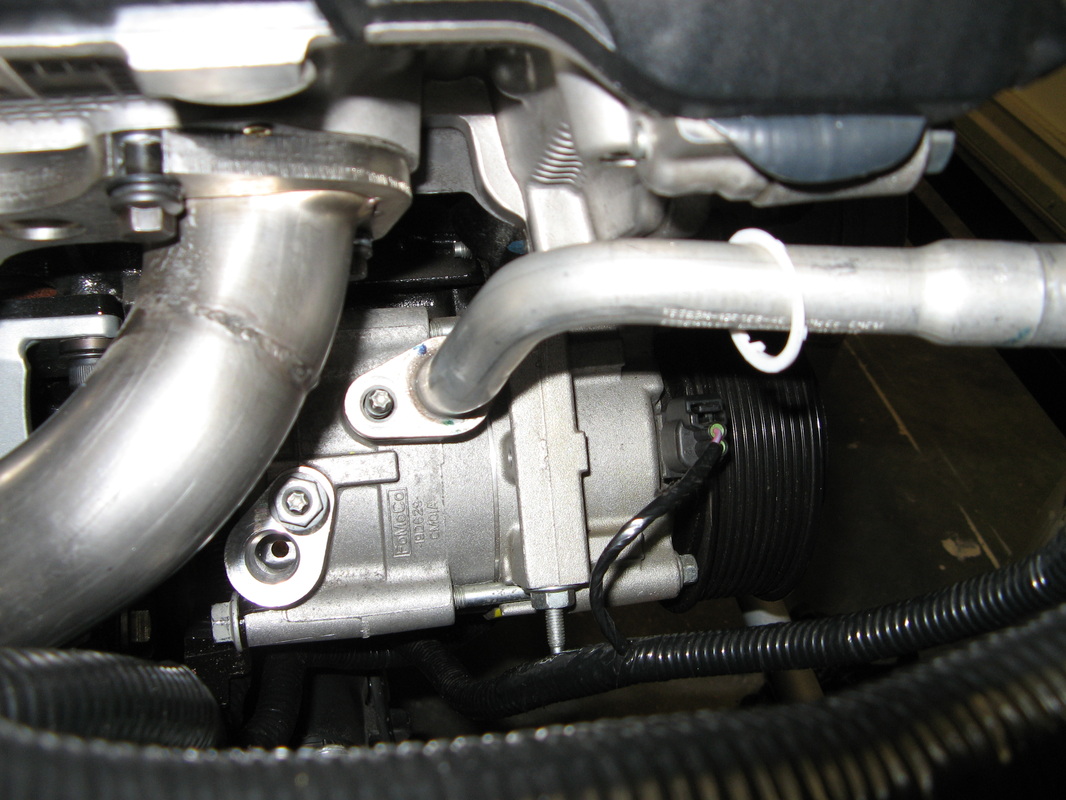
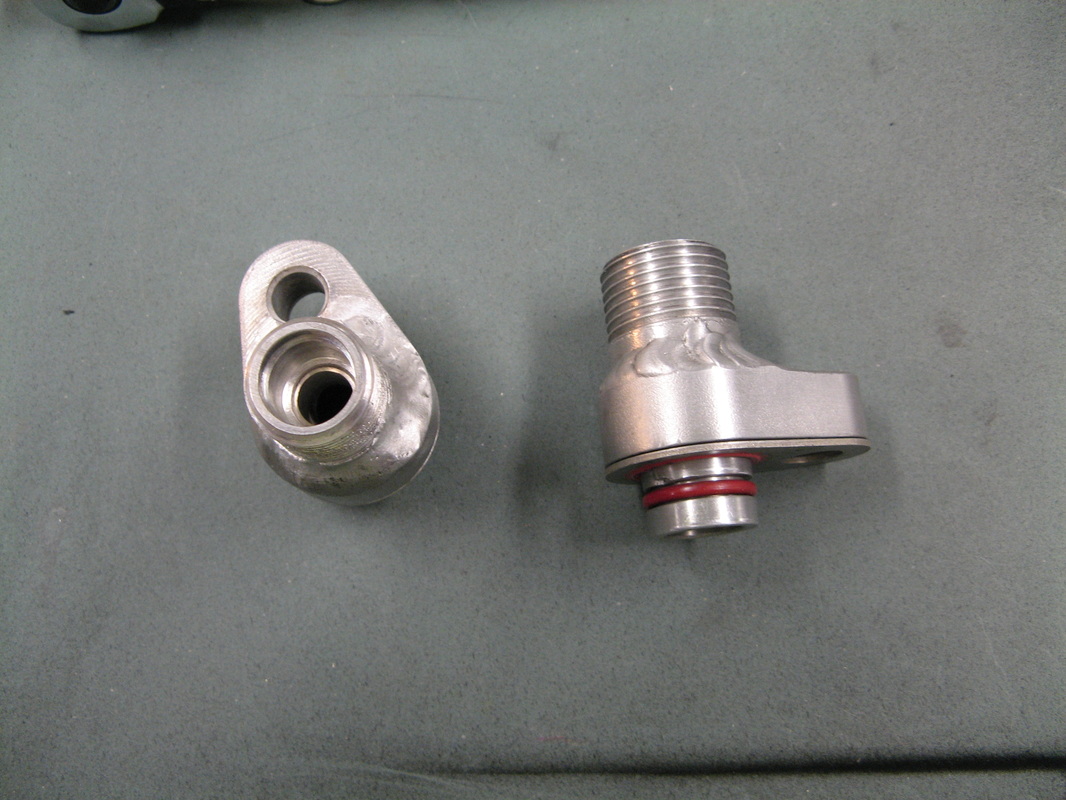
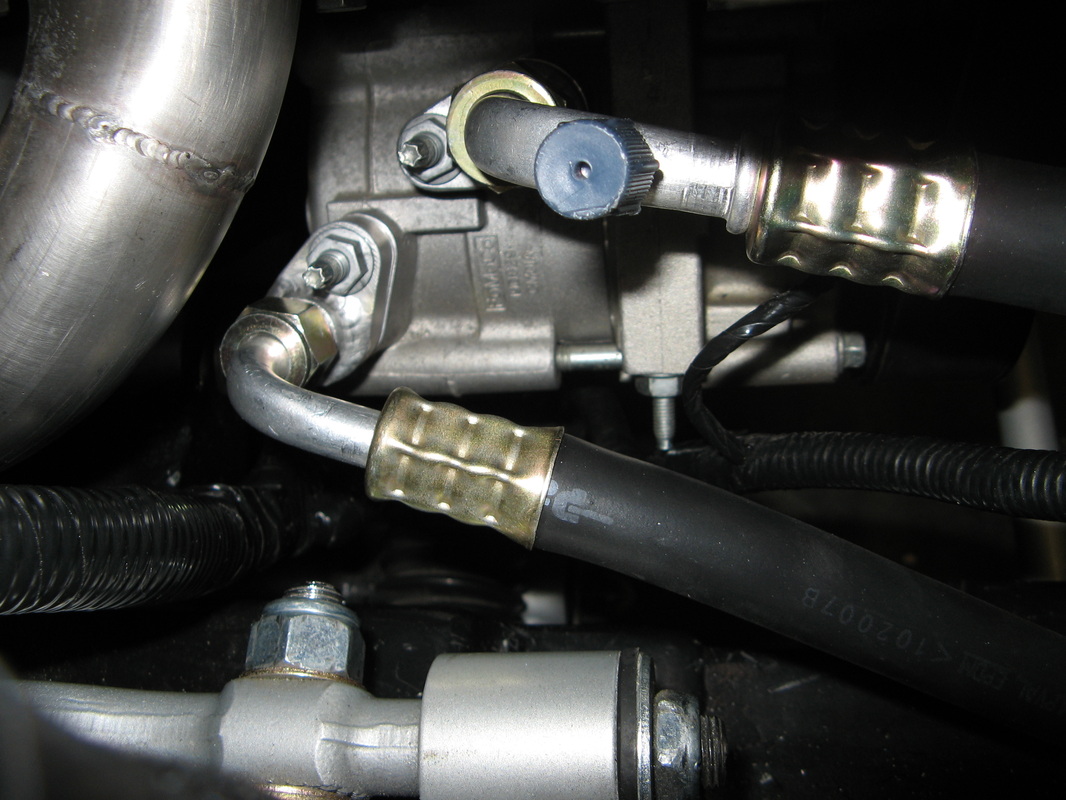
How to make OEM adapters for everything
Well like the power steering pump, I had to end of making something work with the OEM hardware. Here you can see on the left the original hardlines from the A/C compressor. I needed to take these to some stanard -10 and -8 A/C fittings. So I bought the threaded portions, took my OEM hard mounts, and traded my old gas tank for some welding work at the Barillaro's shop. They came out real nice. Here you can see the final suction line on the top, and the compressed line on the bottom. Oh that blue cap is the vacuum port for when I have the system purged.
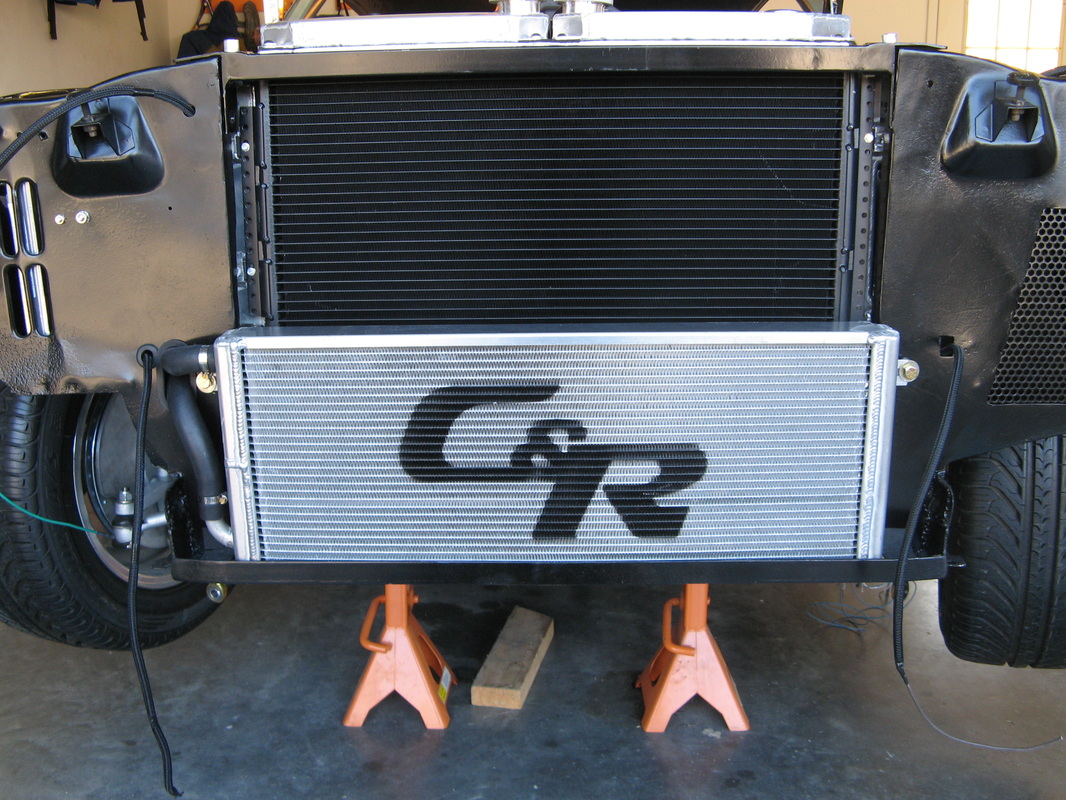
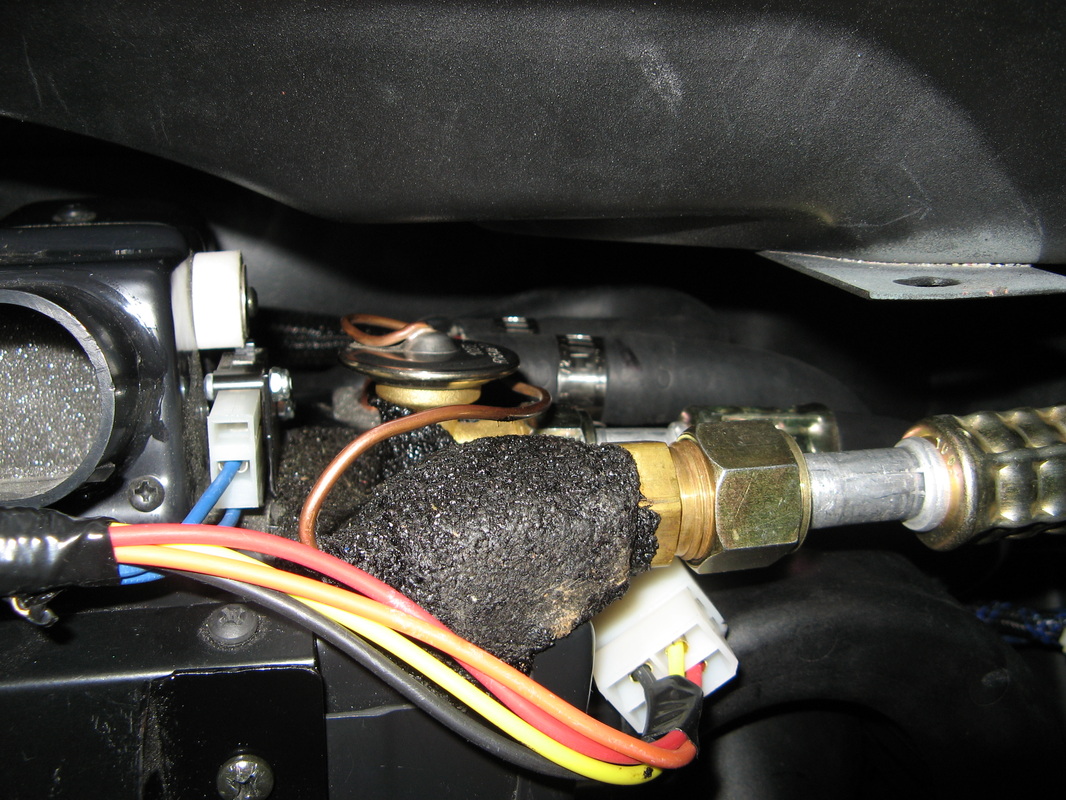
Dryer and Condensor Connections
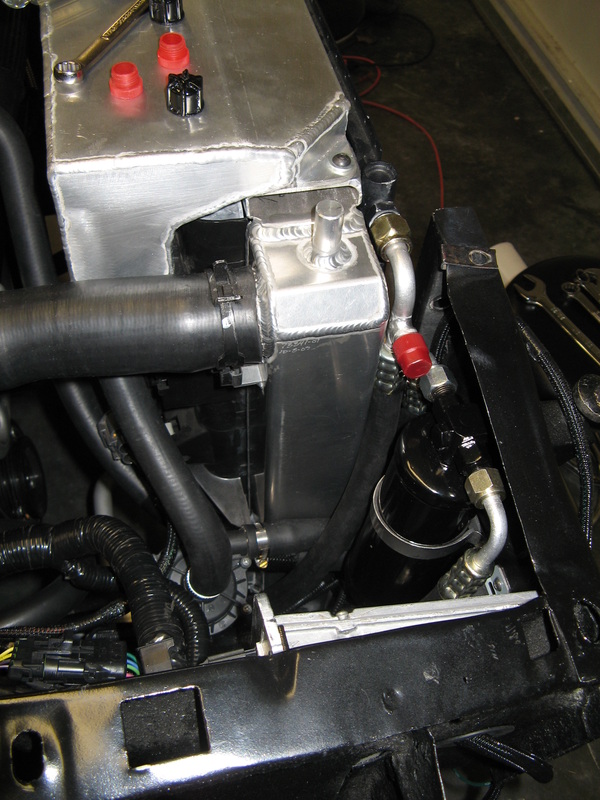
Last but not least the dryer and Condensor connections. The red cap is the fill line for the R134a gas (when I get around to it). And you can see the black dryer on the right. I couldn't find a clamp big enough to mount the dryer (and for that reasont he intercooler pump), so I cut me a sliver of stainless steel and bent me up a bracket. It actually came out very nice, with the added touch of foam to keep everything vibration free.
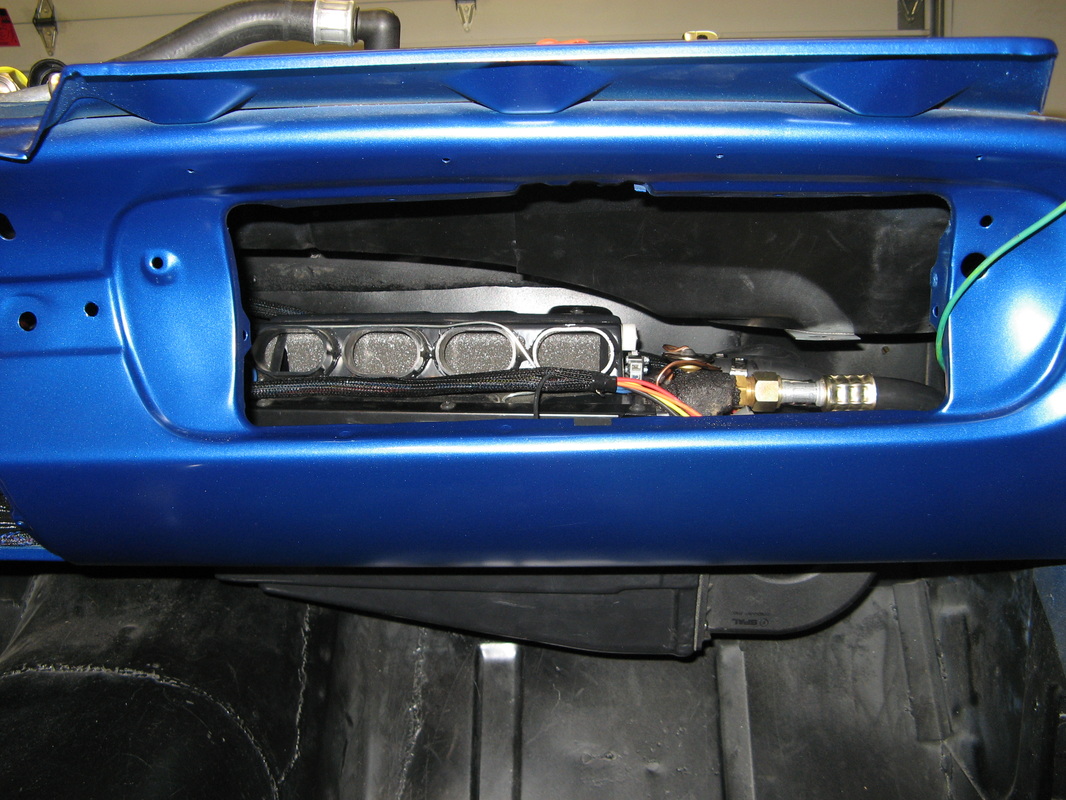
Final Pictures
And just for good measures. Here are the two final pictures showing the inside and the outside of the car.